


Special offers from our partners!

Find Replacement BBQ Parts for 20,308 Models. Repair your BBQ today.
Page 54
Heatilator • Constitution EPA Fireplace • 480-1091H
4/12
10
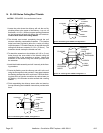
Finishing
• Materials which will not ignite and burn, composed of
any combination of the following:
- Steel - Iron
- Brick - Tile
- Concrete - Slate
- Glass - Plasters
• Materials reported as passing ASTM E 136, Standard
Test Method for Behavior of Metals, in a Vertical Tube
Furnace at 750° C
• Materials made of or surfaced with any of the following
materials:
- Wood - Compressed paper
- Plant bers - Plastic
• Any material that can ignite and burn; ame proofed or
not, plastered or un-plastered
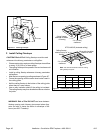
Table 10.1
R = 1/k x inches of thickness
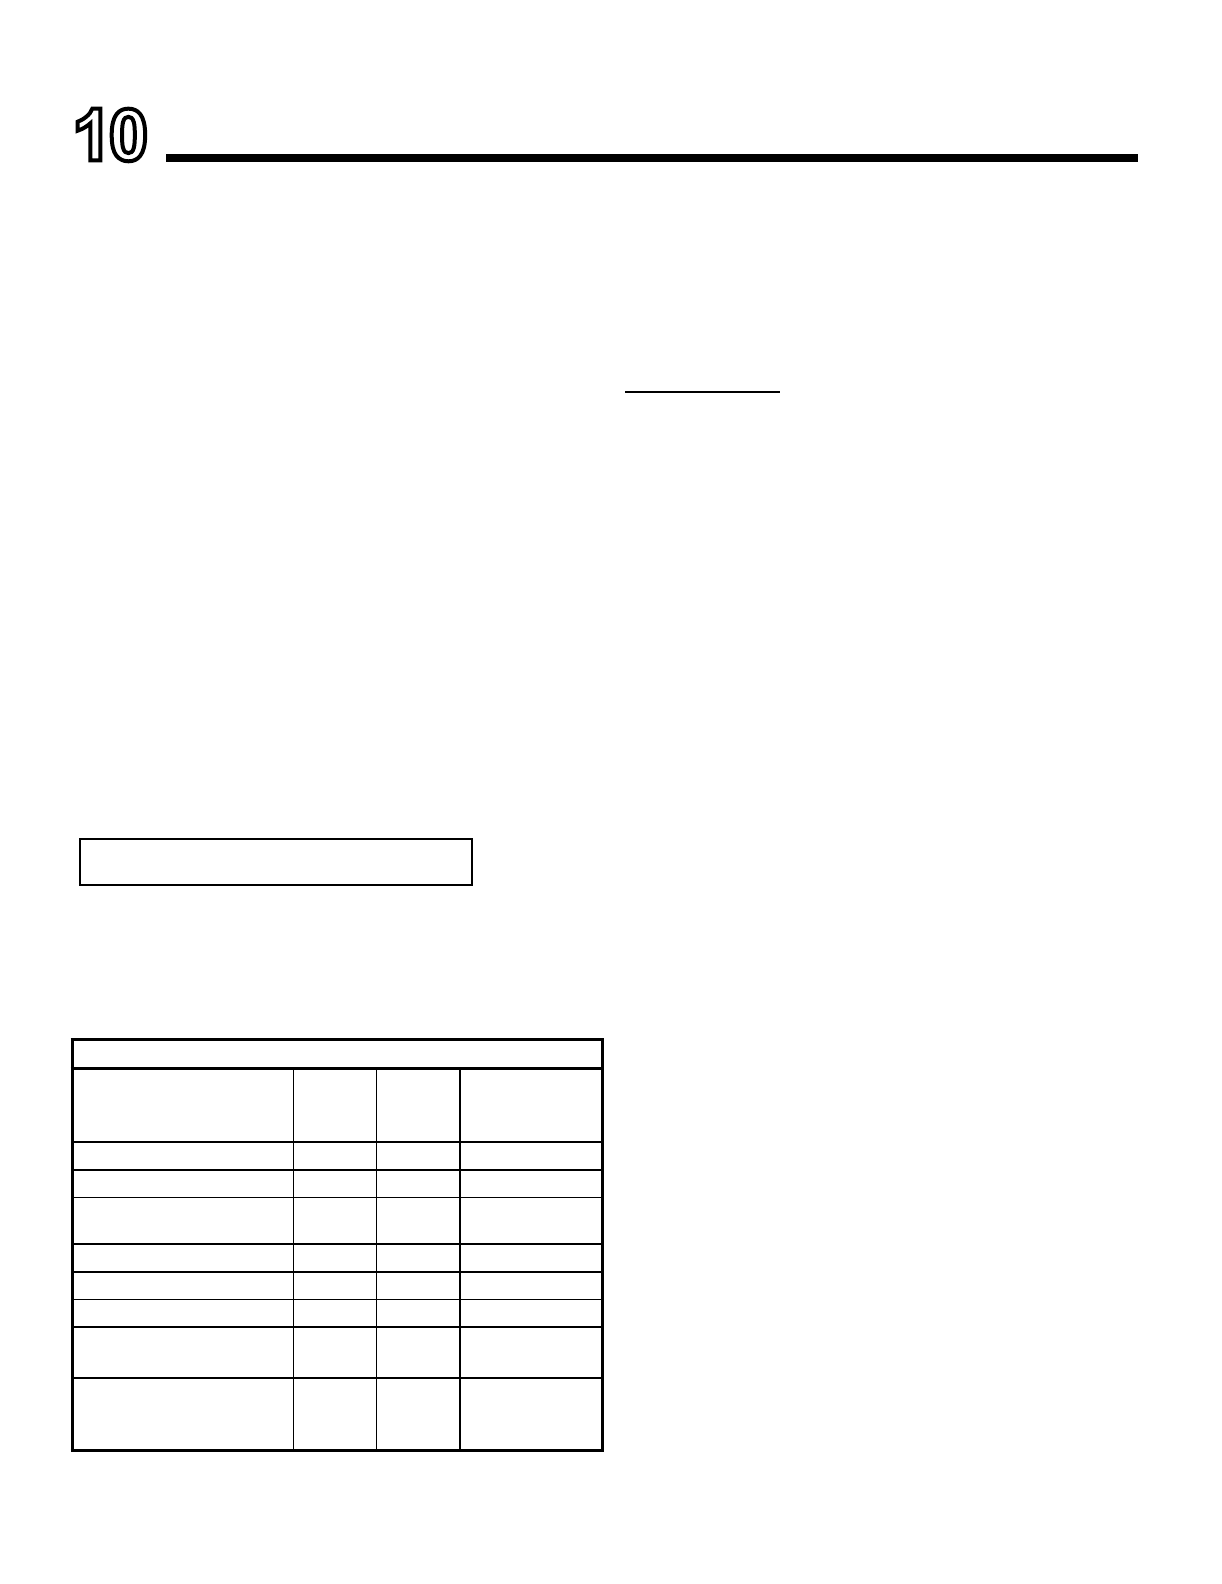
Table 10.2
Hearth Extension Insulation Alternatives, R Value = 2.06
Material
k per inch
thick
r per inch
thick
Minimum
thickness
required
Hearth & Home HX3, HX4 0.49 2.06 1 in.
USG Micore 300™ 0.49 2.06 1 in.
USG Durock™ Cement
Board 1.92 0.52 4 in.
Cement Mortor 5.0 0.20 10 1/2 in.
Common Brick 5.0 0.20 10 1/2 in.
Ceramic Tile 12.50 0.08 25 3/4 in.
Armstrong™ Privacy Guard
Plus 0.046 2.18 1 in.
Marble 14.3-20.0 0.07-0.05 29 1/2 - 41 1/4 in.
A. Non-Combustible Materials
B. Combustible Materials
C. Non-Combustible Facing Material In-
stallation
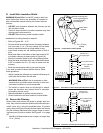
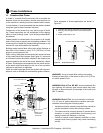
1.
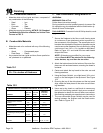
Secure the replace to the oor or wall framing studs
at a minimum of two attachment points to prevent fur-
ther movement of the replace. The same holes and L
brackets that attached the replace to the pallet may be
used to secure the replace to the sub ooring by using
a minimum of two 1/4 in. x 2 in. lag bolts or equivalent.
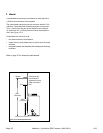
Refer to Figure 10.1 and install the two metal hearth
strips at this time.
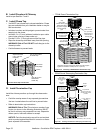
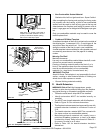
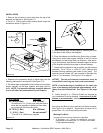
2.
Attach the bottom board to the bottom of the outer re-
place can with enclosed screws, ensuring the board is
centered.
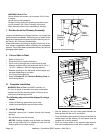
3.
Center and attach the top board to the outer can and
framing members.
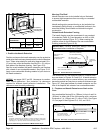
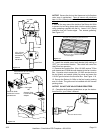
4.
Using the Super Calstick, run a light bead (1/8 in. mini-
mum) on the butt edges of the top board. See Figure
10.2
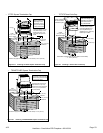
5.
Ensuring the top of the side pieces and the top board
align, attach the side pieces to the outer can and fram-
ing members.
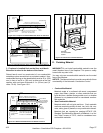
6.
Use a wet or dry towel or a soft brush to remove any
dust or dirt from facing material. Apply a non-combusti-
ble adhesive to attach tile, stone or other non-combus-
tible nishing materials per manufacturer’s instructions.
7.
The non-combustible Super Calstick may be used for
sealing between the replace and the hearth exten-
sion. Refer to Figure 10.3.
TOOLS NEEDED: Powered drill with #2 Phillips head bit; caulk-
ing gun.