


Special offers from our partners!

Find Replacement BBQ Parts for 20,308 Models. Repair your BBQ today.
4/12
Heatilator • Constitution EPA Fireplace • 480-1091H
Page 45
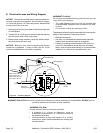
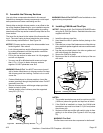
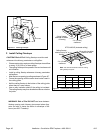
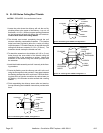
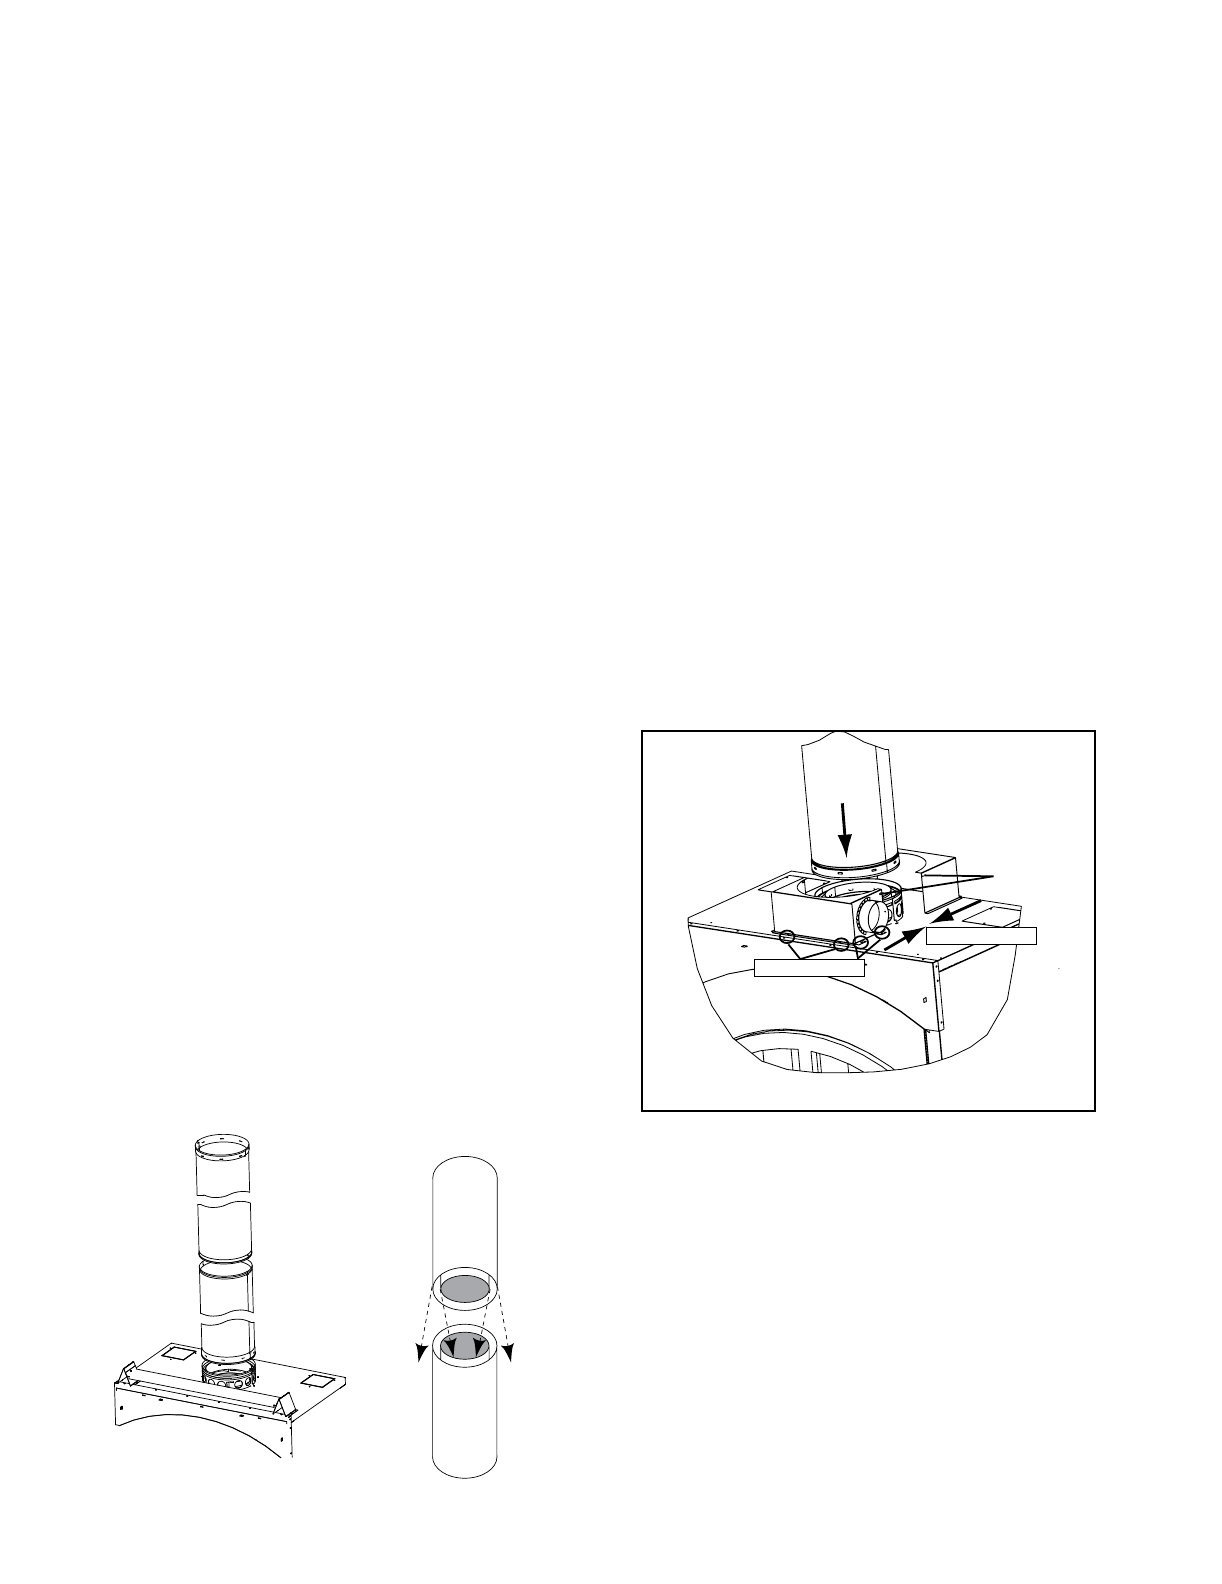
Figure 8.4 Assembling Chimney Sections
Attach
Flue First
CAK4A
Secure with Screws
Provided
Push Together
Secure to Top
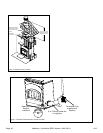
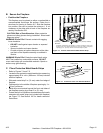
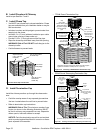
1. Install the chimney pipe rst.
2. Hand bend the tabs in position before placing on the
replace.
3. Place the box on top of the replace around the chimney
pipe, push both pieces together and secure with screws
provided.
4. Use the pre-punched holes in the tabs as guides and
drill holes through the replace top.
5. Secure the CAK4A in place.
6. Seal around the kit at the ue and at the top of the can
with caulk.
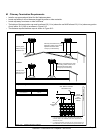
NOTES:
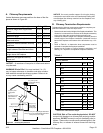
1. The outside termination cap must be a minimum of 6 ft
(1829 mm) above the ground and kept free of debris.
2. If the CAK4A is installed in a chase, the CAK4A side
termination cap must be at least 3 ft (914 mm) below
the chimney top.
3. Seal around the cap and ex with caulk to stop air from
getting in to the chase (See Figures 9.4-9.8 on page
52).
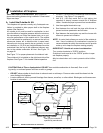
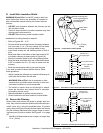
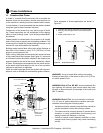
Figure 8.5 Installing the CAK4A
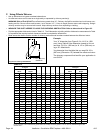
• Lock chimney sections and/or offsets/returns together
by pushing downward until the top section meets the
stop bead on the lower section.
• Pull on the top section to make sure it is fully engaged
and will not separate.
• You may use #6 or #8 sheet metal screws no longer
than 1/2 in. (13 mm) to fasten chimney sections
together. Do NOT penetrate inner ue.
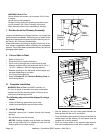
• Fasten offset/returns to chimney sections. Insert the
screws (provided) through the predrilled holes. Do NOT
penetrate inner ue.
• Secure chimney returns with hanger straps provided;
fasten to studs or joists.
• Vertical straight runs of chimney must be supported
every 35 ft (10.7 m).
Substitute or damaged chimney components could impair
safe operation and cause overheating and re.
Attach either a straight chimney section or an offset to the
top of the replace (depending on your installation require-
ment). Chimney sections are locked together by pushing
downward until the top section meets the stop bead on the
lower section.
The inner ue is placed to the inside of the ue section be-
low it. The outer casing is placed outside the outer casing
of the chimney section below it. See Figure 8.4.
D. Assemble the Chimney Sections
E. Installing CAK4A and Flex Pipe