


Special offers from our partners!

Find Replacement BBQ Parts for 20,308 Models. Repair your BBQ today.
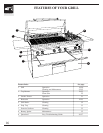
6
installation
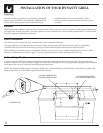
INSTALLATION OF YOUR DYNASTY GRILL
Safe and satisfactory operation of your Dynasty grill depends
upon its proper installation. The installation, adjustments and
service of your Dynasty grill must be performed only by
qualified installers and service technicians. This is
necessary to insure proper operation and also to prevent
accidents.
Location
When determining a suitable location take into account concerns such as exposure to wind, proximity to traffic paths and keeping any
gas supply lines as short as possible. Locate the grill only in a well ventilated area. For free standing models allow 12" from the sides
and rear to adjacent combustible construction.
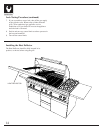
Built-in Installation
Your Dynasty grill is designed for easy installation into a non-combustible enclosure.
The supporting deck and counter must be level and flat. When determining the final location for your grill it is required that
ventilation holes be provided in the enclosure so that gas will not become trapped in the event of a leak (See page 9).
When installing your Dynasty grill in a combustible enclosure, it is necessary to use a suitable insulated jacket or sleeve; follow
cabinet cut out dimensions as shown on page 7. Use only an insulated jacket or sleeve manufactured by Jenn-Air.
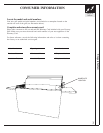
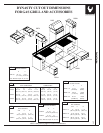
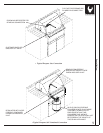
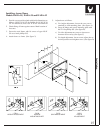
Built-in Design Models
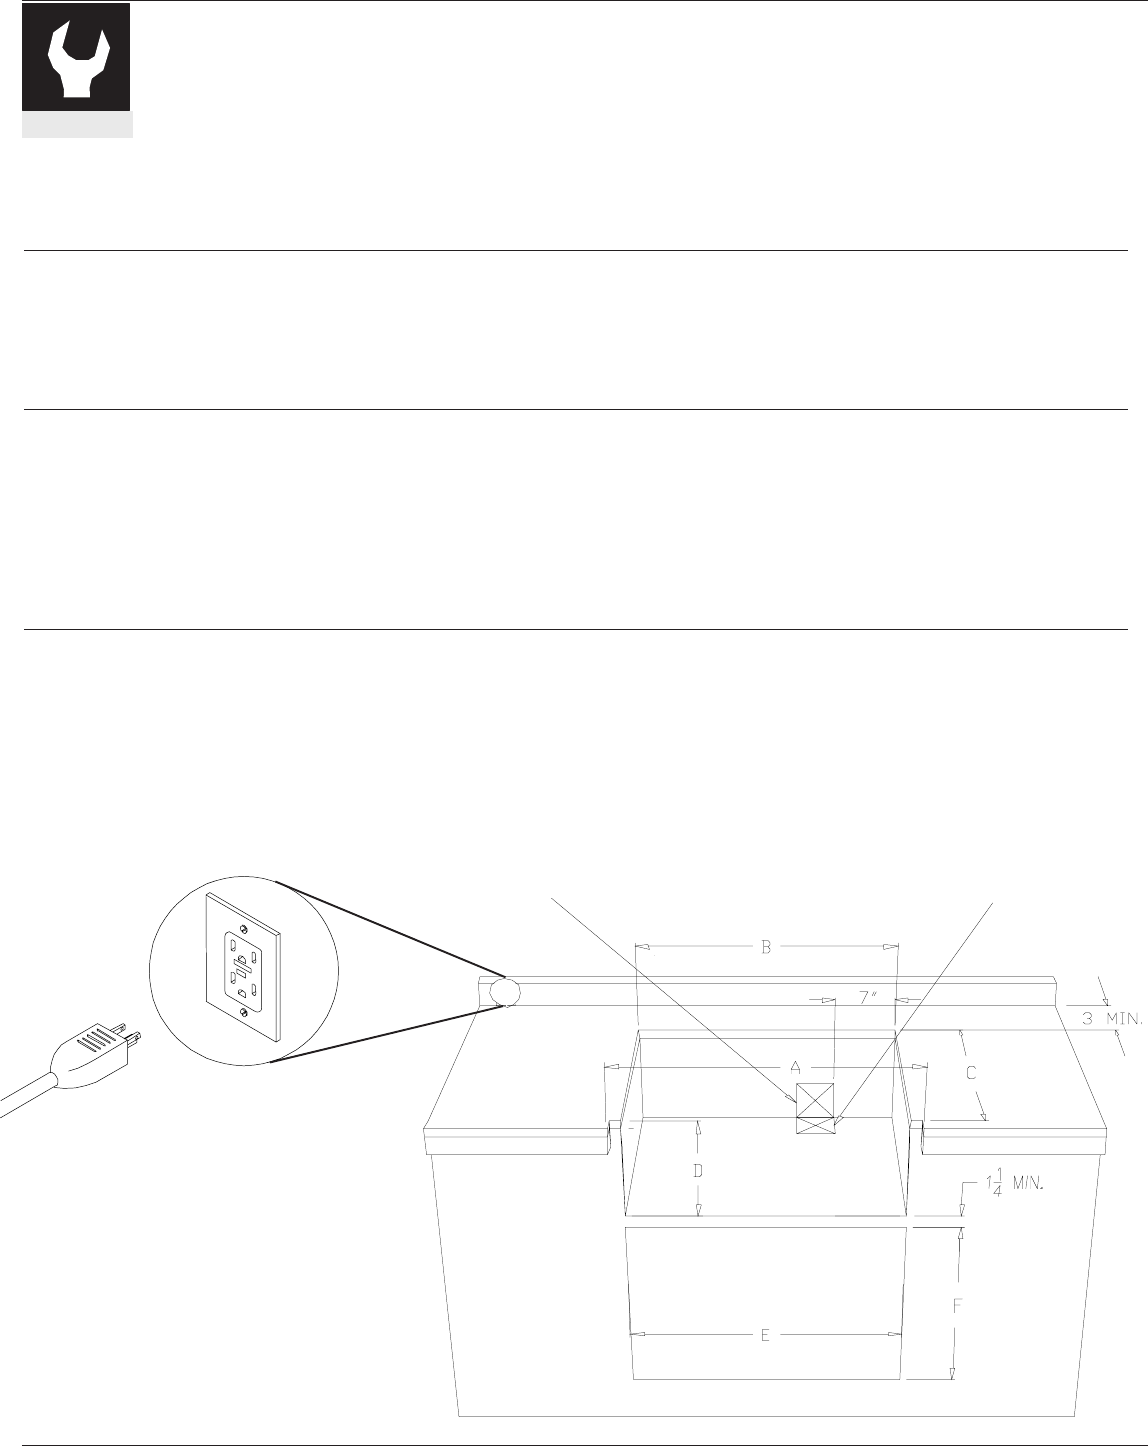
If using a rear wall, locate the weather proof electrical outlet on the left-hand side for the rotisserie motor. The rotisserie motor
requires a 110/120 VAC supply. The power supply cord on the motor is equipped with a 3 prong (grounded) plug for protection against
shock hazard. Do not cut or remove the grounding prong from the plug.
NOTE: See dimension tables in page 7 referring to figure below. When installing a grill, side burner, or bartender on a cabinet with
bullnose, dimension "A" is the width of appliance plus 1/8 clearance.
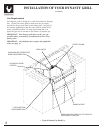
3 PRONG PLUG
4 X 4 MIN. OPENING FOR
BOTTOM GAS CONNECTION
4 X 4 MIN. OPENING FOR
REAR GAS CONNECTION