


Special offers from our partners!

Find Replacement BBQ Parts for 20,308 Models. Repair your BBQ today.
45
RECORDING
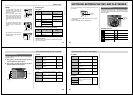
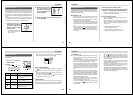
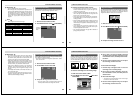
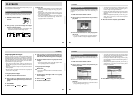
Resolution Settings
The camera has four resolution modes: Super Fine ( ), Fine
(
), Normal ( ), Economy ( ).
• To determine the number of images that can be stored on a
memory card of a different capacity, multiply the capacities
in the table by the appropriate value.
• The actual number of images that can be stored in memory
cannot be specified precisely because the amount of
memory required for storage of each image differs accord-
ing to image contents.
• The figures in the left are approximations only. The actual
number of images depends on image subject matter.
Use the procedure under “Record Menu” on page 59 for
details on changing the resolution modes.
• Note that the maximum number of images that can be
stored in a single folder is 250. Because of this, even if you
are using a card that allows storage of more than 250 im-
ages, the camera’s monitor screen will show capacity for
up to 250 images only. You will be able to store the addi-
tional images by changing to another folder.
• The number of images that can be recorded may differ
when you use card browser (page 89).
Setting Indicator
Resolution
Number of Images
8MB memory card
Number of Images
48MB memory card
(option)
File Size
(per image)
Computer
Output image
Super
Fine
Fine Normal Economy
14 19 33 55
88 123 207 342
500KB 352KB 200KB 112KB
1280 x 960 1280 x 960 1280 x 960 640 x 480
pixels pixels pixels pixels
46
RECORDING
3.
After adjusting the exposure, press the shutter
button to record the image.
NOTES
• Exposure compensation is generally expressed in
terms of an exposure compensation (EV) value. The
exposure compensation value is always set to zero
whenever you turn on the camera.
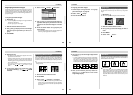
• Each press of [+] or [–] changes the exposure com-
pensation value by 0.5EV. A change in either direction
is indicated on the monitor screen by arrows pointing
left (negative correction) or right (positive correction).
• The normal maximum range for exposure compensa-
tion is –2EV to +2EV. Under certain conditions, how-
ever, the camera may impose lower maximum values
when exposure compensation would result in an im-
age that is too dark or too light.
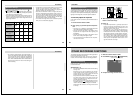
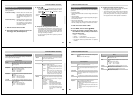
Exposure Compensation
This camera features an program AE function that automati-
cally changes shutter speed and aperture in accordance
with available light. In addition, you can also manually adjust
the exposure to compensate for backlighting, indirect indoor
lighting, dark backgrounds, and other special conditions.
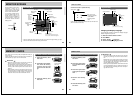
To manually adjust the exposure
If the monitor screen is turned off, press the DISP button to
turn it on.
1.
Set the Function Switch to REC.
2.
Use [+] and [–] to perform exposure compensa-
tion.
• Pressing [+] or [–] displays an EV indicator that shows
the current exposure compensation setting.
• Pressing [+] makes the image on the monitor screen
brighter. Use it to adjust for dim indoor lighting and
backlighting.
• Pressing [–] makes the image on the monitor screen
darker. Use it to adjust for bright sunlight.
• The EV indicator turns red whenever the compensa-
tion value is at its limit.
47
RECORDING
• The exposure compensation value automatically re-
verts to zero whenever the shutter button is pressed.
You can manually reset the exposure compensation
value by using [+] and [–] to change the value back to
zero, which is indicated when the EV indicator disap-
pears from the monitor. EV value is fixed during pan-
orama recording.
48
OTHER RECORDING FUNCTIONS
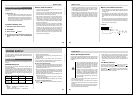
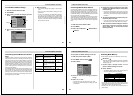
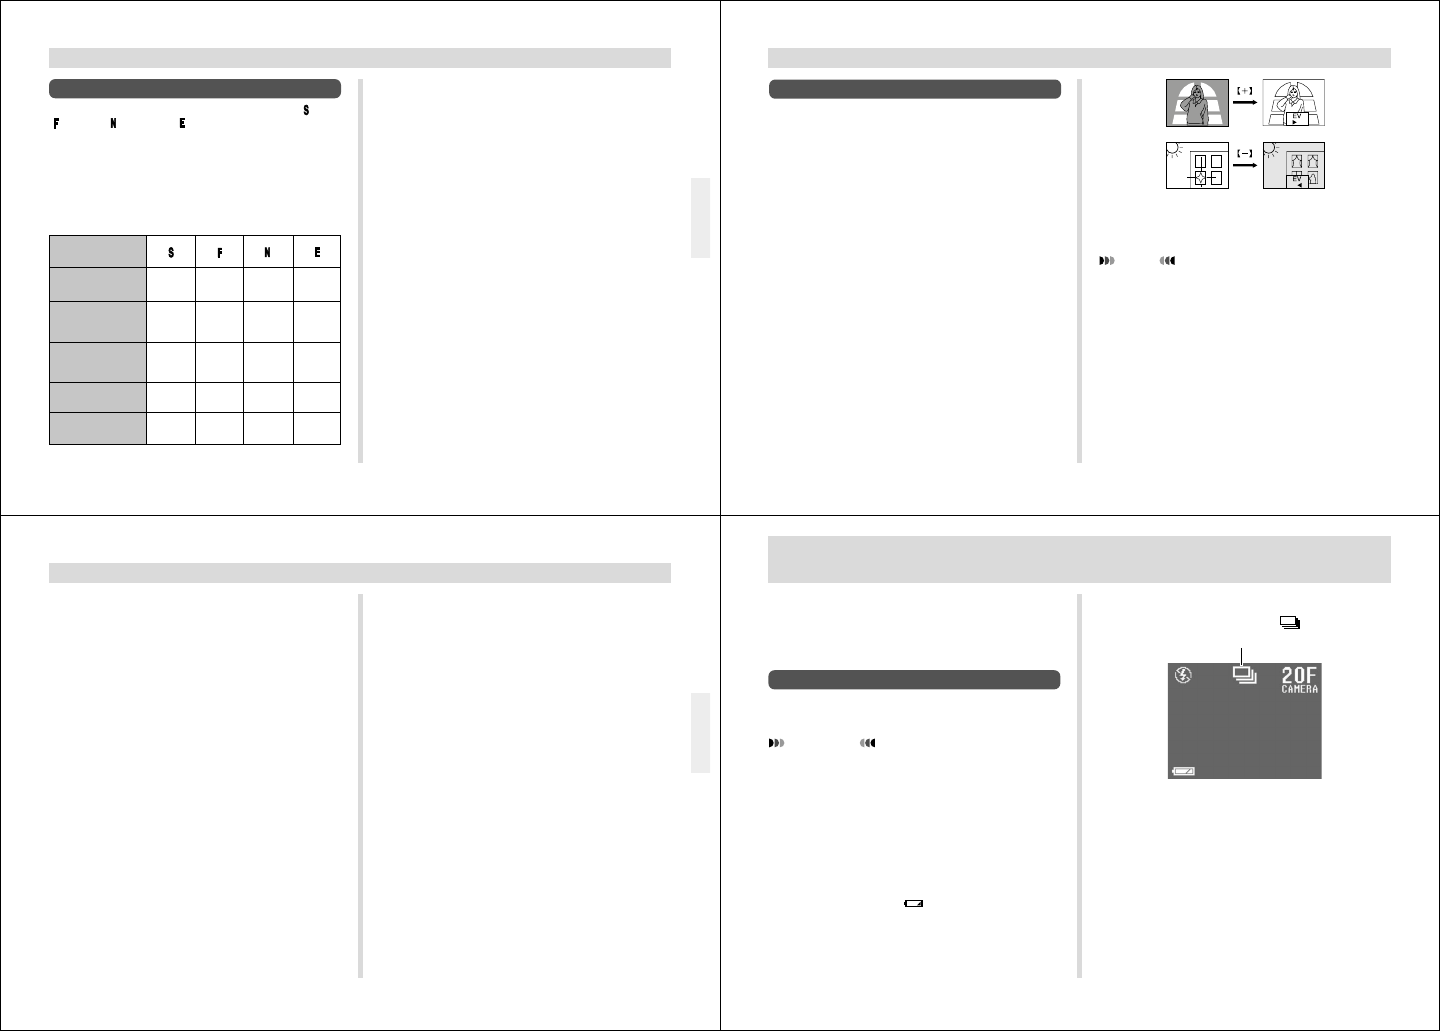
1.
Slide the Function Switch to REC.
2.
Press MODE, and then select (CONTINUOUS).
3.
Compose the image and then record it.
OTHER RECORDING FUNCTIONS
This section describes more advanced recording operations
that are also provided by this camera.
Use the monitor screen for zoom, macro, movie, panorama,
manual, timer and multiple exposure recording operations.
Continuous Recording
Holding down the shutter button records up to six images at
0.5-second intervals.
IMPORTANT!
• The flash unit is disabled while Continuous Recording
is being used.
• Note that you can use the viewfinder only (monitor
screen turned off) when recording images at a 0.5-
second interval. The interval is about one second
when the monitor screen is turned on.
• The power/card access lamp flashes while data is be-
ing written to the memory card. Never remove the
memory card, batteries or AC adaptor from the cam-
era while this lamp is flashing.
• Do not perform an image record operation while the
low battery indicator “
” is displayed. Doing so may
result in failure of part of the image to be recorded.
• It takes about 60 seconds for six images to be stored
in memory.
Continuous Recording Mode