


Special offers from our partners!

Find Replacement BBQ Parts for 20,308 Models. Repair your BBQ today.
4-03 19 480-1081
North Star
EPA Certied Fireplace
19. Finishing Material
Do not install combustible materials over the front
of the replace! This poses a safety hazard and may
start a re. You may only use noncombustible material
over the front of the replace.
a. Combustible Material
Material which is made of or surfaced with wood,
compressed paper, plant bers, plastics, or any
material capable of igniting and burning, whether
ame proofed or not, plastered or unplastered.
b. Noncombustible Material
Material which will not ignite and burn. Such
materials are those consisting entirely of steel, iron,
brick, tile, concrete, slate, glass or plasters, or any
combination thereof.
c. Noncombustible Sealant Material
Sealants which will not ignite and burn; General
Electric RTV103 Black (or equivalent), Rutland, Inc.
Fireplace Mortar #63 (or equivalent).
After completing the framing and applying the facing
material (dry wall) over the framing, a 1/2” wide
(maximum) bead of noncombustible sealant must
be used to close off any gaps at the top and sides
between the replace and facing to prevent cold
air leaks.
Only noncombustible materials may be used to
cover the metal replace front.
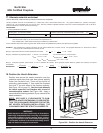
d. Cardboard OR Metal Template
A cardboard template of the front is printed on the
outside of the shipping box. It measures 1/8” bigger
all the way around than the actual front. Cut out the
template for use in your installation.
A metal template is also available for more durable
continued use remaining accurate over time.
The part number for this metal template is HHT-
Template.
21. Mantel
A combustible mantel may be positioned no lower than
60” from base of the replace. The combustible mantel
may have a maximum depth of 12”. Combustible trim
pieces that project no more than 1-1/2” from the face of
the replace can be placed no closer than 6” from the
side of the replace decorative front. Combustible trim
must not cover the metal surfaces of the replace. This
mantel clearance is in accordance with Section 7-3.3.3
of ANSI/NFPA211.
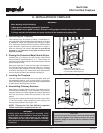
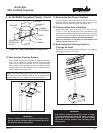
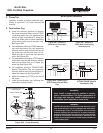
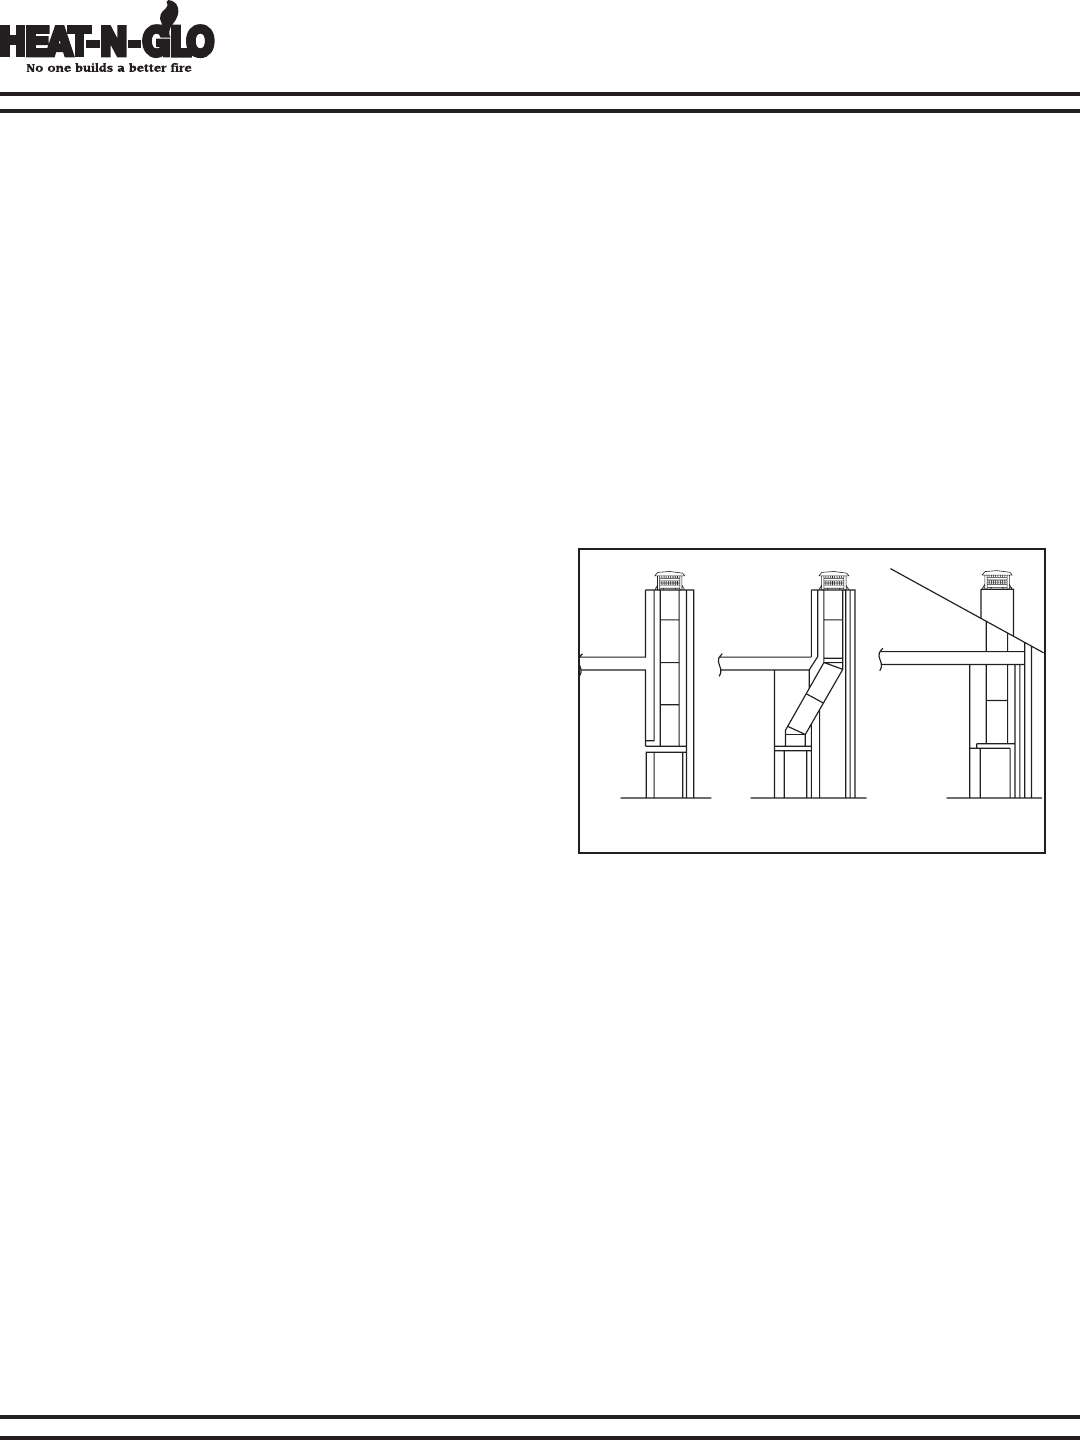
H. CONSTRUCTING A CHASE
1 2 3
Figure 19A - Chase Constructions
1. Materials
a. The chase is constructed using framing materials
much the same as the walls in your home. A variety
of siding materials may be used including brick,
stone, veneer brick, or standard siding materials.
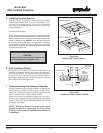
b. In constructing the chase, several factors must
be considered:
1) Maintain a 2” air space around the chimney.
2) The chase top must be constructed of noncom-
bustible material.
3) In cold climates, a restop spacer should be
installed in an insulated false ceiling at the 8’
level above the replace assembly. This reduces
heat loss through the chase.
4) In cold climates, the walls of the chase should
be insulated to the level of the false ceiling
as shown in Figure 20A on page 20. This will
help reduce heat loss from the home around
the replace.
A chase is a vertical boxlike enclosure built around the
chimney and replace. A chase may be constructed for the
replace and chimney or for the chimney only. It is most
commonly constructed on an outside wall.
In cold climates, it is recommended that the chase oor
be insulated using batt type insulation between the oor
joists.
Three examples of chase applications are shown in Figure
19A.
1. Fireplace and chimney enclosed in an exterior
chase.
2. Chimney offset through exterior wall and enclosed
in chase.
3. Chase constructed on roof.