Special offers from our partners!

Find Replacement BBQ Parts for 20,308 Models. Repair your BBQ today.
Heat & Glo • Crescent II • 2083-902 Rev. G • 9/0518
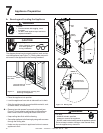
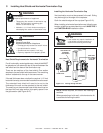
A. Securing and Leveling the Appliance
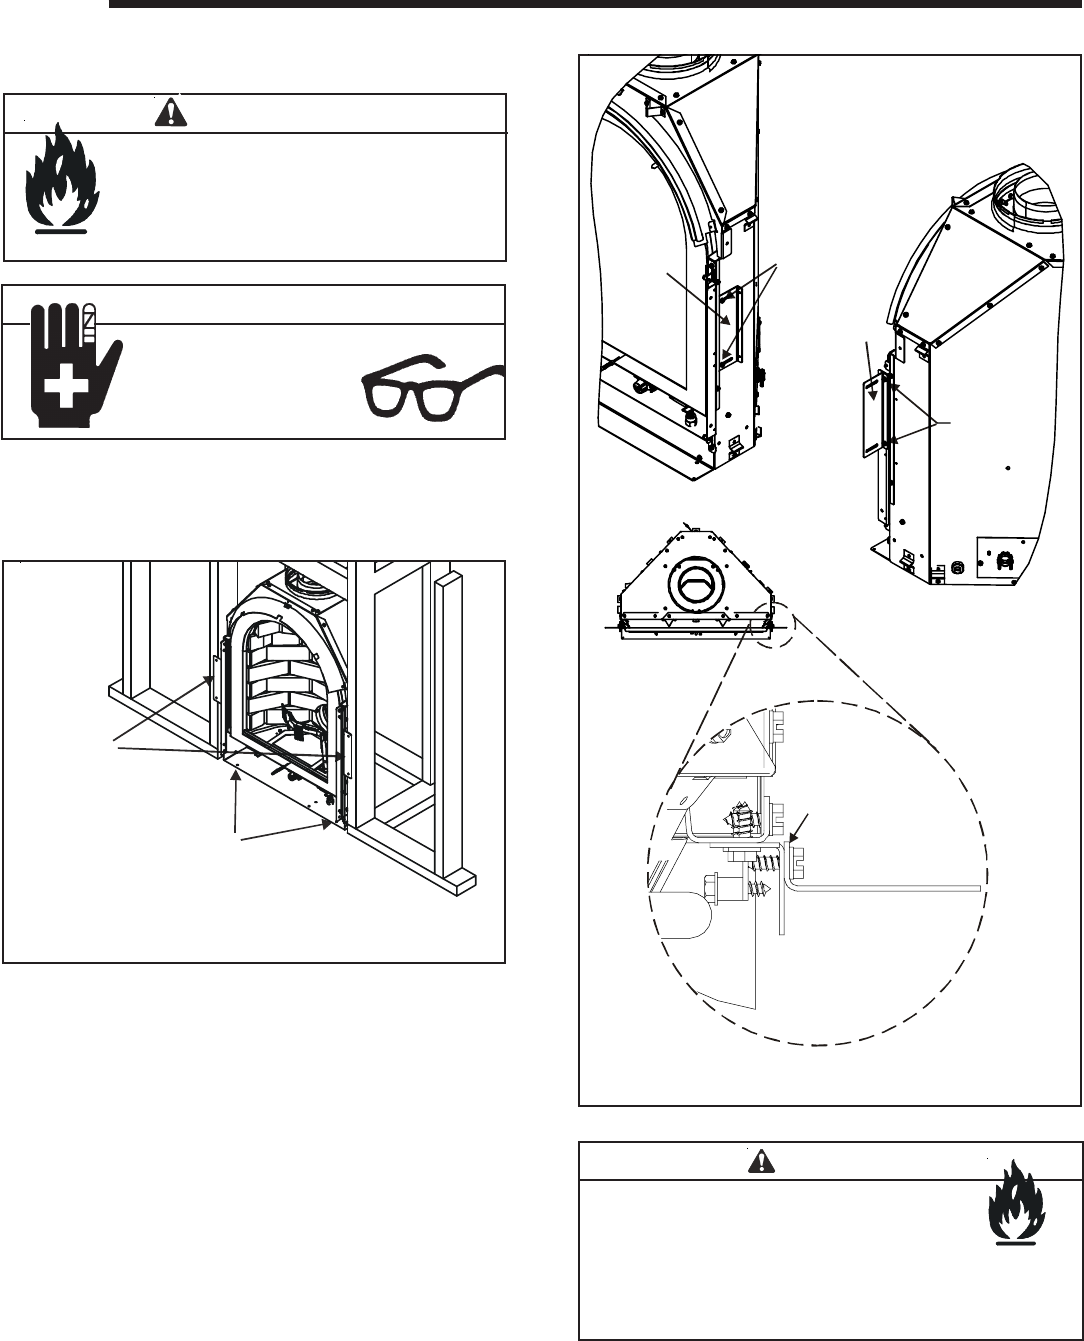
Figure 7.1 Proper Positioning, Leveling and
Securing of a Appliance
Fire Risk.
• Prevent contact with sagging, loose
insulation.
• Do NOT install against vapor barriers or
exposed insulation.
WARNING
Appliance Preparation
7
CAUTION
Sharp Edges
• Wear protective gloves
and safety glasses
during installation.
Figure 7.2 Nailing tabs
• Place the appliance into position.
• Level the appliance from side to side and front to back.
• Shim the appliance with noncombustible material, such
as sheet metal, as necessary.
• Remove two side screws from each nailing tab (see
Figure 7.2) and refasten nailing tabs to the appliance.
Note: Return bend on nailing tab faces back of unit.
• Keep nailing tabs flush with the framing.
• Secure the appliance to the framing by using nails or screws
through the nailing tabs.
• Holes are also provided in appliance bottom to secure
appliance to floor.
WARNING
Fire Risk.
• ALWAYS maintain specified
clearances around the appliance.
• Do NOT notch into the framing around the appliance spacers.
Failure to keep insulation, framing or other material away
from the appliance may cause fire.
NAILING TABS
BOTH SIDES
2 HOLES IN BASE FOR
MOUNTING TO FLOOR
The diagram shows how to properly position, level, and se-
cure the appliance (see Figure 7.1). Nailing tabs are provid-
ed to secure the appliance to the framing members.
REFASTEN
NAILING
TAB
SCREWS (2)
NAILING
TAB
REMOVE
SCREWS (2)
FRONT
VIEW
BACK
VIEW
TOP
VIEW
DETAIL A
RETURN BEND FACES
THE BACK OF THE UNIT
Î
Í


