


Special offers from our partners!

Find Replacement BBQ Parts for 20,308 Models. Repair your BBQ today.
GAS BRAISING PANS - SERVICE PROCEDURES AND ADJUSTMENTS
F25121 (February 2003) Page 18 of 32
11. Turn on/off switch on and set the temperature
dial to call for heat.
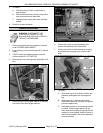
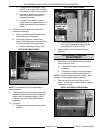
12. Manually operate pan position/down limit switch
and observe spark from ignitor.
A. If spark from ignitor is present and lights
the gas for pilot burner, and pilot burner
remains lit, then the system is working
properly.
B. If pilot burner lights but does not maintain
an adequate flame during the trial for
ignition (90 seconds):
1) Check pilot burner orifice for clogging.
CAUTION: If orifice is clogged with debris, clean
with air or non-flammable liquid only.
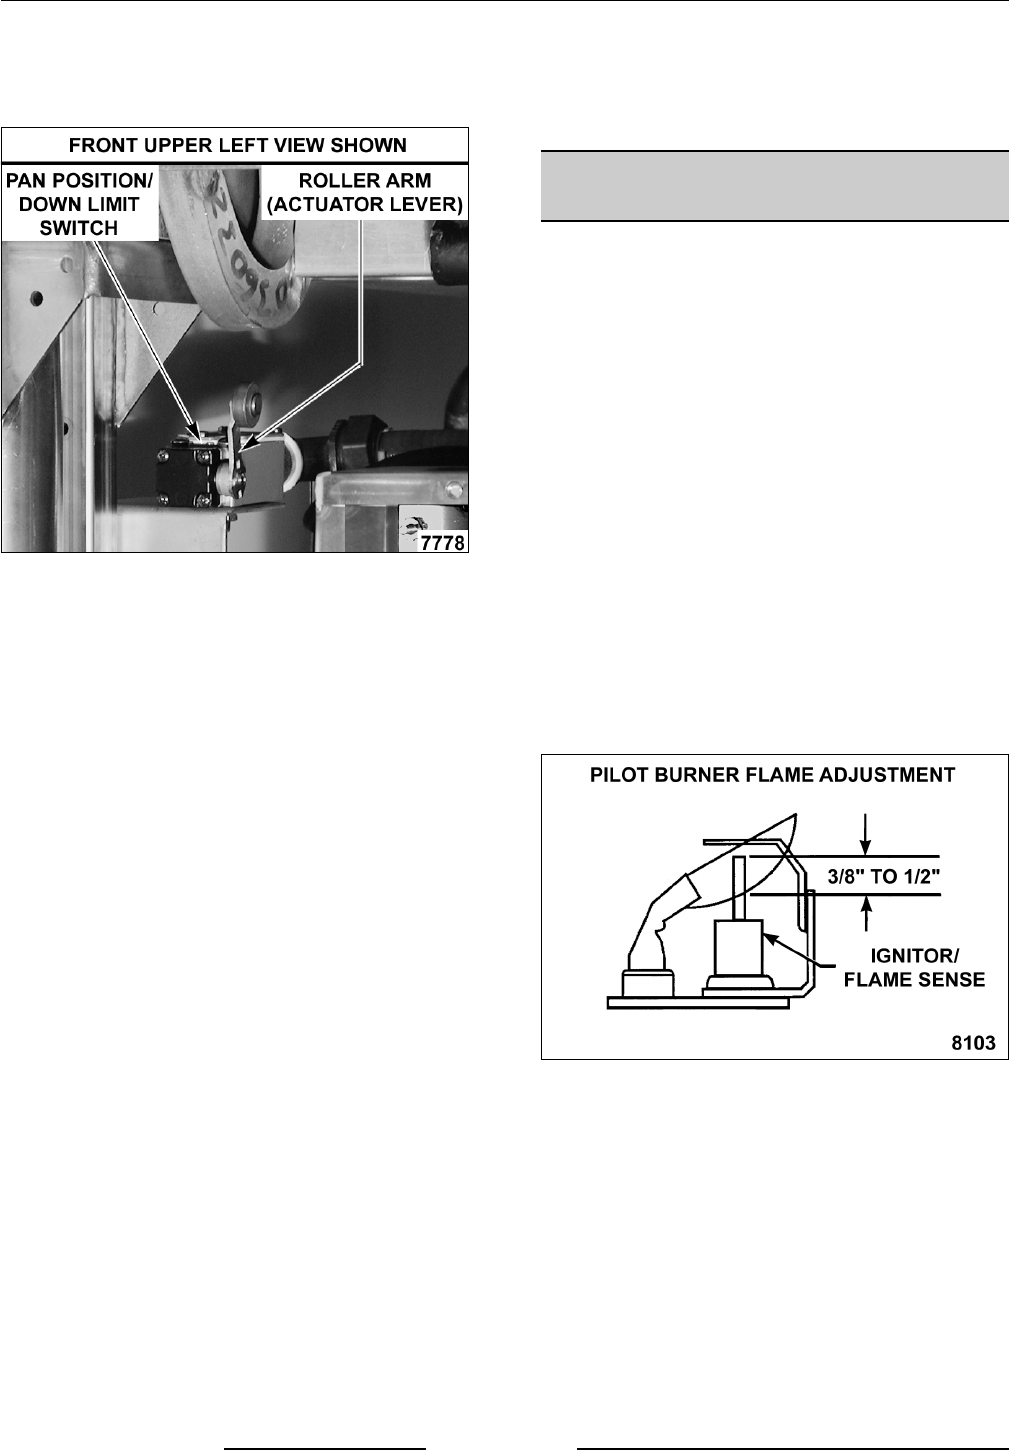
2) Check pilot burner flame adjustment
as outlined under SERVICE
PROCEDURES AND
ADJUSTMENTS.
C. If spark from ignitor is present but does not
light the pilot gas before ignition control
module locks out, there may not be
enough gas in the supply line for ignition.
Release the pan position/down limit switch
to remove power and re-set the module.
Wait 5 minutes between ignition tries for
unburned gas to vent.
Manually operate pan position/down limit
switch and sparking should resume. The
module may need to be re-set several
times before ignition takes place.
1) If pilot burner ignition is successful,
release the pan position/down limit
switch, turn the on/off switch to off
and re-connect main valve (MV) lead
wire on the ignition control module.
D. If ignitor is still not sparking, turn the on/off
switch off, disconnect power to the
machine and turn the gas supply off.
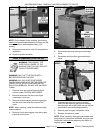
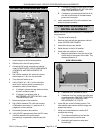
13. Install a replacement ignition control module
and check for proper operation.
PILOT BURNER FLAME
ADJUSTMENT
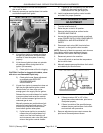
1. Turn the on/off switch off.
2. Raise the pan to the full tilt position.
3. Remove left side panel as outlined under
COVERS AND PANELS.
4. Access the ignition control module as outlined
under POWER SUPPLY BOX COMPONENTS
IN REMOVAL AND REPLACEMENT OF
PARTS.
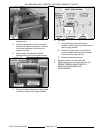
5. Disconnect main valve (MV) lead wire from
terminal 1 on the ignition control module.
NOTE: Removal of lead wire prevents main burners
from lighting with the pan raised and the pan
position/down limit switch manually operated.
6. Reconnect power to the machine.
7. Turn on/off switch on and set the temperature
dial to call for heat.
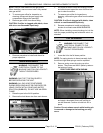
8. Manually operate pan position/down limit switch
and observe pilot burner flame.
A. If flame envelops 3/8" to 1/2" of the
ignitor/flame sense electrode, pilot burner
is adjusted properly.
B. If flame is outside of the specified range,
release the pan position/down limit switch
and
continue with procedure.
9. Remove adjustment screw cap to access the
pilot burner flame adjustment screw.