


Special offers from our partners!

Find Replacement BBQ Parts for 20,308 Models. Repair your BBQ today.
20
W415-0665 / B / 02.11.08
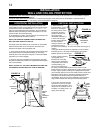
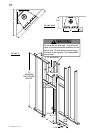
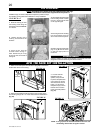
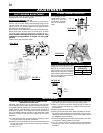
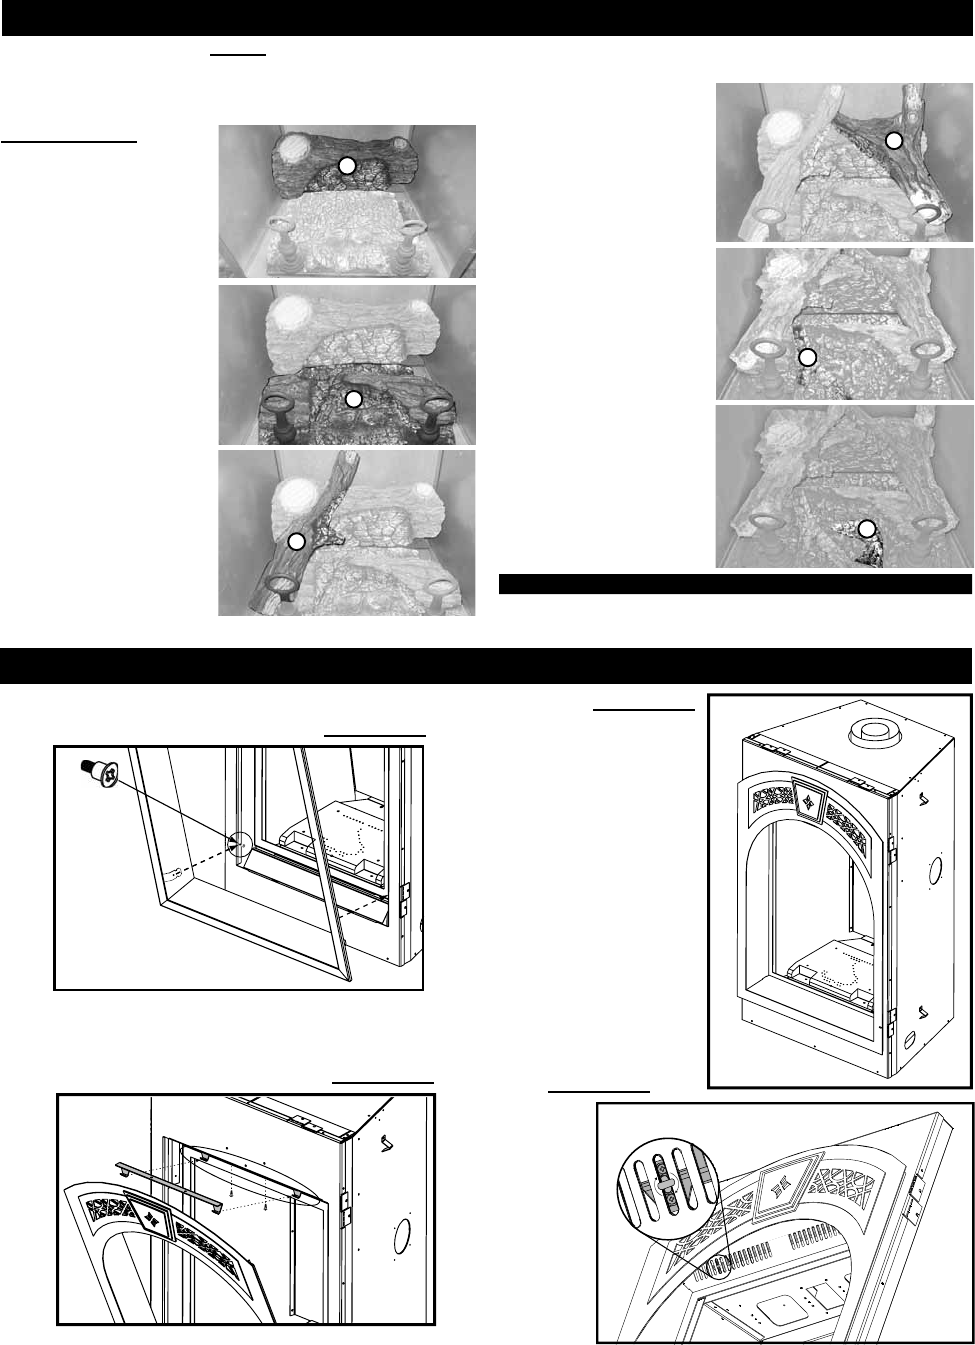
1. Attach screw and spacer as illustrated in (Fig. 44) to the bottom
of both sides of the front housing.
2. Attach the face plate bracket provided to the top edge of the
front housing using 2 #8 - 1/2” truss head screws as illustrated in
(Fig. 45).
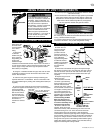
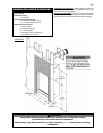
3. Lift and hook the
faceplate over the
spacers, and push the
top of the faceplate back
until it comes in contact
with the base of the turn
button. To secure the
faceplate simply turn the
head of the turn button
to the horizontal position.
(Fig. 47).
SCREW
&
SPACER
NOTE: A 1/4” gap must be maintained between the front and
all fi nishing material due to regular removal.
AFK / WI FACE KIT INSTALLATION
FIGURE 45
FIGURE 44
FIGURE 46
FIGURE 47
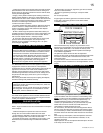
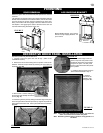
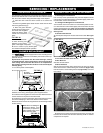
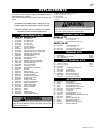
5. Place log #5 so the locating
hole on the bottom of the log
sits on the screw and spacer.
6. Finally, align the rectangular
peg on log #6 with the notch
on the front right portion of
the burner.
NOTE: Decorative brick panels must be installed before the logs.
See installation instructions supplied with the panel kit.
LOG PLACEMENT
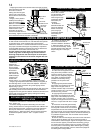
PHAZER
TM
logs, exclusive to Napoleon
®
Fireplaces, provide a unique
and realistic glowing effect that is different in every installation.
1. Place the rear log #1 onto
the locating studs along the
back edge of the PHAZERAM-
IC™ burner.
2. Position log #2 in the 2
locating holes behind the
andirons.
3. Place log #3, with the
charred branch facing in-
ward. Position the pin in log
#3 into the hole on the left of
the log #2.
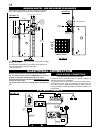
GLOWING EMBERS
2
3
4
1
FIGURE 39 a-f
Glowing embers are NOT recommended. The burner has been
designed to achieve maximum glow without embers.
5
6
4. Place log #4 with the charred
branch facing inward. Position
the pin in log #4 into the hole
on the right of log #2.