


Special offers from our partners!

Find Replacement BBQ Parts for 20,308 Models. Repair your BBQ today.

11
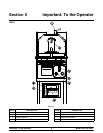
Models QS10 & QS22 Important: To the Operator
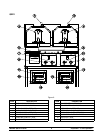
Operating Screen and Controls
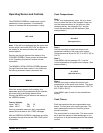
The VERSION SCREEN is viewed when a grill is
powered for normal operation. It indicates the
version of software the microprocessor is using.
VER 1.01B
Note: If the grill is not equipped with the upper cook
surface option, the words “NO PLTN” will appear on
the display for two seconds before the version
screen appears.
Pressing any key will advance the display to the
COOKING SCREEN. These screens are described
in the “Operating Procedures” section of these
instructions.
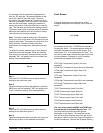
The MEMORY INITIALIZATION SCREEN appears
if the grill has never been used or in the rare event
that set-up parameter memory has been lost.
MEM INIT
When this screen appears on the display, the
parameters previously programmed by the operator
will revert back to the factory default values.
Pressing the MENU key will advance the display to
the VERSION screen.
Factory defaults:
Upper 400_F TM1 30
Lower 325_F TM2 0
If set-up parameter memory is lost, programmed
names will revert back to the “ITEM” messages.
After the VERSION SCREEN is displayed and a key
is pressed, the grill will enter the ITM1 COOK mode
of operation.
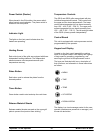
Cook Temperatures
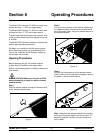
Step 1
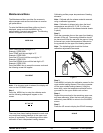
To set cook temperatures, press the up or down
arrow to select the item to be changed. Press and
hold the temperature key for five seconds. After
releasing the key, the message “SU1” and the
current set temperature will be displayed. (See
example below.)
SU1 400 F
(Set upper item 1)
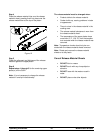
Step 2
Use the arrow keys to adjust the desired cook
temperature setting for the upper cook surface.
Temperatures may be set for 150_F to 425_F (66_to
218_C).
Step 3
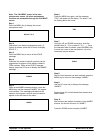
Press MENU and the message “SL1” and the
current temperature will appear on the display. (See
example below.)
SL1 325 F
(Set lower item 1)
Step 4
Use the arrow keys to adjust the desired cook
temperatures for the lower cook surface. The range
for the lower cook surface temperatures is 150_F to
400_F (66_to 204_C).
Press MENU again to return to the selected item
display.
Cook Timers
Each item selection has two programmable cook
timers. The first timer is the cook cycle timer. This
timer measures the amount of time the product
should be cooked.
The second timer is an alert timer. This timer can be
set to alert the operator to add seasonings, to turn
the product, or to start warming buns for the cooked
product.