


Special offers from our partners!

Find Replacement BBQ Parts for 20,308 Models. Repair your BBQ today.

29
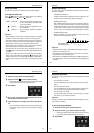
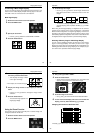
4. Use [+] and [–] to select ADJUST, and then press the shut-
ter button.
5. Set the current date and time.
• Use [+] and [–] to select the setting that is highlighted on the
monitor screen, and then press the shutter button to
advance to the next setting. Repeat this for all of the settings
on the monitor screen.
6. After making all the settings on the monitor screen, press
MENU to register them.
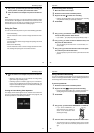
To select the date format
Example: May 12, 1998
You can select any one of the following formats for the above date:
1998/5/12, 12/5/1998, 5/12/1998.
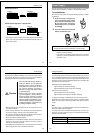
1. Slide the function switch to the PLAY position.
2. Press MENU.
Setting the Current Date and Time Getting Acquainted
30
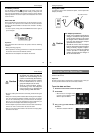
3. Use [+] and [–] to select ADJUST, and then press the shut-
ter button.
4. Use [+] and [–] to select STYLE, and then press the shutter
button.
5. Use [+] and [–] to select the date format you want, and then
press the shutter button.
31
Recording Images
The following procedure provides the basic steps for recording an
image.
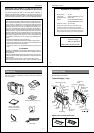
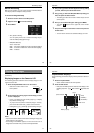
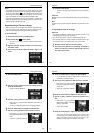
To record an image
1. Enter the Record Mode.
• Slide the function switch to the
REC position.
2. Set the dial to for normal recording.
• You can perform steps 1 and 2 in
either order (1 then 2, or 2 then 1).
3. Turn on the camera.
• Slide the POWER switch in the di-
rection indicated by the arrow.
• The POWER switch automatically
slides back to its original position
when you release it.
• When power comes on, the image of the object that is in
front of the camera’s lens appears on the LCD.
4. Set the NORMAL/MACRO switch to (NORMAL) posi-
tion.
• If the object whose image you are
recording is about 15 centimeters
from the lens (about 6 inches), set
the NORMAL/MACRO switch to
(MACRO). See page 36 for
details on using this switch.
Recording Images
REC
ON/OFF
DEL
POWER
Operation
32
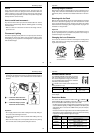
5. Use button to enter the resolution mode you want.
• Each press of
button cycles the resolution in the
following sequence:
(FINE) (NORMAL)
(ECONOMY).
• See “Resolution Modes” on page 36 for details on the
number of images that can be stored on the memory card for
each resolution.
6. Record the image.
• Compose the image you want to record while viewing it on
the LCD.
• It is best to look at the LCD directly, and not from an angle.
• Take care that your finger is not
blocking the lens and exposure
sensor.
• When the image is situated on the LCD as you want it, press
the shutter button.
• Press the shutter button lightly to avoid moving the camera.
See page 33 for information on how to avoid hand move-
ment.
• Here you could change the function switch to the PLAY posi-
tion and view the image you just recorded.
• Note that you can also select a memory card folder into
which recorded images should be placed (page 68).