


Special offers from our partners!

Find Replacement BBQ Parts for 20,308 Models. Repair your BBQ today.

41
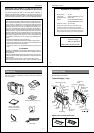
Recording Images
Using the Flash
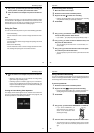
You can use the camera’s built in flash when recording images.
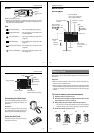
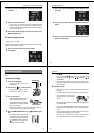
To change the flash mode
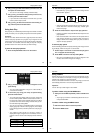
Press button to cycle through flash modes in the following
sequence: Auto Flash
Flash On Flash Off.
Auto Flash .......Camera automatically decides whether
or not to fire the flash in accordance with
exposure conditions.
Flash On .........Flash is always fired, regardless of expo-
sure conditions.
Flash Off .........Flash is not fired, regardless of exposure
conditions.
None
Important!
• When aiming the camera, make sure that your fingers do not block
the flash or sensor. A block flash or sensor can ruin your picture.
• The flash should be used when recording images from a distance
from about 0.7 meters (2.3') to about 3 meters (9.8'). Recording an
object outside of this range may not produce desired results.
• Depending on current conditions, recharging can take anywhere
from a few seconds to as long as about 10 seconds.
• The flash does not fire when you shoot a sequential series of im-
ages.
appears on the monitor screen to indicate that the flash will
not fire.
• The flash unit may not be able to recharge when camera battery
power is low. This condition is indicated by
flashing red on the
monitor screen. Be sure to replace batteries as soon as possible in
order to prevent improper exposure due to improper firing of the
flash.
Operation
42
Repeat Recording
You can use any of the three following methods to record a consecu-
tive series of images.
• Shutter Button (CONT.S)
Images are continuously recorded (at intervals of about one sec-
ond) as long as you keep the shutter button pressed.
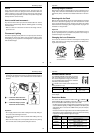
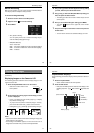
• TIME Recording (Past)
With TIME Recording (Past), the camera constantly records im-
ages, even when the shutter button is not pressed. Pressing the
shutter button produces a series of four images that include the
image when the shutter button is pressed, and three images
0.05, 0.1, and 0.15 seconds before the shutter button is pressed.
• TIME Recording (Future)
With this method, the camera records a series of four shots
based at intervals of about 0.05 second.
Important!
• The flash cannot be used in combination with repeat recording, re-
gardless of the method you use.
• The ability to repeat record depends on the amount of unused ca-
pacity available on your memory card.
• After performing a TIME Recording (Past) or TIME Recording (Fu-
ture) operation, the monitor screen shows the third image that was
recorded.
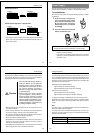
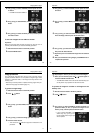
SHUTTER
1
Time Recording (Past)
234
Time Recording (Future)
1234
43
Recording Images
To record a consecutive series of images
1. Slide the function switch to the REC position.
2. Align the dial with to select repeat recording.
• Pressing the shutter button here, performs repeat recording
using the last method you previously selected.
3. Press MENU.
4. Use [+] and [–] to select the repeat method you want to use,
and then press the shutter button.
5. Point the camera at the subject and press the shutter but-
ton.
• If you are using the shutter button for repeat recording, keep
it held down long enough to record the number of images
you want.
Operation
44
Using the Self-timer
You can use the self-timer to perform any of the following recording
operations.
• One shot after 10 seconds
Use this method when you want to include yourself in the photo-
graph.
• One shot after two seconds
Use this method when you want to eliminate the effects of cam-
era movement caused when the shutter button is pressed.
• Four shots after 10 seconds
Use this method when you want to record a series of images,
from which you can select the best one.
Important!
The flash cannot be used in combination with four shots after 10 sec-
onds self-timer recording.
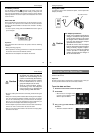
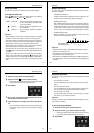
To record using the self-timer
1. Slide the function switch to the REC position.
2. Align the dial with to select self-timer recording.
• Pressing the shutter button here, performs self-timer record-
ing using the last method you previously selected.
3. Press MENU.