


Special offers from our partners!

Find Replacement BBQ Parts for 20,308 Models. Repair your BBQ today.
85
Using the Camera with a Connected Device
Connecting to another CASIO Digital Camera
DIGITAL
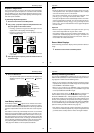
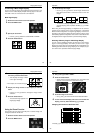
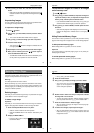
You can connect the camera to another CASIO digital camera and
exchange image data between them. Connect the DIGITAL terminals
of the two cameras using the optionally available SB-62 connecting
cable.
To connect the two cameras
1. Turn both cameras off.
2. Connect the two cameras by plugging the optional SB-62 connec-
tion cable into their DIGITAL terminals.
3. Turn both cameras on.
To send data from this camera to another camera
1. Set the function switches of both cameras to PLAY.
2.Use the [+] and [–] buttons of this camera to find the image you
want to send.
• You cannot send images between two cameras while either of their
function switches is set to REC.
• You cannot send images while using the multi-page display or
zoom function.
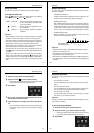
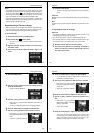
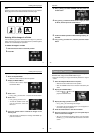
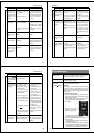
3. Press the shutter button of this camera.
Send icon
Using the Camera with a Connected Device
86
4. Use the [+] and [–] buttons to move the pointer to the send icon.
5.After you make the setting you want, press the shutter button
again.
• Pressing the shutter button sends the selected image to the other
camera.
• You can send only one image at a time. To send more images,
repeat steps 2 through 5.
To receive data to this camera from another camera
1. Set the function switches of both cameras to PLAY.
2. Use the [+] and [–] buttons of other camera to find the image you
want to receive.
• You cannot receive images between two cameras while either of
their function switches is set to REC.
• You cannot receive multi-page display or zoomed images.
• If you try to receive a multi-page display or zoomed images, other
camera’s monitor automatically changes to normal display of page
1.
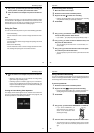
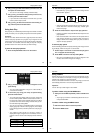
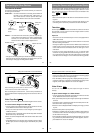
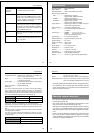
3. Press the shutter button of this camera.
Receive icon
87
Using the Camera with a Connected Device
4. Use the [+] and [–] buttons to move the pointer to the receive icon.
• As soon as you perform the above step, all of the buttons and con-
trols on the other camera become disabled.
5.After you make the setting you want, press the shutter button
again.
• Pressing the shutter button receives the selected image from the
other camera.
* You can receive only one image at a time. To send more images,
repeat steps 2 through 5.
Important!
• Never disconnect the cable, turn power off, or change the function
switch setting while a data communication operation is in progress.
Doing so can damage the camera.
• When the QV-700 is connected to another model camera, be sure
to perform all operations on the QV-700.
• Make sure that both cameras are set up to display images using the
1-Page display.
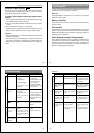
How data transfer affects resolution
• QV-700 QV-100/QV-120/QV-200/QV-300 .........FINE
• QV-700
QV-100/QV-120/QV-200/QV-300 ........NORMAL FINE
QUARTER
NORMAL
• QV-700
QV-10/QV-10A/QV-11/QV-30/QV-70...NORMAL
• QV-700
QV-10/QV-10A/QV-11/QV-30/QV-70...QUARTER NORMAL
Using the Camera with a Connected Device
88
Connecting to a QV Color Printer
DIGITAL
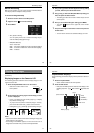
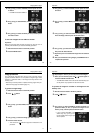
You can connect this camera to a CASIO QV Color Printer and print
out images that are in camera memory. Use the communication cable
that comes with the printer to connect the camera’s DIGITAL terminal
to the printer’s terminal.
Applicable printer models: CASIO QG-100, DP-8000, DP-300
• After connecting to a printer, slide the function switch to the PLAY
position. See the documentation that comes with the printer you are
using for details on its operation.
Important!
Image numbers greater than 200 may not appear correctly on the
monitor screen of the camera when you are selecting images for
printing on a connecting DP-8000 QV Printer. Because of this, you
should always look at the image itself (rather than just the image
number) to confirm that it is the one you want, before actually starting
the printing operation.
Using QV-Link Software and a Connection Cable
The optionally available QV-Link Software and connection cable
lets you transfer images from your digital camera to a personal
computer. The following are the models of QV-Link software that
support this camera.
Windows Version: LK-11
Macintosh Version: LK-21
Important!
This camera does not fully support the software that comes with the
LK-1, LK-1A, LK-10V connection kits for Windows, and the LK-2, LK-
2A, LK-2V connection kits for the Macintosh. Never try to use the
software that comes with these connections kits with this digital
camera.