


Special offers from our partners!

Find Replacement BBQ Parts for 20,308 Models. Repair your BBQ today.
17
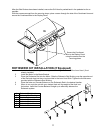
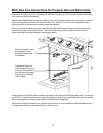
4 Using a 13 mm wrench undo all of the main
burner orifices from the underside of the
Display Panel. Place then aside form any
other orifices included in the Natural Gas
Conversion Kit.
5 Using an approved thread sealant, replace
the Main Burner Orifices with the NEW
Natural Gas orifices supplied.
6 Before reinstalling the Main Burner tubes,
using a # 2 Phillips screwdriver, loosen the
screw at the Air Shutter on the Main Burner.
CLOSE the Air Shutter to a distance of 1/16”
OPEN and retighten the Air Shutter
adjustment screw.
7 Reinstall the Main Burners ensuring that the
Burner is properly placed over the Main
Burner orifice and reinstall the Main Burner screw on the firebox rear wall.
8 Reinstall the Grease Pan, Upper Flavor Shields and Cooking Grids.
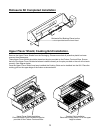
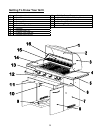
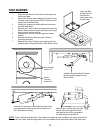
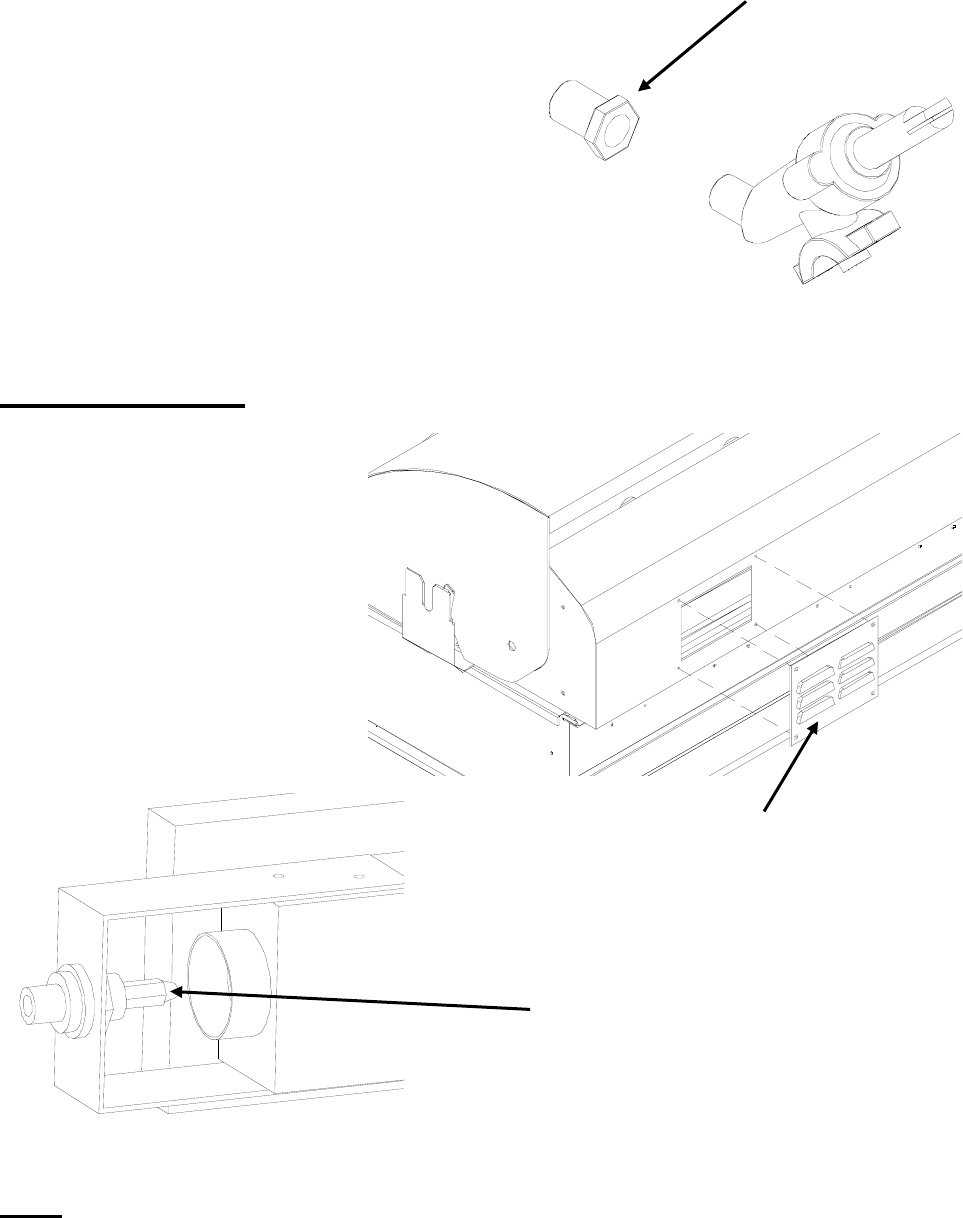
REAR BURNER.
1 Using a # 2 Phillips
screwdriver undo the 4
screws that hold the Back
Cover plate to the Inner
Hood.
2 Once the Cover has been
removed use a 7 mm
wrench to remove the Rear
Burner Orifice from the
Rear Burner.
3 Install the new Rear
Burner orifice using an
approved thread sealant.
4 Reinstall the Rear Burner Cover Plate using the 4 screw previously removed.
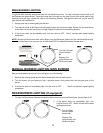
NOTE:
There is NO air adjustment required when converting the rear burner from Propane Gas to Natural
Gas.
Remove Propane Gas Orifice and
reinstall Natural Gas Orifice
Remove the 4 screws that hold the Back
Cover plate using a # 2 Phillips screwdriver
Undo the Rear Burner Orifice using a
7 mm wrench.
Reinstall the new Natural Gas Orifice
using an approved thread sealant.