


Special offers from our partners!

Find Replacement BBQ Parts for 20,308 Models. Repair your BBQ today.
10
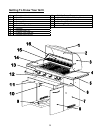
ASSEMBLY:
Please ensure the proper tools are used for ease of installation.
Some assembly will be required if this unit is installed in a pedestal.
Please remove all components from the packaging and inspect all components to ensure there is no damage
to any components in the packaging. If damage is present please contact you local dealer for replacement
components. Please replace all damaged components with original manufacturer’s parts only no substitutions
will be permitted. Please remove all packaging from all components of the gas grill before operating.
TOLLS REQUIRED FOR ASSEMBLY:
# 2 Phillips Screwdriver
8 mm Open Ended Wrench
2- 3/4” Open Ended Wrenches
Adjustable Wrench
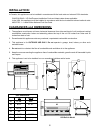
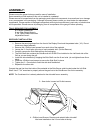
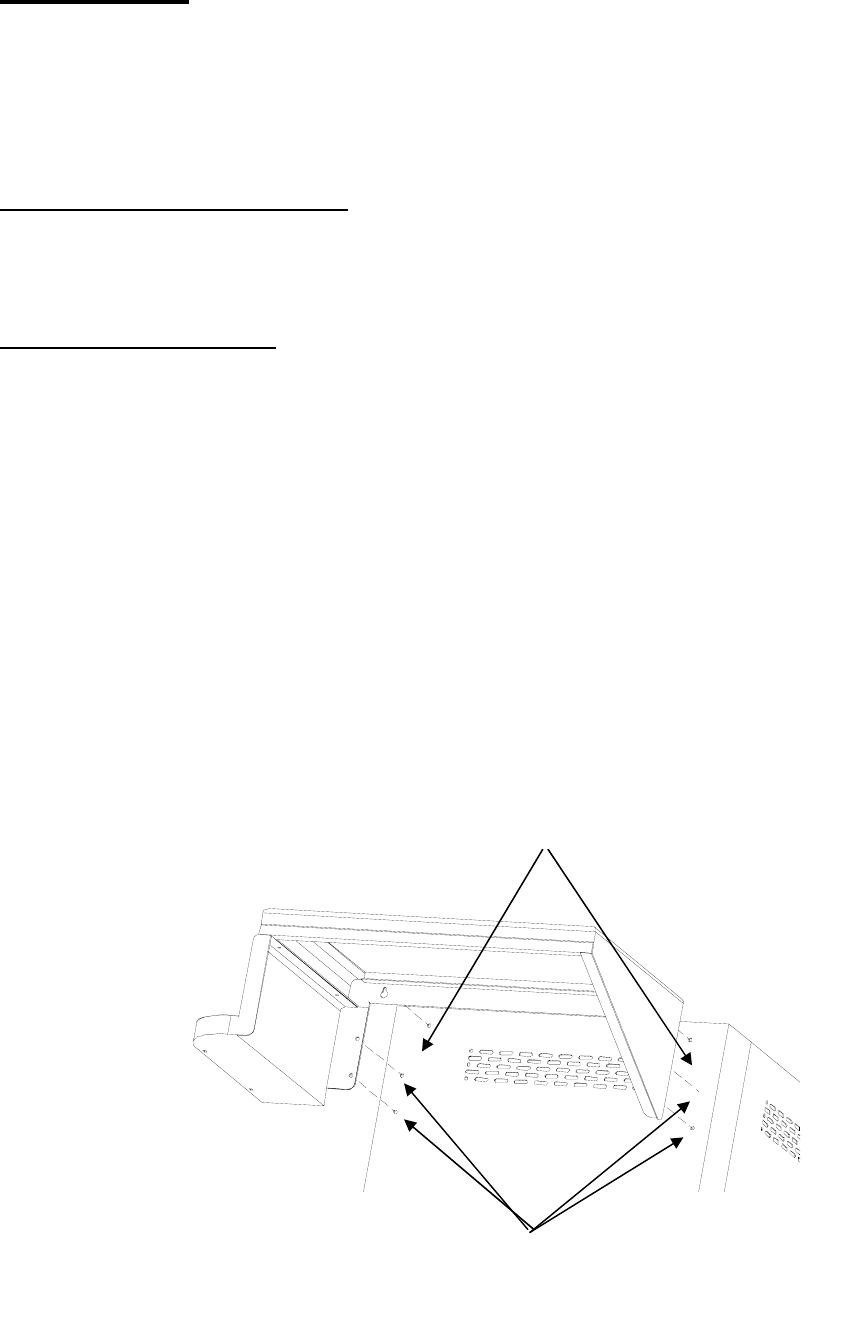
SIDE SHELF INSTALLATION.
¾ Remove the securing straps from the front of the Display Panel and the pedestal side ( X 2). Do not
throw away these fasteners.
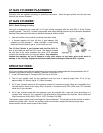
¾ Remove the 4 Phillips head screws from each side of the pedestal.
¾ Loosen the 2- 8 mm bolts at the top of each pedestal side. (Do Not Remove)
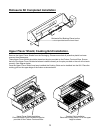
¾ Carefully remove the Side Shelves from the packaging.
¾ The Side Shelf that contains the Side Burner will ALWAYS be installed on the Left hand side of the
Grill as you are facing the grill.
¾ Install the side shelves buy dropping the Side Shelf over the 8 mm bolts. (do not tighten these 8 mm
bolts).
¾ Install the 4 Phillips head screws to secure the Side Shelf in place.
¾ Tighten the 2 – 8 mm bolts to finish the side shelf installation.
¾ Repeat for the other side.
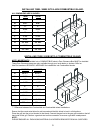
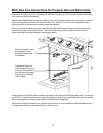
Connect the gas line from the inside of the pedestal to the Side Burner outlet located under the Left Side
Shelf. Use 2 - 3/4” wrenches to properly secure the gas line to the Side Burner Gas Valve assembly.
NOTE: The Condiment bin is already attached to the side shelf as an assembly.
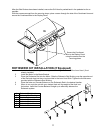
4 – Phillips head Screws. Remove and reinstall after side shelf
has been installed on the 2 8 mm bolts at the top
2
–
8mm bolts. Loosen but Do Not remove