


Special offers from our partners!

Find Replacement BBQ Parts for 20,308 Models. Repair your BBQ today.
Buy Weber Grill Parts. It couldn't be easier. Find your Weber parts here.
WWW.WEBER.COM
®
13
PREPARING TO USE YOUR GRILL
m DANGER
Do not use an open ame to check for
gas leaks. Be sure there are no sparks or
open ames in the area while you check
for leaks. Sparks or open ames will
result in a re or explosion, which can
cause serious bodily injury or death and
damage to property.
m WARNING: The gas connections of
your gas grill have been factory tested.
We do, however, recommend that you
leak check all gas connections before
operating your gas grill.
m WARNING: Perform these leak checks
even if your grill was dealer or store
assembled.
m WARNING: You should check for gas
leaks every time you disconnect and
reconnect a gas tting.
NOTE: All factory-made connections have been
thoroughly checked for gas leaks and the burners have
been ame-tested. As a safety precaution, however,
you should check all ttings for leaks before using your
Weber® gas grill. Shipping and handling may loosen or
damage a gas tting.
4
2
3
1
6
5
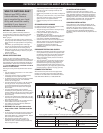
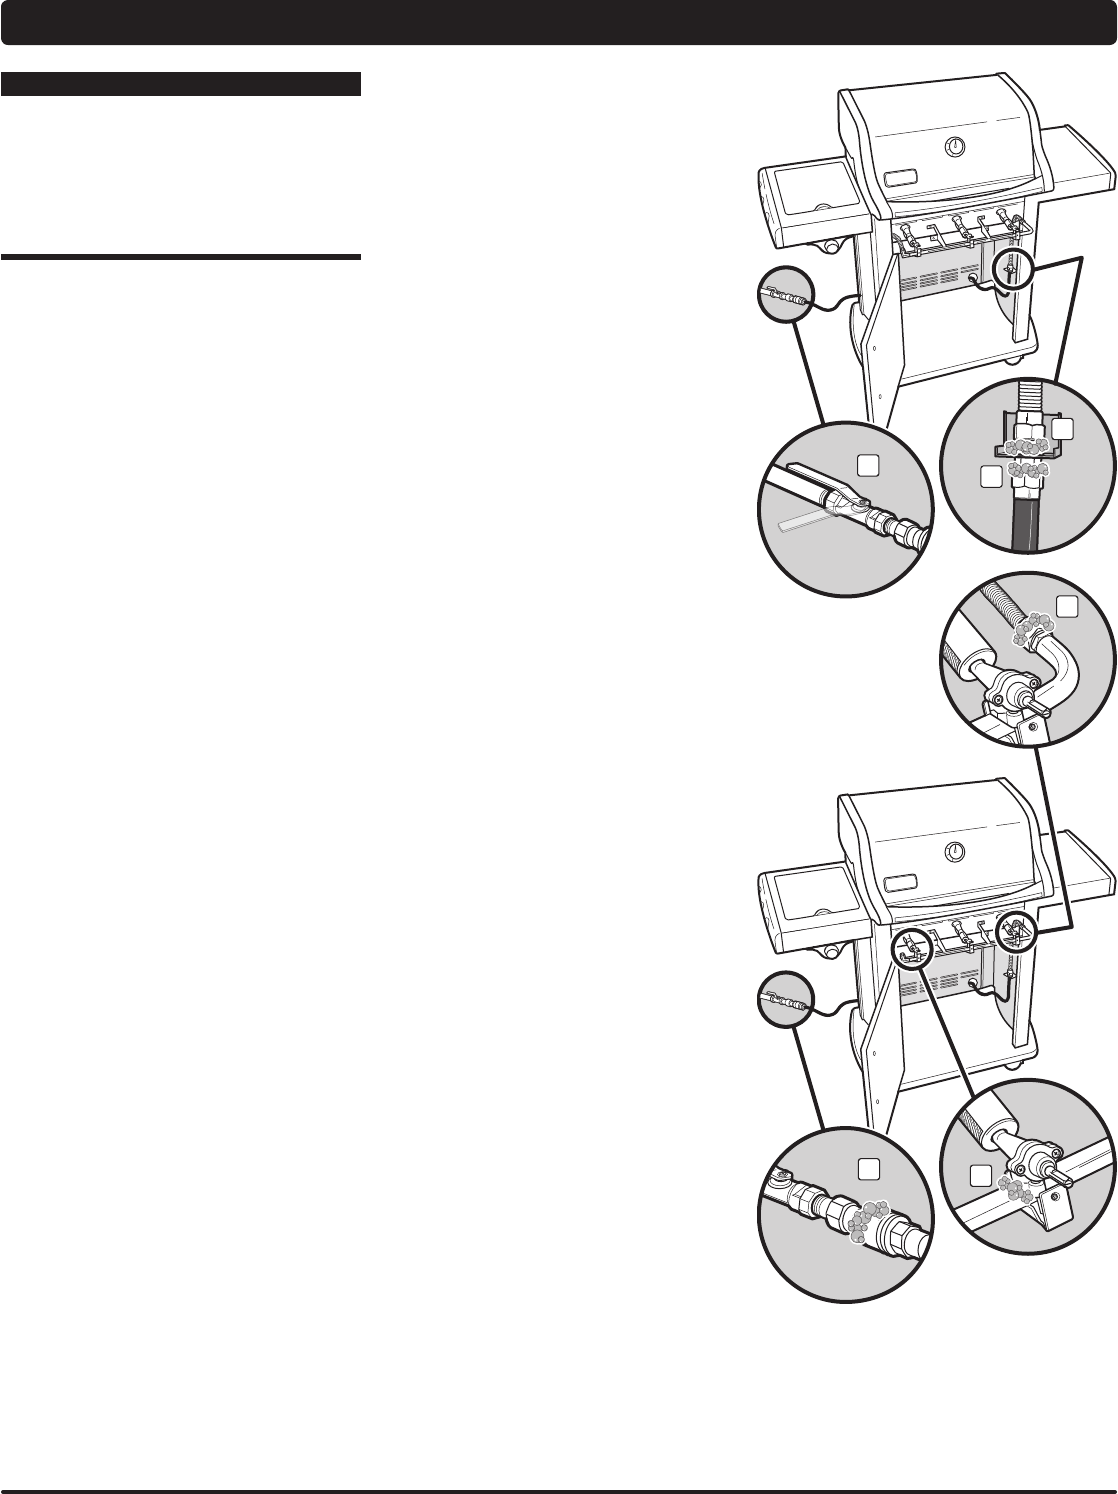
CHECKING FOR GAS LEAKS
You will need: A spray bottle or brush or rag and a soap
and water solution. (You can make your own soap and
water solution by mixing 20% liquid soap with 80% water;
or, you can purchase leak check solution in the plumbing
section of any hardware store.)
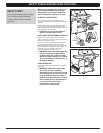
A) Turn gas supply on at source (1).
m WARNING: Do not ignite burners when
leak checking.
B) To check for leaks, wet ttings with the soap and water
solution, using a spray bottle, brush or rag. If bubbles
form, or if a bubble grows, there is a leak. Apply the
soap and water solution to the following connections:
a) Flexible hose-to-bulkhead connection (2).
b) Corrugated manifold hose-to-bulkhead
connection(3).
c) Corrugated manifold hose-to-manifold
connection(4).
m WARNING: If there is a leak at
connections (2, 3 or 4), turn off the
gas, tighten the tting with a wrench,
and recheck for leaks with soap and
water solution. If a leak persists
after tightening the tting, turn off
the gas. DO NOT OPERATE THE
GRILL. Contact the Customer Service
Representative in your area using the
contact information on our web site.
Log onto www.weber.com
®
.
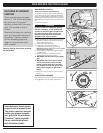
d) Flexible hose-to-quick-disconnect connection (5).
e) Valves-to-manifold connections (6).
m WARNING: If there is a leak at
connections (5 or 6), turn off the
gas. DO NOT OPERATE THE GRILL.
Contact the Customer Service
Representative in your area using the
contact information on our web site.
Log onto www.weber.com
®
.
C) When leak checking is complete, turn gas supply off at
the source and rinse connections with water.
NOTE: Since some leak test solutions, including soap and
water, may be slightly corrosive, all connections should be
rinsed with water after checking for leaks.
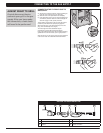
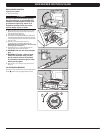
Reinstall Control Panel
You will need: A Phillips screwdriver.
A) Align valve stems with holes in control panel. Position
top edge of control panel on tabs of frame assembly.
Push control panel down into position.
B) Fasten control panel with screws.
C) Place control knobs onto valve stems.
D) Connect the wires to the igniter button.
m WARNING: Make sure that all parts
are assembled and hardware is fully
tightened before operating the grill.
Your actions, if you fail to follow this
product warning, may cause a re,
an explosion, or structural failure
resulting in serious personal injury or
death as well as damage to property.
Now that the grill has been leak checked and gas supply
has been installed and checked for leaks in accordance
with the instructions, you are ready to grill.