


Special offers from our partners!

Find Replacement BBQ Parts for 20,308 Models. Repair your BBQ today.

INSTALLATION/OPERATION MANUAL GARLAND ELECTRIC CLAMSHELL GRILL WITH PRODUCT RECOGNITION MODEL MWE3W
PART #4521777 (03/19/08)Page 20
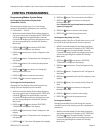
CONTROL PROGRAMMING (continued)
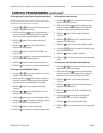
2. PRESS the AND arrow buttons TOGETHER.
“CONFIGURE” will appear in the display.
3. PRESS the arrow button. “Setup” will appear in the
display
4. PRESS the button. “Temperature Unit” will appear in
the display.
5. PRESS the repeatedly until “Audible” appears in the
display.
6. PRESS the button. The currently set Audible will
flash.
7. PRESS the OR arrow buttons to change the
flashing audible options.
For a complete listing of setup functions and their
options, see page 25.
8. PRESS the button to save the current setting.
9. PRESS THE 2X to exit the program mode.
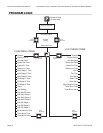
Programming Modes; Menu Items
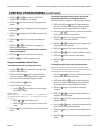
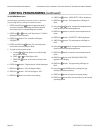
To change the name of an existing menu item
1. Using the or button, select the menu item that
requires a name change.
2. PRESS and HOLD the button for approximately 3
seconds. Controller will display previously selected
menu item and its corresponding item number.
3. PRESS and HOLD the button.
4. To spell out the product name:
a. Use the or arrow buttons to scroll through
the character library.
Character Library:
space ! “ # $ % & ‘ ( ) * + , - . / 0 1 2 3 4 5 6 7 8 9 : ; < = > ? @ A B C D E F G H
I J K L M N O P Q R S T U V W X Y Z [ \ ] ^ _ ` a b c d e f g h i j k l m n o p q r
s t u v w x y z
b. PRESS or to scroll right or left.
c. PRESS the button to save the new menu item
name.
5. PRESS the 2X to exit and return to normal operating
mode.
To activate / deactivate a menu item in the Normal
Operating mode library, or change its day-part
(Defaults are listed on page 15 under ‘Menu Item Library.’)
1. PRESS and HOLD the button for approximately 3
seconds. Controller will display previously selected
menu item and its corresponding item number.
2. Using the or arrow buttons, select the menu item
that requires activation / deactivation.
3. PRESS the button. The controller will display
“Product”. The menu item will flash.
4. PRESS the or arrow buttons until “Display Active”
is displayed on the controller.
5. PRESS the button. The current setting will flash.
6. PRESS the or button to select a different setting.
7. PRESS the button to save the new setting.
8. PRESS the 2X to exit and return to normal operating
mode.
To change the grill surface set point temperature
NOTE: Grill temperature set points are preset in the controller to the
currently required standard. You should not change this set point to any
temperature other than what is shown on page 24.
1. Using the or arrow buttons, select the menu item
that requires a temperature change.
2. PRESS and HOLD the button for approximately 3
seconds. Controller will display previously selected
menu item and its corresponding item number.
3. PRESS the button. The controller will display
“Product”.
4. PRESS the or arrow buttons until “Grill SetPt” is
displayed on the controller.
5. PRESS the button. The current grill set temperature
will begin to flash.
6. Using the or button, change the temperature set
point to the new desired temperature.
7. PRESS the button to save the new temperature set
point.
8. PRESS the 2X to exit and return to normal operating
mode.