Special offers from our partners!

Find Replacement BBQ Parts for 20,308 Models. Repair your BBQ today.

8
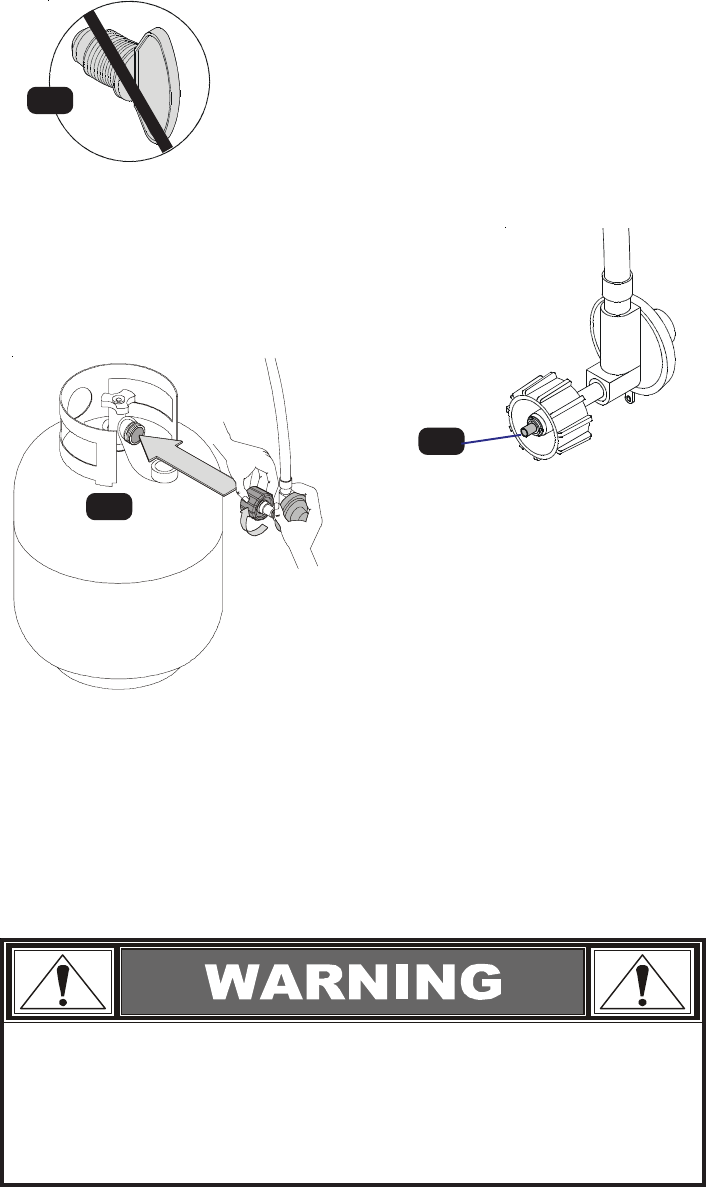
5. Hold regulator, insert nipple (B) into LP tank valve. Hand tighten
coupling nut, holding regulator in a straight line (C) with
LP tank valve so as not to cross thread the connection.
Do not use a POL transport plug (A) (plastic part with
external threads)! It will defeat the safety feature of
the valve.
6. Turn the coupling nut clockwise to tighten to a full solid stop. The regulator will seal on the
back-check feature in LP tank valve, resulting in some resistance. An additional one-
half to three quarters turn is required to complete connection. Tighten by hand
only - do not use tools.
NOTE: If you cannot complete connection, disconnect regulator and repeat steps 5 and 6. If
you are still unable to complete the connection, do not use this regulator!
Hold coupling nut and regulator as shown
for proper connection to LP tank valve.
• Do not insert any foreign objects into the valve outlet. You may damage the
valve and cause a leak. Leaking propane may result in explosion, fire, severe
personal injury, or death.
• Never attempt to attach this grill to the self-contained LP gas system of
a camper trailer or motor home.
CC
CC
C
Straight
AA
AA
A
Nipple has to be centered
into the LP tank valve
BB
BB
B


