Special offers from our partners!

Find Replacement BBQ Parts for 20,308 Models. Repair your BBQ today.

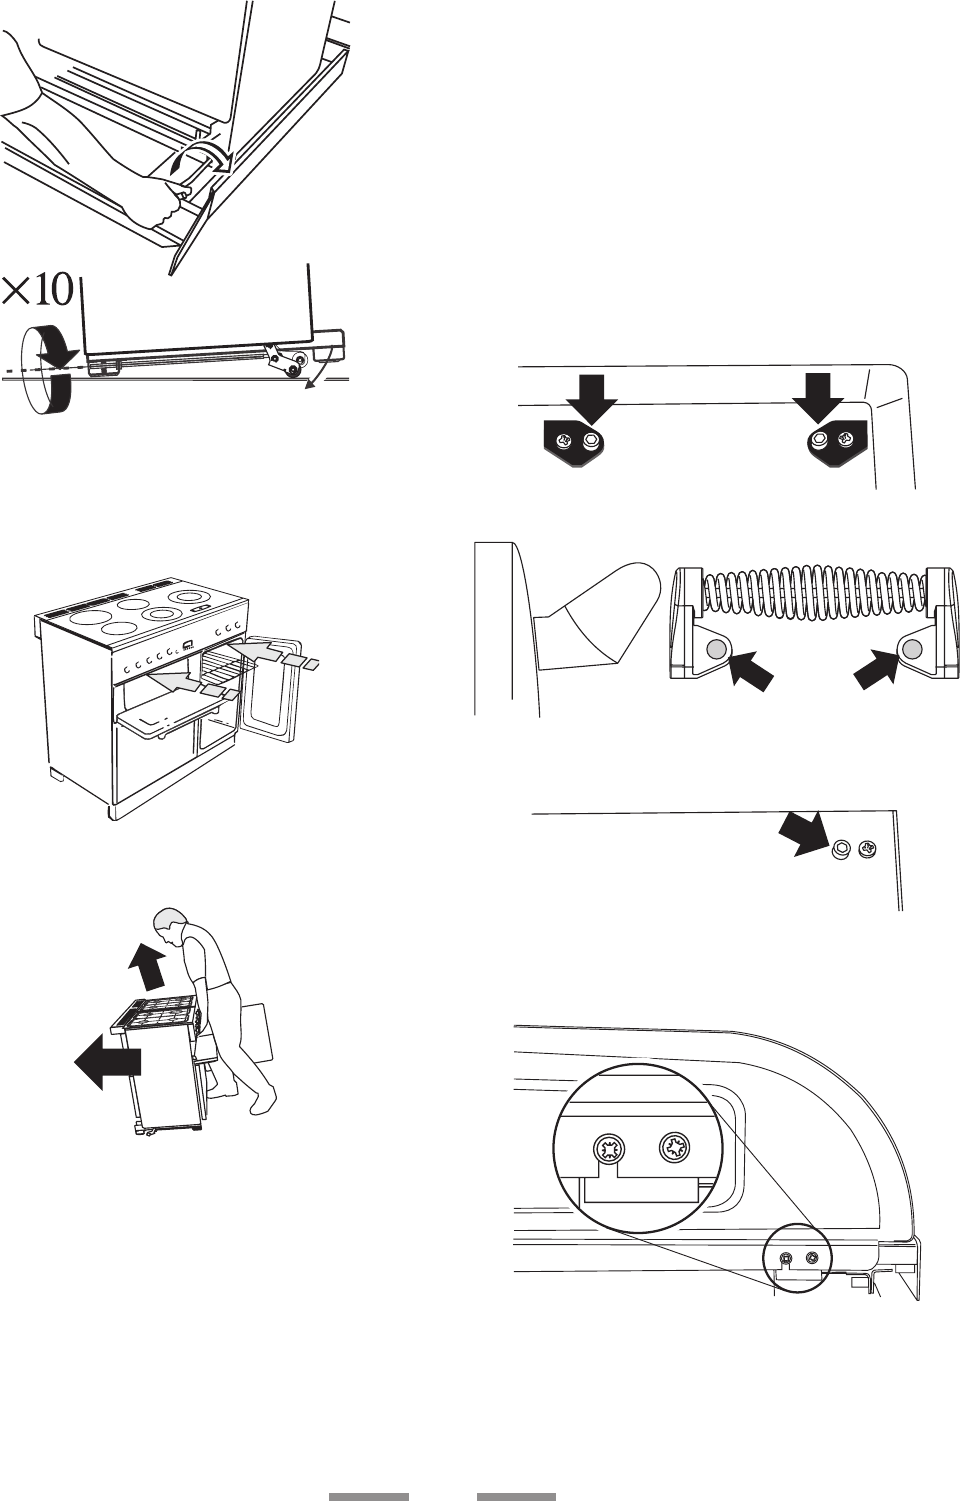
Make sure you lower BOTH REAR ROLLERS. There are two
adjusting nuts, one for each roller, at both the front bottom
corners of the cooker.
Unfold the rear edge of pack base tray. Open the grill door
and the Tall oven door. Grip under the facia panel and lift
the front of the cooker.
Carefully push the cooker backwards off the pack base.
Remove the pack base tray. Position the cooker close to its
final position leaving just enough space to get behind it.
Do not use the door handles or control knobs to manoeuvre
the cooker. Use the hotplate and griddle bowl areas.
You are recommended to use a spirit level on a shelf in one
of the ovens to check for level.
Place the cooker in its intended position taking care not to
twist it within the gap between the kitchen units as damage
may occur to the cooker or the units.
The front feet and rear rollers can be adjusted to level the
cooker. To adjust the height of the rear of the cooker use
the levelling tool supplied to turn the adjusting nuts at the
front bottom corners of the cooker. To set the front feet turn
the bases to raise or lower.
Remove the 4mm Allen screws from the doors with the
hexagon key tool. Use the screws to fit the door handles.
Fit the plastic blanking plugs to the fixing holes.
Remove the 4mm Allen screws from the top corners of the
fascia and fix the front handrail in position.
The cooker can be installed with or without the supplied
splashback. To fit the splash follow the instructions below.
view from the rear of the cooker
The splash back is fitted using 4 screws in the rear edge
of the flue grille, two at each end. Remove the outer two
screws and loosen the inner pair. Fit the splash over the
inner screws and then refit the outer two screws. (see
figure).


