Special offers from our partners!

Find Replacement BBQ Parts for 20,308 Models. Repair your BBQ today.

26
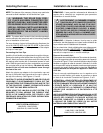
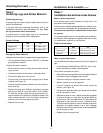
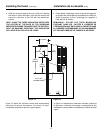
Positioning the Logs
If the gas logs have been factory installed they should not
need to be positioned.
If the logs have been packaged separately, refer to the
installation instructions that accompany the logs. Save
the log instructions with this manual.
If sooting occurs, the logs might need to be repositioned
slightly to avoid excessive flame impingement.
Installing the Insert (continued)
Step 7
Installing Logs and Ember Material
Installation de la cassette (suite)
Étape 7
Installation des bûches et des braises
Mise en place des bûches
Si les bûches à gaz ont été placées en usine, elles n’ont
pas besoin d’être replacées.
Si les bûches ont été emballées séparément, reportez-vous
aux instructions d’installation qui accompagnent les bûches.
Conservez les instructions relatives aux bûches avec
ce manuel.
En cas de formation de suie, il est possible que les bûches
aient besoin d’être légèrement repositionnées afin d’éviter
un empiètement excessif sur les flammes.
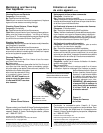
Placing the Ember Material
One bag of ember material is shipped with this gas appliance:
• The bag labeled Glowing Ember (050-721) is standard
glowing ember material.
To place the ember material:
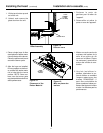
• Remove the trim door by pulling out the bottom and lift-
ing to unhook.
• Unlatch the latches at the bottom of the glass door.
• Remove the glass door from the unit.
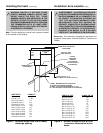
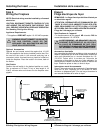
• Cover the top of the burner with a single layer of ember
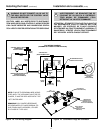
material (see Figure 12).
• Save the remaining ember materials for use during fire-
place servicing.
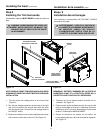
• Replace the glass door. Slide the top tabs on the glass
door into the slots on top of the firebox. On the Grand-
XT slide the top tabs under the top spring latches. Ro-
tate the bottom of the glass door toward the firebox with
slight upward pressure. Latch the bottom spring latch
securely onto the bottom glass door tabs.
• Replace the trim door.
Mise en place des braises
Un sac différents de braises sont livrés avec cet appareil à
gaz :
• Le sac étiqueté Glowing Ember (050-721) est une imi-
tation standard de braises incandescentes.
Pour mettre les braises en place :
• Démontez la porte de garniture en tirant sa partie inférieure
et soulevez-la pour la dégager des crochets.
• Ouvrez les verrous en bas de la porte en verre.
• Retirez la porte en verre de l’appareil.
• Couvrez le dessus du brûleur d’une seule couche de
braises, (voir Figure 12).
• Conservez le reste des braises afin de pouvoir les utiliser
lors de l’entretien du foyer.
• Replacez la porte en verre. Insérez ensuite les languettes
du haut de la porte en verre dans les fentes situées en
haut du foyer. Pour le modèle Grand-XT, faites glisser les
languettes du haut sous les verrous à ressort du haut.
Tournez le bas de la porte en verre en direction du foyer en
appliquant une légère pression vers le haut. Engagez
fermement le verrou à ressort du bas sur les languettes du
bas de la porte en verre.
• Replacez la porte de garniture.
___________________________________________
___________________________________________
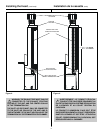
Shutter Settings
NG LP
Supreme-XT 3/8” Full Open (3/4”)
Grand-XT 1/2” Full Open (3/4”)
___________________________________________
___________________________________________
Fixations d’obturateur
GN PL
Supreme-XT 9.5 mm Plein ouvert (19 mm)
Grand-XT 12.7 mm Plein ouvert (19 mm)


