


Special offers from our partners!

Find Replacement BBQ Parts for 20,308 Models. Repair your BBQ today.
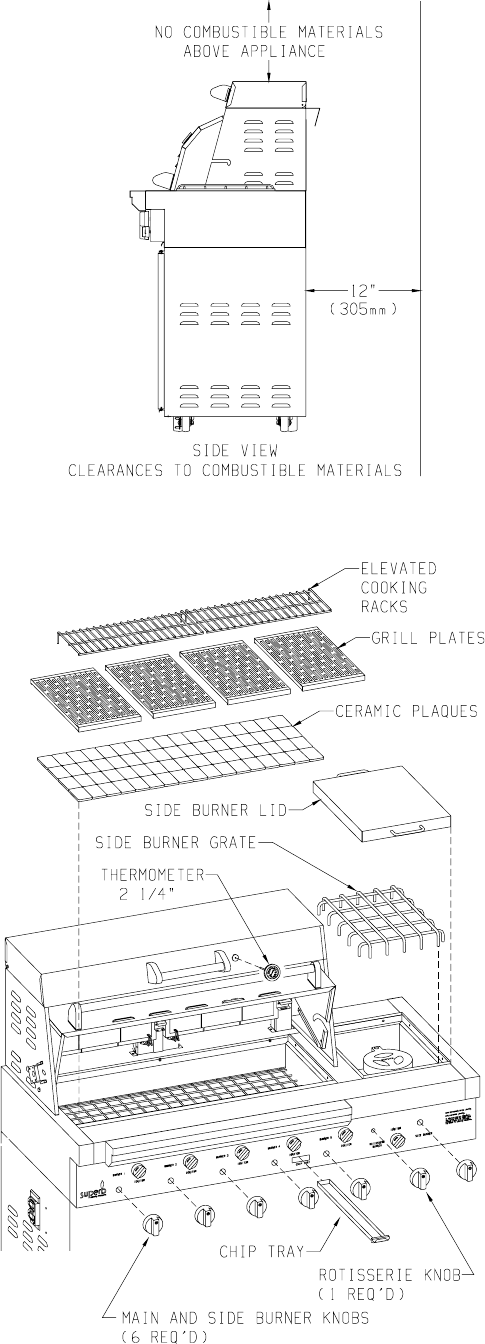
R-3848 Page 5
Figure 3
Figure 4
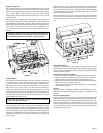
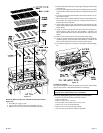
The cardboard box within your grill contains the following parts:
(Figure 4)
1 box of ceramic plaques (70)
4 grill plates
1 grill plate handle (see page 14, part number 19)
2 elevated cooking racks
1 side burner grate
1 side burner lid
6 burner knobs
1 rotisserie knob
1 chip tray
1 - 5" thermometer for front lid
1 - 2 1/4" thermometer for steamer lid
1 inlet adaptor (LP gas grill only)
1 hose assembly with LP regulator (LP gas grill only)
1 Natural gas regulator (Natural gas grill only)
1 rotisserie rod
1 rotisserie handle
1 counter balance
4 meat forks
1 rotisserie motor
2 rotisserie drip pans
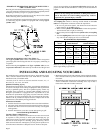
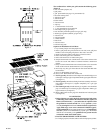
Sequence of Installation of Grill Parts
1. Lay ceramic plaques onto the plaque rack.
2. Place 4 grill plates into grill (flat side or sear side). Your grill plate
handle is used to flip the grill plates to flat side or sear side.
3. Install 2 elevated cooking racks above rotisserie burners.
4. Place side burner grate over side burner.
5. Place side burner lid over side burner grate.
6. Snap 6 burner knobs onto 5 main burner valve stems and onto side
burner valve stem. The inside of a burner knob has a mushroom
pattern.
7. Snap 1 rotisserie burner knob onto rotisserie burner valve stem. The
inside of the rotisserie burner knob has a 3/4 round pattern.
8. Insert chip tray into grill front between the fourth and fifth main
burner knobs.
9. Insert 5" thermometer into grill lid.
10. Insert 2 1/4" thermometer into steamer lid.
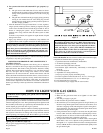
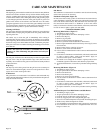
11. For LP gas only, thread brass inlet adaptor onto manifold pipe. Use
teflon tape or a LP gas pipe compound to make a gas tight connection
(see Figure 1).
12. For LP gas only, thread brass fitting from hose assembly onto brass
inlet adaptor (see Figure 1). Tighten completely for a gas tight
connection.
13. For Natural gas only, thread Natural gas regulator onto manifold
pipe. Use teflon tape or a Natural gas pipe compound to make a gas
tight connection (see Figure 1).
14. Refer to Rotisserie section, page 9 for installation of rotisserie parts
(see Figure 8).
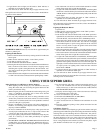
LEAK TESTING
1. Before lighting your grill, check all connections for leaks using
a mild soapy water solution. DO NOT use matches, lighters or
flame to check for leaks, — you could cause an explosion. With
the grill burner controls turned OFF, slowly open the cylinder
valve by turning the handwheel counterclockwise (right to left).
Apply mild soapy water to the connection. If bubbles appear,
a leak is indicated. Do not put the product in service! Immediately
close the cylinder valve handwheel for propane gas or the manual
shutoff valve for natural gas. A qualified service person must be
contacted to make the needed repairs.
2. DO NOT SMOKE WHILE LEAK TESTING!
3. For LP gas (propane) models, leak test with a full propane cylinder.