


Special offers from our partners!

Find Replacement BBQ Parts for 20,308 Models. Repair your BBQ today.
Buy Weber Grill Parts. It couldn't be easier. Find your Weber parts here.
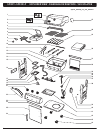
12 WWW.WEBER.COM
®
LP CYLINDER INSTALLATION AND REMOVAL
FUELING YOUR GRILL
Before using your grill for the
first time, you need to obtain
an LP cylinder. New cylinders
can be purchased full; empty
cylinders can be refilled or
exchanged. You may choose to
purchase a spare LP cylinder
so that you don't run out of fuel
in the middle of cooking a meal.
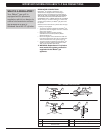
1
2
4
5
3
3
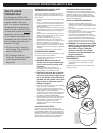
m WARNING: Never store an extra
(spare) LP cylinder under or near the
Weber
®
gas grill.
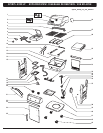
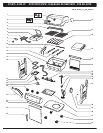
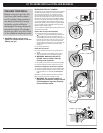
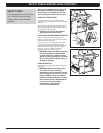
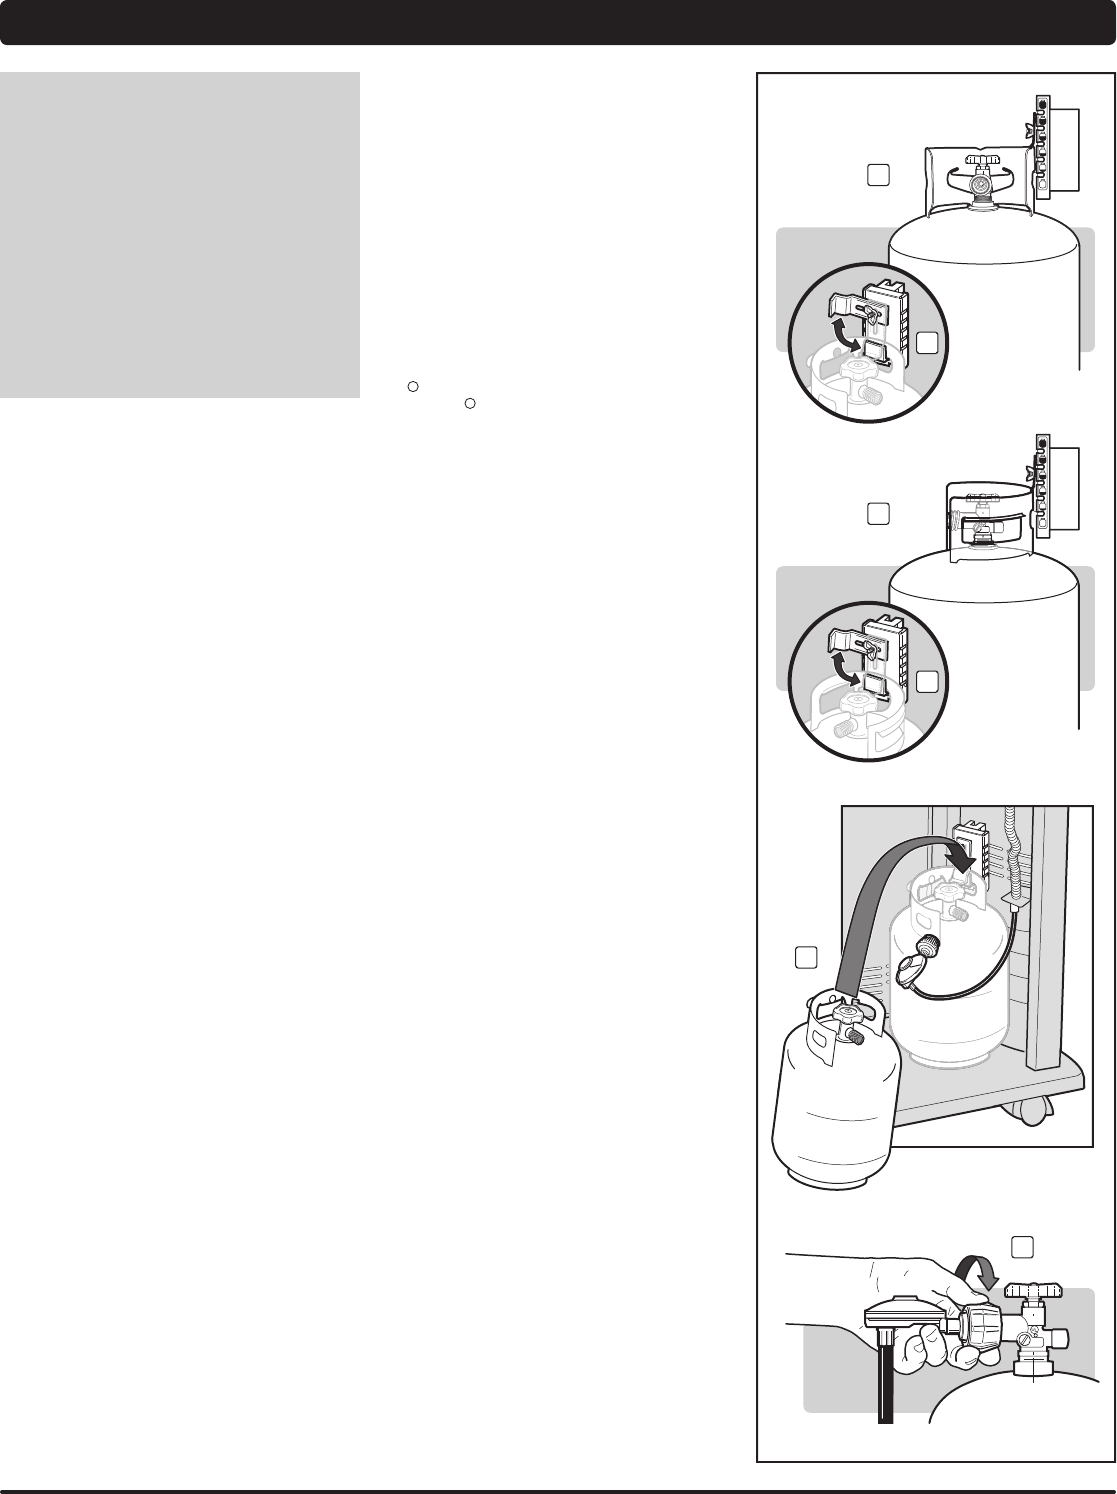
INSTALLING THE LP CYLINDER
LP cylinders can vary based on the shape of the top collar
assembly (the metal protective ring around the cylinder
valve). Its shape determines how a cylinder will hang
on the cylinder scale. One type of cylinder mounts with
the valve facing forward (1). The other type mounts with
the valve facing away from the fuel scale (2). To properly
install your LP cylinder, rst identify what type of cylinder
you purchased. Weber recommends LP cylinders with a
47.6lb water capacity. Other cylinders may be acceptable
for use provided they are compatible with the appliance
retention means (cylinder scale).
The LP cylinder is installed inside the base cabinet, on the
cylinder scale (right side).
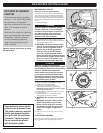
Prepare Grill for Cylinder Installation
A) Check that all burner control knobs are in the off
( ) position. Your grill was shipped with control knobs
in the off ( ) position, but you should check to be
sure that they are turned off. Check by pushing in and
turning knobs clockwise. If they do not turn, they are
off. If they do turn, continue turning them clockwise
until they stop; then they are off. If your grill has a side
burner, make sure the side burner control knob is
turned off.
B) Open base cabinet door.
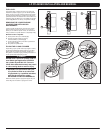
Install the LP Cylinder
A) Loosen cylinder lock wing nut. Swing cylinder lock
up(3).
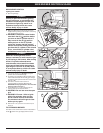
B) Turn the LP cylinder so the opening of the valve is
either to the front or side of the Weber
®
gas grill.
m WARNING: Make sure that the LP
cylinder valve is closed. Close by
turning valve clockwise.
C) Lift cylinder up into position on the cylinder scale (4).
D) Swing the cylinder lock down. Tighten the wing nut.
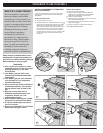
Connect the Regulator / Hose to the Cylinder
A) Remove the plastic dust cover from the cylinder valve.
B) Screw the regulator coupling onto the cylinder valve,
turning clockwise, or to the right (5). Hand-tighten
only.
NOTE: This connection tightens clockwise and will not
allow gas to ow unless the connection is tight.
m WARNING: Do not use a wrench to
tighten the connection. Using a wrench
could damage the regulator coupling
and could cause a leak.