


Special offers from our partners!

Find Replacement BBQ Parts for 20,308 Models. Repair your BBQ today.

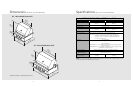
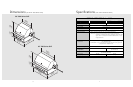
31
1/2
"
(
1
.3 cm)
3/8"
(.
95
cm)
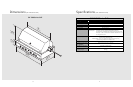
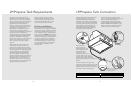
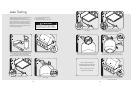
CORRECT
YELLOW
BLUE LIFTING
5
1
Off
6
2
3
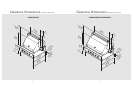
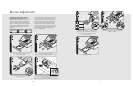
If the flame is yellow, turn the air shutter counter
clockwise to allow more air to the burner. If the
flame is noisy and lifting away from the burner, turn
the air shutter clockwise to reduce the amount
of air to the burner.
Once adjusted, turn the burner off, tighten the set
screw on the air shutter. For grill burners, replace the
valve panel and knobs.
7
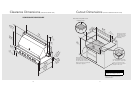
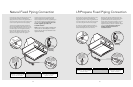
Replace the drip tray
30
1
2
To access the air shutter on the grill burners,
remove the drip tray.
Remove the knobs and valve panel.
Note: Leave wires connected to switches on valve panel.
3
2
1
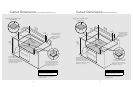
H
I/
L
ITE
4
With a screw driver, loosen the lock-screw on the
face of the air shutter.
Push and turn the the valve to light the burner and adjust
according to the directions following. Must push ignition
button on 100 Series.
Note: By replacing the knob, it may be easier to light the burner.
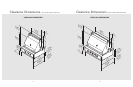
A qualified installer should perform the
following burner adjustments. Each burner is
tested and adjusted at the factory prior to
shipment; however, variations in the local gas
supply may make it necessary to adjust the
burners. The flames of the burners (except the
rotisserie infrared burner) should be visually
checked and compared with the following
illustrations.
Flames should be blue and stable with no yellow
tips, excessive noise or lifting. If any of these
conditions exist, check if the air shutter or burner
ports are blocked by dirt, debris, spider webs,
etc. With a proper flame height, adjust the air
shutter to obtain a blue flame with no yellow
tipping that sits on the burner at the burner ports.
The air shutter is locked in place by a set screw
which must be loosened prior to lighting the
burner for adjustments.
Burner Adjustment
CORRECT
YELLOW
BLUE LIFTING