


Special offers from our partners!

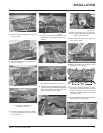
Find Replacement BBQ Parts for 20,308 Models. Repair your BBQ today.
11
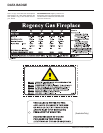
Regency I31-3 Gas Fireplace Inbuilt
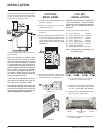
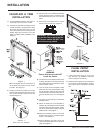
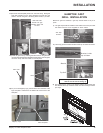
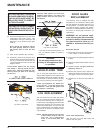
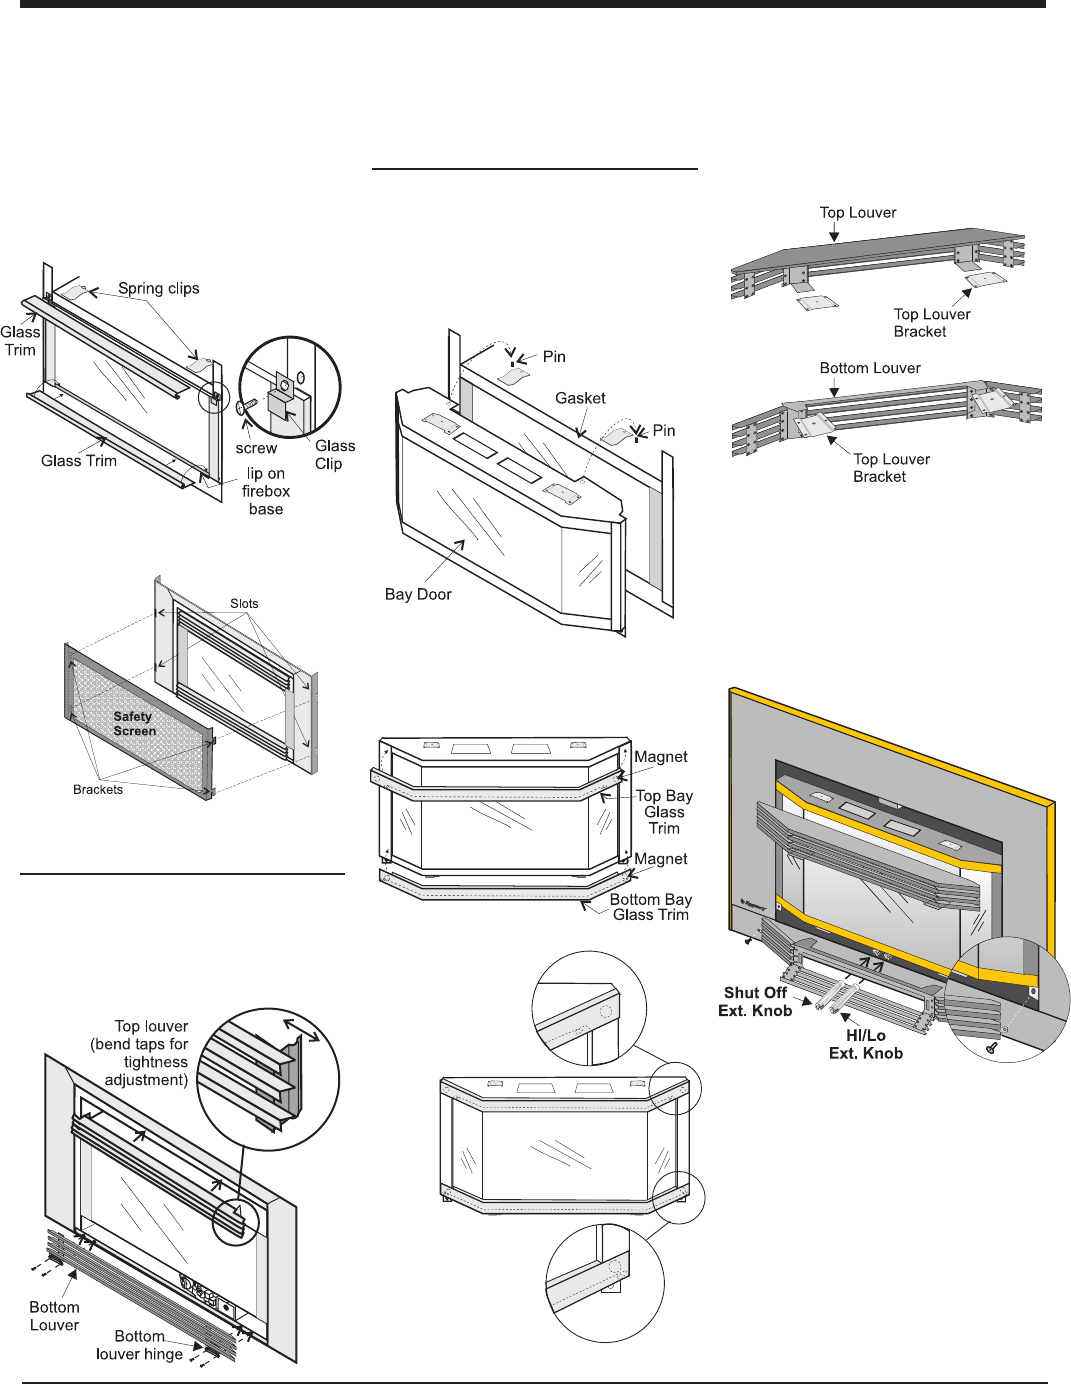
BAY FRONT
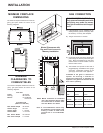
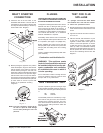
INSTALLATION
1) Place the bay door onto the 2 pins on the top
of the unit.
2) Install bottom louvre by sliding the two
bracket clips into the brackets located un-
derneath the bay door and secure with 2
screws into the bracket on the bottom of the
Bay Front as per diagram above.
3) Slide the valve extension knobs onto the
valve knobs. match the correct ext. knob
with the valve knob.
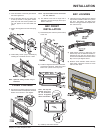
BAY LOUVRES
1) Install top louvre by sliding the two bracket
clips into the brackets located on top of the
bay door. See below. The fitted louvre
leaves a small gap between faceplate bot-
tom and louvre top.
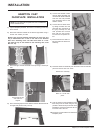
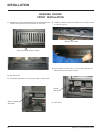
INSTALLATION
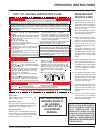
FLUSH LOUVRES
1) The top louvre is held in place by friction fit,
if the louvre needs to be adjusted; bend the
bracket out as shown in the diagram.
3) Place the bottom of the flush glass behind
the bottom glass trim.
4) Secure the glass with the two glass clips
at the top corners of the glass. Secure
glass clips with the screws provided. Do
not over tighten as this could break the
glass.
5) Slide in the top glass trim under the spring
clips.
2) Position 2 magnets on the back of each trim
piece close to the ends. Place the top and
bottom trim pieces on the bay front.
3) Install top and bottom louvres.
Note: The top and
bottom trim piec-
es are different,
check diagrams
above and below.
6) Install safety screen (only in Australia) by
inserting the 4 brackets into the 4 slots.
Note: Optional safety screen only in
Australia.
Note: Top and bottom louvres and brack-
ets are different.
2) The bottom louvre has a hinge that is
attached (2 screws per hinge) to the lip on
bottom of the unit.