Special offers from our partners!

Find Replacement BBQ Parts for 20,308 Models. Repair your BBQ today.
8
Grill Positions
The Wheel-It and Grill-It
™
Portable Propane Grill
is compact enough to transport to any grilling
location. Wheel-It from the storage shed to the
patio, to a picnic in the park, or off on a camp-
ing trip. The Portable Propane Grill easily trans-
forms from storage to transport and to high or
low Grill-It positions.
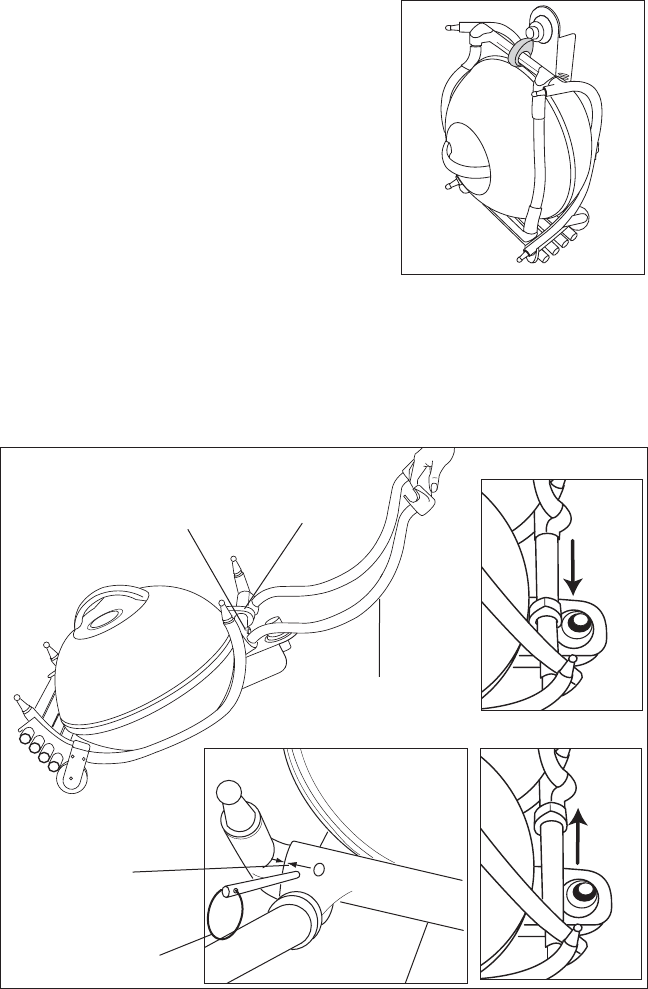
Storage Position: This position makes the Grill
compact enough for space saving storage. The
Legs are stored in the Leg Storage Rack and
the Transport Handle folds over the top of the
Lid and snaps into place to secure all parts.
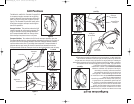
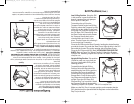
Transport Position: To transform the Grill to the transport position, raise the
Transport Handle from the closed position and swing it over the Lid. Pull one of
the Lock Pins from its storage location. Slide the Transport Handle sideways
until the white marker line is just visible then rotate the Transport Handle to
align the two arrows. Insert the Lock Pin into the front location to lock the
Transport Handle. Slide the Transport Lock into the locked position and roll away
.
Unlocked
Locked
Transport
Lock
Transport Handle
Lock Pin
Figure 4
Figure 5
Lock Pin
Alignment
Arrow
8
Configurations du gril
Grâce à son format très compact, vous pouvez trans-
porter ce gril portable au propane où vous le désirez.
Faites-le rouler de votre remise de jardin jusqu’à
votre terrasse ou jusqu’au parc de votre quartier.
Vous pouvez également l’emporter en camping. Le
gril peut passer rapidement d’une configuration à
une autre, de la position de rangement à la position
d’utilisation basse ou sur pieds.
Position de rangement : Dans cette configuration, le
gril occupe un minimum de place. Les pieds sont
accrochés sur leur support de rangement et la
poignée de transport, repliée sur le dessus du
couvercle, s’enclenche pour maintenir l’ensemble.
Position de transport : Pour passer à cette position,
relevez la poignée de transport pour dégager le
couvercle du gril. Retirez l’une des goupilles de blocage de son logement de
rangement. Dépliez la poignée de transport jusqu’à ce que les flèches d’alignement
soit visibles, puis faites pivoter la poignée pour faire coïncider ces deux flèches.
Introduisez la goupille de blocage dans l’axe de la poignée de transport pour
verrouiller celle-ci. Poussez le verrou de transport en position de verrouillage.
Le gril est prêt pour le transport.
D verrouill
Verrouill
Verrou de
transport
Poignée de
transport
Goupille de
blocage
Figure 4
Figure 5
Goupille de
blocage
Flèches
d'alignement
GP100SILCAN_IB_1-8-02 8/1/02 5:12 PM Page 15


