


Special offers from our partners!

Find Replacement BBQ Parts for 20,308 Models. Repair your BBQ today.
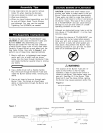
CAUTION:Whileit ispossibleforonepersonto
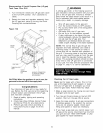
Figure 1
CART LEG
assemble this grill, obtain assistance from another person
when handling some of the larger, heavier pieces, espe-
cially the grill head.
1. Open Lid of shipping carton and remove top sheet of
cardboard. Lay cardboard sheet on floor and use as a
work surface to protect floor and grill parts from
scratches.
2. Remove packing materials and cart parts from
shipping carton.
3. You may slice the carton front corners with a utility
knife to lay open the carton front panel. This wilt
allow you to raise the grill head Lid and remove the
components packed inside the head, making it
easier to lift.
4. With an assistant, lift the grill head out of the ship-
ping carton and place it on the cardboard work sur-
face.
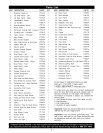
5. Use the parts list to check that all parts have been
included.
6. Inspect the grill for damage as you assemble it. Do
not assemble or operate the grill if it appears
damaged. If there are damaged or missing parts
when you unpack the shipping box, or you have
questions during the assembly process, call:
1-888-317-7642
8 a.m. - 8 p.m CST, Mon.- Fri.
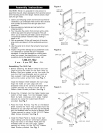
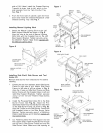
Assembling The Grill Cart
1. Before attaching the Bottom Shelf to the Cart
Legs be sure the holes for the Door Stop on
Bottom Shelf are located on the front side. Be
sure the Cart Leg Brackets and air vents all
face outward. Cart Leg Bracket-Right has a
semi-circle cutout at top front. See Fig. 1.
Install the Bottom Shelf between the Cart Legs.
Align the holes on Cart Legs with the
threaded holes at the corners of Bottom Shelf.
Tighten securely by using 8 of the 1/4"x2"
Pattern Head Screws provided. See Fig. 1.
BOTTOM
SHELF
HOLES FOR
DOORSTOP
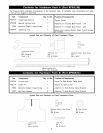
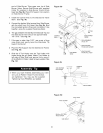
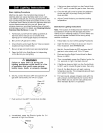
Figure 2
CART LEG -LEFT
BOTTOM
SHELF
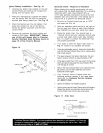
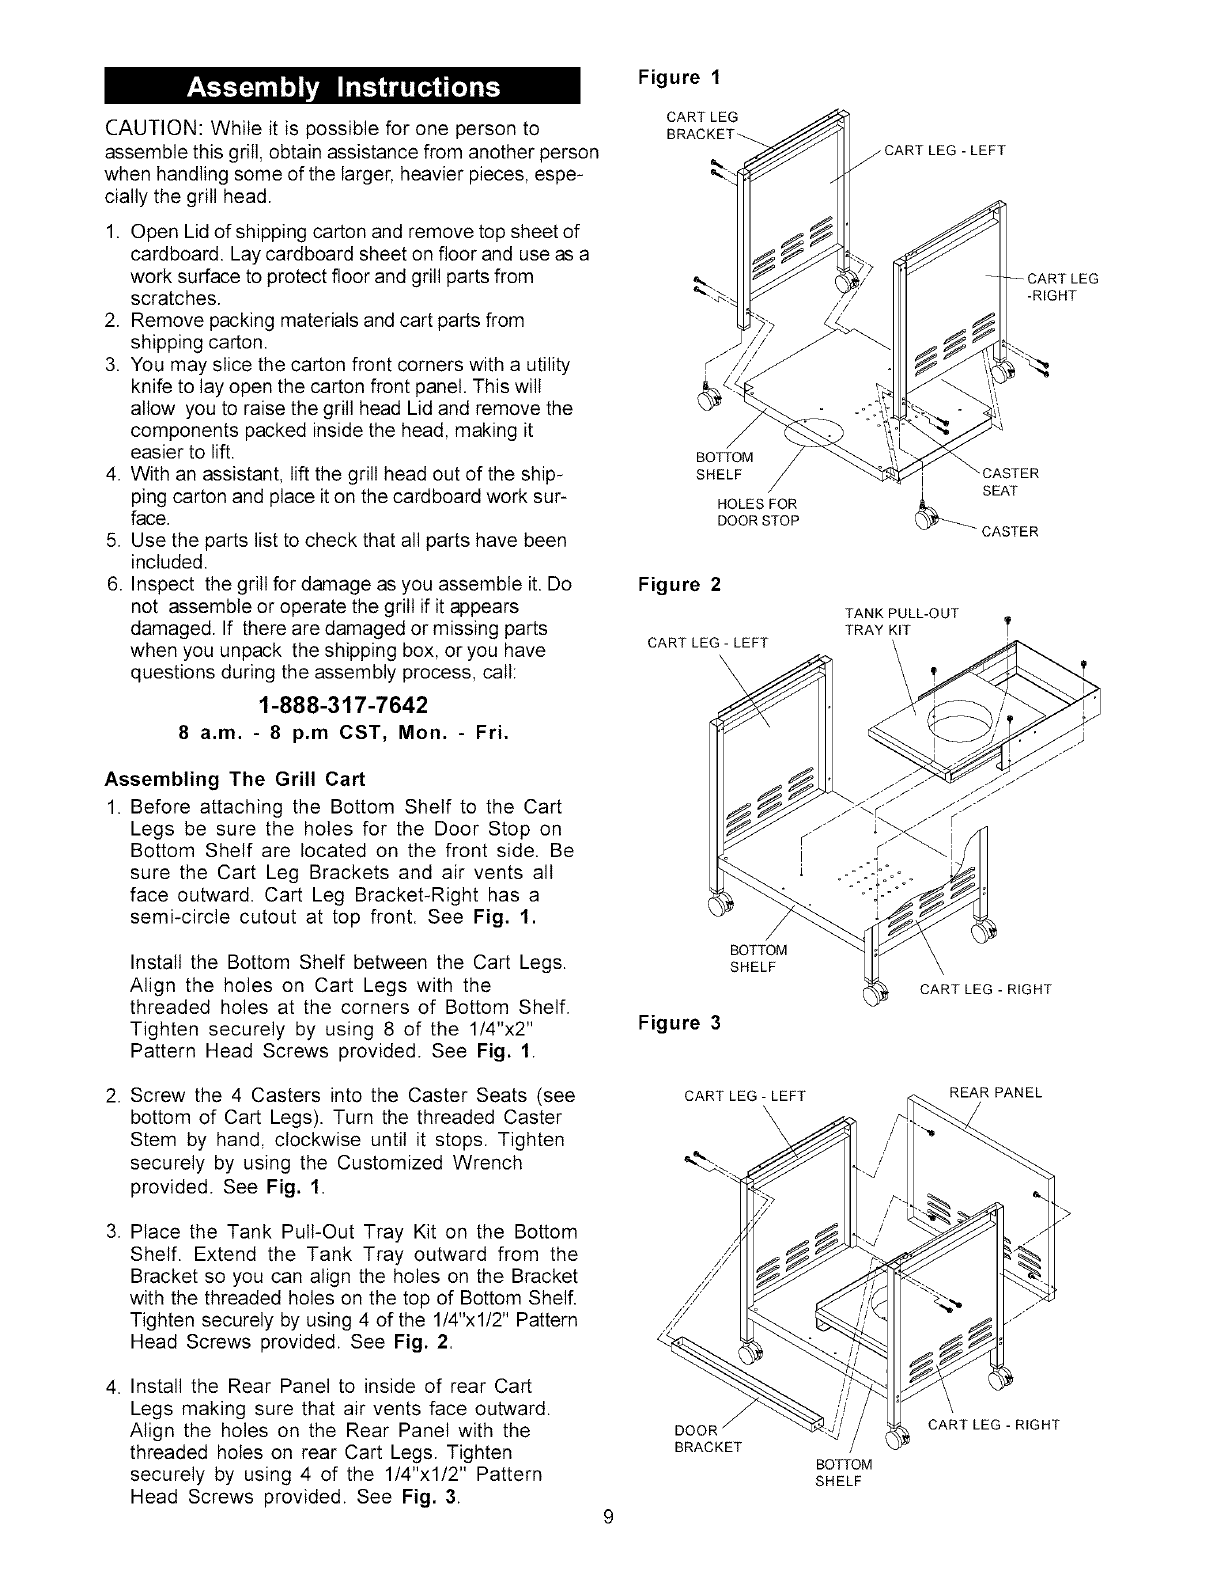
Figure 3
-RIGHT
SEAT
CASTER
TANK PULL-OUT
TRAY KIT T
CART LEG - RIGHT
2. Screw the 4 Casters into the Caster Seats (see
bottom of Cart Legs). Turn the threaded Caster
Stem by hand, clockwise until it stops. Tighten
securely by using the Customized Wrench
provided. See Fig. 1.
CART LEG -LEFT
REAR PANEL
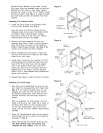
3. Place the Tank Pull-Out Tray Kit on the Bottom
Shelf. Extend the Tank Tray outward from the
Bracket so you can align the holes on the Bracket
with the threaded holes on the top of Bottom Shelf.
Tighten securely by using 4 of the 1/4"xl/2" Pattern
Head Screws provided. See Fig. 2.
4. Install the Rear Panel to inside of rear Cart
Legs making sure that air vents face outward.
Align the holes on the Rear Panel with the
threaded holes on rear Cart Legs. Tighten
securely by using 4 of the 1/4"x1/2" Pattern
Head Screws provided. See Fig. 3.
DO0
BRACKET
BOTTOM
SHELF
CART LEG - RIGHT