


Special offers from our partners!

Find Replacement BBQ Parts for 20,308 Models. Repair your BBQ today.
13
Fireplace Assembly Procedures
TOOLS NEEDED FOR INSTALLATION:
One4ft.level•
Roto-hammerwith½”drillbit•
DrillmotorwithmixerbladetomixMortar•
Twoempty5gallonbucketstomixMortar•
Onewheelbarrow• andshoveltomixconcrete
Groutbag•
Triangularmasonrytrowel•
Rubberhammer•
Spongeand2waterbucketstowipedownandmoisten•
partspriortoapplyingmortar
MATERIALS NEEDED FOR INSTALLATION:
Epoxyforsecuringrebarinfooting/foundation•
Three(3)-90lb.bagsofreadymixconcretewith¼”or•
smalleraggregate
MATERIALS INCLUDED:
8-⅜”Rebarx28”Long•
8-⅜”Rebarx12”Long•
1-50lb.bucketMortar•
20-SmallWoodShims•
Note-Wipeexcesswaterfromsurfacepriortoapplyinggrout.
Thiswillhelpgrouttoadheretosurfaceduringassembly.
Warning:Allsurfaceswheregroutisappliedmusthavewater
spongedonseveralminutespriortoassembly.Thiswillminimize
crackingofgroutjointandprovidemaximumstrength.
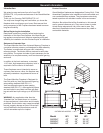
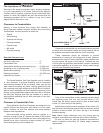
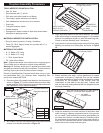
PlacetheGrandMeridianFireplacehearthbaseontopofyour
non-combustible oor. For concrete slabs, supporting oor
needstoberatedatASTM90.
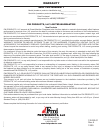
Drawanoutlineofthehearthareabasedonthedimensions1)
showninFigure 17.PositionHearthslabsandmarkrebar
centerlocations.Drill4inchesintoconcreteslabandsecure
the8piecesof12inchrebarwithepoxy.
Figure 17
LeftSideHearth2nd
RightSideHearth1st
Model W
MM39VF 43”
MM44VF 48”
MM49VF 53”
W
28”
Applymortar
betweenjoints
12inchrebar
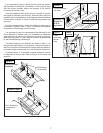
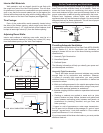
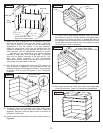
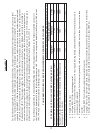
MixabatchofmortarandprepareRightSideHearthbottom2)
surfacetobebondedasshowninFigure 18.
Figure 18
1/2”AWAY
FROMEDGES
1/2”MORTAR
BEADTYPICAL
Hearthsectionshownprepared
forRightSideposition
APPLYMORTAR
BEADTOALL
MATINGSURFACES
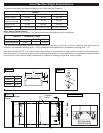
AlignRightSideHearthtotheoutlinecreated.Theoverall3)
widthshouldallowforanapproximategapof1/8”between
slabsfortheadditionalmortartounitetheremainingslab.
Checkforsurfaceatness,levelifnecessary.
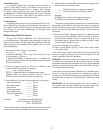
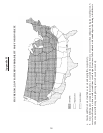
ApplymortartotheremainingHearthexceptthistimeapply4)
beadingonsurfacetobefacingoorasshowninFigure
19.
Figure 19
Hearthshownprepared
forLeftSideposition
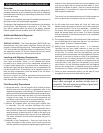
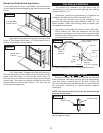
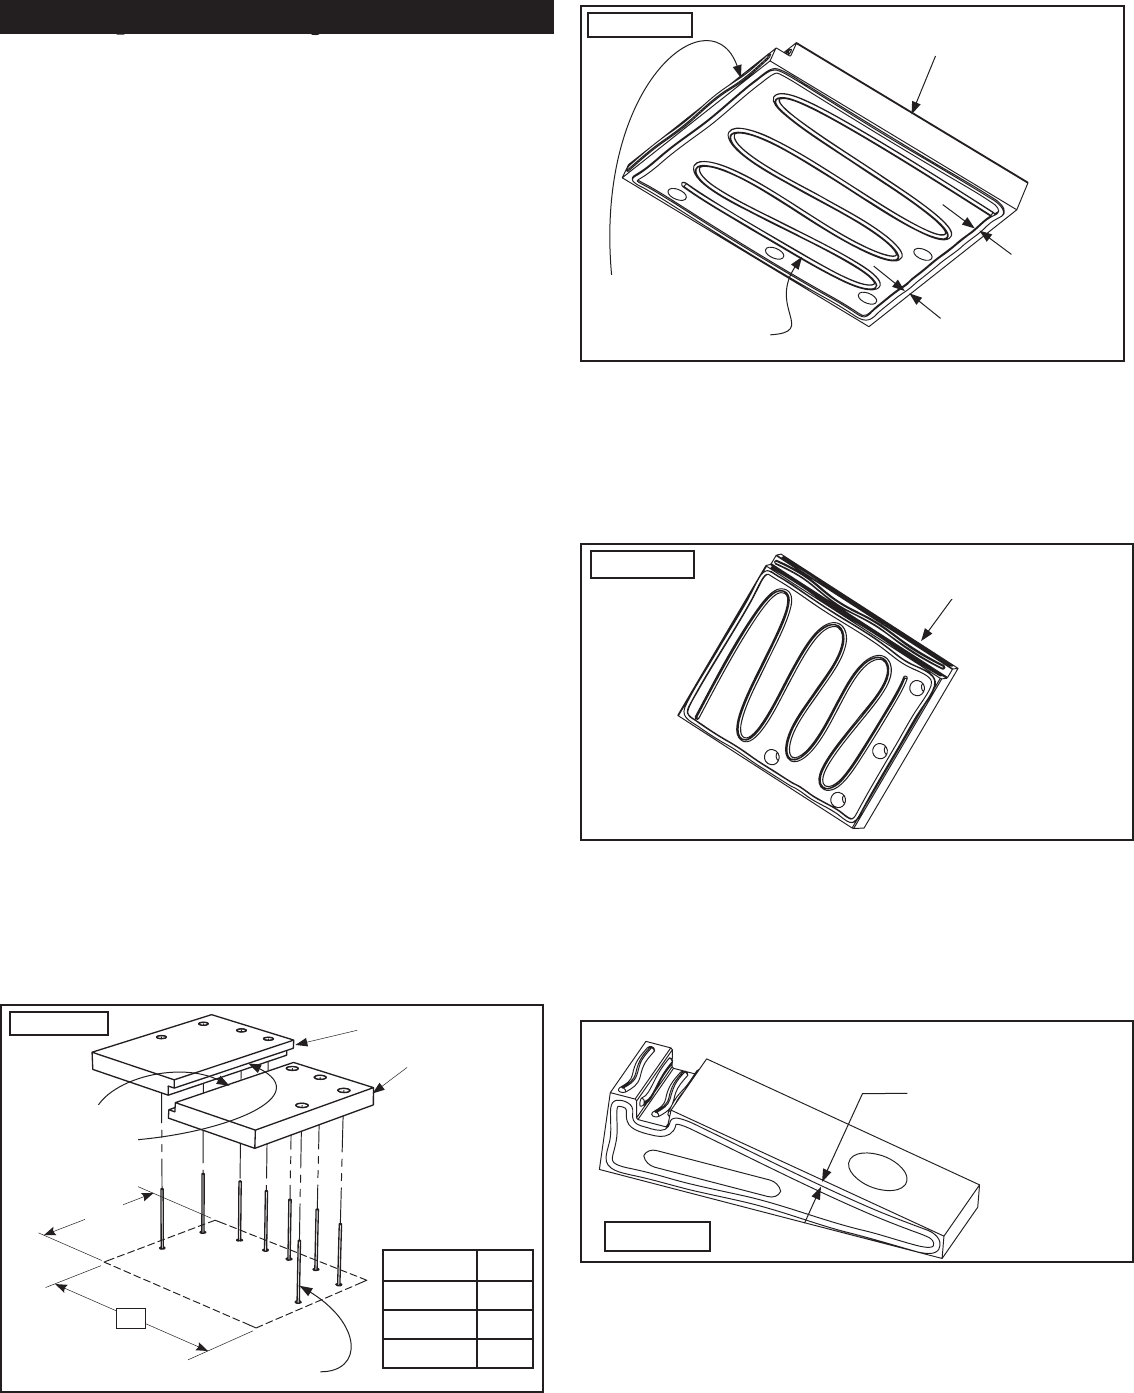
Beforeinstallingsidewalls,conrmplacementofoutside5)
combustion airaccess (ifrequired), this canbe installed
eithersidedependingonwhichsideisaccessibletooutside
combustion air (all diagrams in this manual show the
combustionairinletholeontherightside). Prepareside
wallandrearwallmatingsurfaceswiththepreparedmortar
andbeginassembly.
Figure 20
Side Wall shown prepared for RightSideAir
Access.ForLeftSidebeadoppositeside.
1/2”AWAY
FROMEDGES
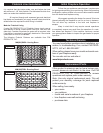
Keeptheassemblyofthenextsectionsofthereboxside6)
wallsmovingup,keepingcomponentsmoist,mixingmortar
asyouneeditandthreadingthemortarappropriatelyas
youstackeachsection,oneontothenext.Constantlycheck
forsquarenessandlevelnesswhilebuildingeachcourseof
block.Asyoucompleteeachsection,makecertainthatyou
adherethemortarateachandeveryjoint.