


Special offers from our partners!

Find Replacement BBQ Parts for 20,308 Models. Repair your BBQ today.
27
Chateau™
20011956
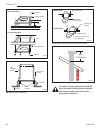
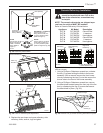
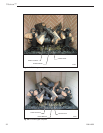
6. Replace the rear lower and upper refractory, side
refractory, fettle, andiron, logs and glass.
FP1556
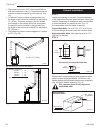
remove rear
log bracket
3/05 djt
Rear Log
Bracket
Remove Screws (3)
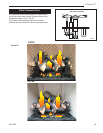
Fig. 37 Remove rear log bracket.
FP1556
FP1558
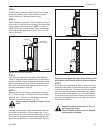
fresh restrictor
plate adjustment
3/05 djt
1
2
3
4
Fresh Air
Restrictor
Plate
FP1557
Fig. 38 Fresh air restrictor plate adjustment.
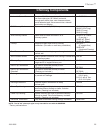
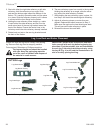
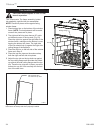
Ceramic Refractory Installation
The ceramic refractories are fragile and
should be handled with care. Due to the
size of the refractories, an assistant may
be helpful.
NOTE: The ceramic refractories are shipped sepa-
rate from the unit but MUST BE installed.
Refer to Ceramic Refractory Kit listed below.
Appliance Kit Model Description
DVT38 DVT38CRR Colonial Red
DVT38 DVT38CRL Limestone
DVT38 DVT38CRH Herringbone
DVT44 DVT44CRR Colonial Red
DVT44 DVT44CRL Limestone
DVT44 DVT44CRH Herringbone
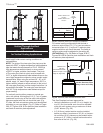
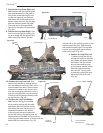
FP1365
DVT44
refractory panels
5/23/03 djt
Left Side
Refractory
Rear Refractory
Upper
Rear Brick Lower
(Colonial Red Only)
Right Side
Refractory
FP1365a
Fig. 39 DVT44IN ceramic refractory panels. (Limestone
refractory shown)
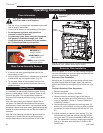
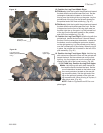
1. Using a Phillips or Robertson screwdriver, unfasten
the two (2) screws holding the fettle to the burner
assembly. With a wrench, remove the front burner
tube by unfastening the two (2) nuts that secure the
burner tube to the front of the burner assembly.
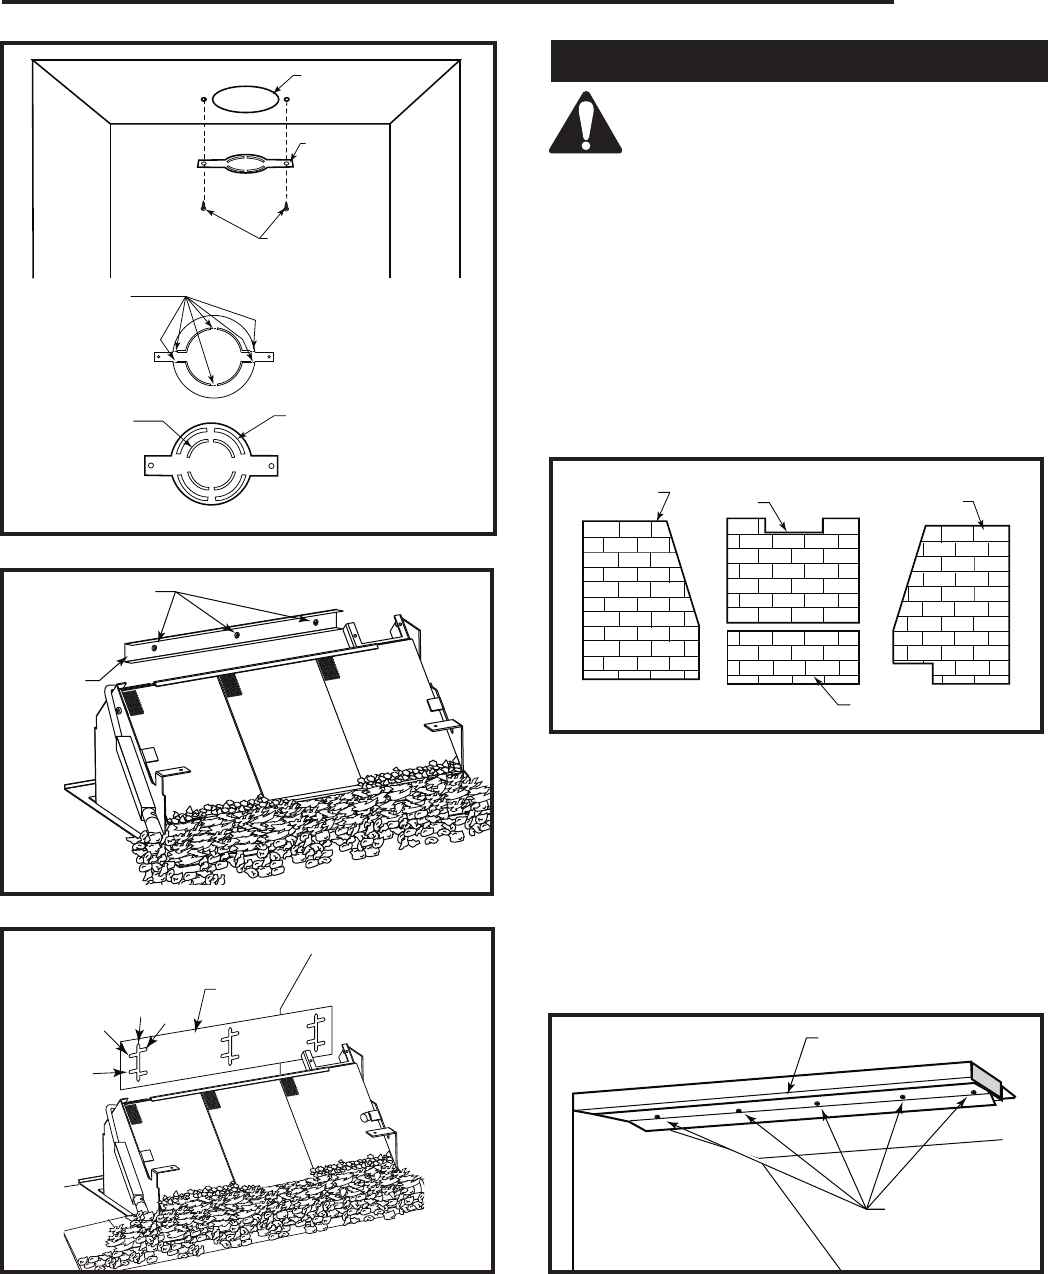
2. Using a Phillips or Robertson screwdriver, remove
the heat shield located toward the front top of the fire
box by unfastening the five (5) screws that secure
the heat shield in place. (Fig. 40)
FP1369
heat shield/insulation
assembly
6/5/03 djt
Remove
Screws (5)
FP1369
Fig. 40 Remove five (5) screws securing heat shield in place.
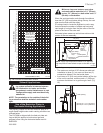
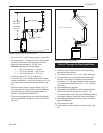
Return Flange
FP1810
restrictor plate_2
6/07 djt
Flue Opening
Restrictor
Plate
Sheet Metal
Screws
FP1810
Fig. 36 Restrictor plate location.
DVT44IN (6³⁄₄” as Shown)
Use tin snips to cut
along slots to make 4¹⁄₂”
(114mm) restrictor plate.
(Refer to Page 17)
DVT38
Use tin snips to cut along
outer slots to make 4¹⁄₂”
(114 mm) restrictor plate.
(Refer to Page 22, Fig. 28)
DVT38
Use tin snips to cut
along inner slots to
make 3” restrictor
plate. (Refer to
Page 17)
To Remove
Outer Ring, Cut
Here (6 Places)