


Special offers from our partners!

Find Replacement BBQ Parts for 20,308 Models. Repair your BBQ today.

Printing Photos in Windows 13
Printing Photos in Windows
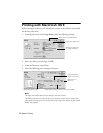
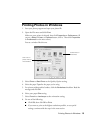
1. Start your photo program and open your photo file.
2. Open the File menu and click
Print.
Make sure your printer is selected, then click
Properties or Preferences. (If
you see a
Setup, Printer, or Options button, click it. Then click Properties
or
Preferences on the next screen.)
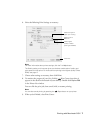
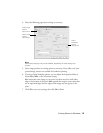
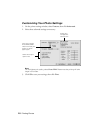
You see a window like this one:
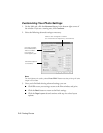
3. Select
Photo or Best Photo as the Quality Option setting.
4. Select the paper
Type for the paper you’re using.
5. For pictures without white borders, click the
Borderless checkbox. Read the
message and click
OK.
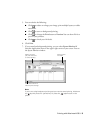
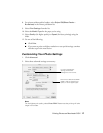
6. Select your paper Size setting.
7. Select
Portrait or Landscape as the orientation setting.
8. Do one of the following:
■ Click OK, then click OK or Print.
■ If you want to print at the highest resolution possible, or use special
settings, continue with the steps in the next section.
Select Photo or
Best Photo
Click here for
photos without
white borders