


Special offers from our partners!

Find Replacement BBQ Parts for 20,308 Models. Repair your BBQ today.

2-29
Cisco Internet OSS for VoIP: Infrastructure Manager Implementation Guide
OL-2706-01
Chapter 2 Provisioning
Step by Step Installation and Initial Configuration
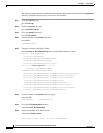
Step 8 Provide answers to the questions at the end of the form, then click Enter Form.
To update a Cisco EMF license currently in use (for example, if you wish to extend an evaluation license
or convert an evaluation system to a proper installation with a permanent license) refer to the Cisco EMF
Installation and Administration Guide at:
http://www.cisco.com/univercd/cc/td/doc/product/rtrmgmt/cemf/3_2/install/license.htm#xtocid183871.
Checking System Prerequisites
If you do not know the procedure for networking your host machine and activating DNS, consult with a
system administrator or the CMNM User’s Guide at the following URL:
http://www.cisco.com/univercd/cc/td/doc/product/access/sc/rel9/cmnm21/index.htm.
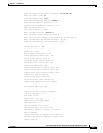
Verify that your machine host(s) can be reached through DNS by invoking the following command:
cmnm-pri# nslookup cmnm-pri
Server: dns-sj.cisco.com
Address: 171.x.x.x
Name: cmnm-pri.cisco.com
Address: 172.19.49.2
You are now ready to begin the installation procedures for VSPT, CEMF, and CMNM.
Order of Installation
1. The first application to be installed is VSPT and any associated patches. VSPT must be installed
prior to CMNM.
2. The next procedure is to install CEMF with its patches.
3. The next procedure is to install CMNM with its patches.
Installing VSPTand Available Patches
Installation Prerequisites
The Voice Services Provisioning Tool can be installed locally or remotely. If your host machine is
equipped with a Frame buffer, keyboard, mouse, and monitor, the installation is straight forward. If your
host machine is not equipped with the setup for a local monitor and you wish to install VSPT from a
remote machine, you can install it through the GUI remotely. If your terminal emulation program is not
X-based, then you can install using the nodisplay option. This example uses the nodisplay option.
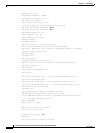
Step 1 Untar the image file in a temporary directory:
cmnm-pri# cd /opt/images
cmnm-pri# pwd
/opt/images