


Special offers from our partners!

Find Replacement BBQ Parts for 20,308 Models. Repair your BBQ today.

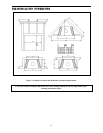
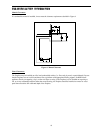
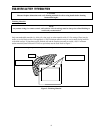
VENT INSTALLATION
VENT INSTALLATION
14
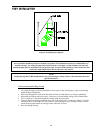
NOTE
When working on the roof, cover the opening of the installed vent pipes below to prevent debris falling in.
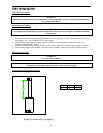
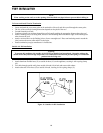
To Locate and install Vertical Termination
• Locate and mark the vent center point on the underside of the roof, and drive a nail through the center point.
• The size of the roof hole framing dimensions depends on the pitch of the roof
• Cut and frame the roof hole.
• Continue to install vent sections through the roof hole until reaching the appropriate distance above the roof.
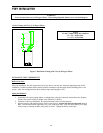
• Attach a flashing to the roof using nails, and use a non-hardening mastic around the edges of the flashing base
when it meets the roof.
• Attach a storm collar over the flashing joint to form a watertight seal. Place non-hardening mastic around the
joint, between the storm collar and the vertical pipe.
• Attach termination per pipe manufacturer’s instructions.
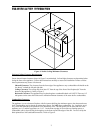
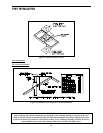
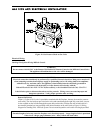
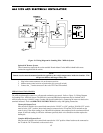
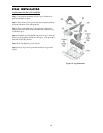
Outside Air Kit Installation:
Warning
To operate this appliance, the outside air kit MUST be installed and operational. Operation without the
outside air kit may result in high temperature on combustible materials and possible spillage of combustion
product into the living area.
1. Attach aluminum flexible hose (#2) to outside air door (#1) on the appliance, securing it with a spring clamp
(#3).
2. Cut a hole through outside wall, place outside air hood (#4) in hole and secure with sealant.
3. Attach other end of flex hose (#2) to outside air hood, securing it with a spring clamp (#3).
Figure 11: Outside Air Kit Installation