


Special offers from our partners!

Find Replacement BBQ Parts for 20,308 Models. Repair your BBQ today.

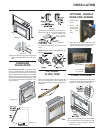
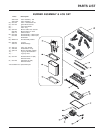
19U32-2 FPI Direct Vent Gas Insert
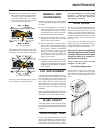
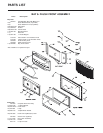
Flush Glass Replacement
Remove the flush door front (as per instruc-
tions on page 11). Remove the 4 glass clips
from each corner. Slide in the new replacement
glass. Push the 4 glass clips back onto the
frame.
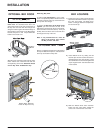
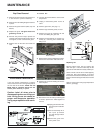
MAINTENANCE
GENERAL VENT
MAINTENANCE
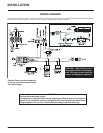
Conduct an inspection of the venting system
semi-annually. Recommended areas to inspect
as follows:
1) Check the Venting System for corrosion in
areas that are exposed to the elements.
These will appear as rust spots or streaks,
and in extreme cases, holes. These compo-
nents should be replaced immediately.
2) Remove the Termination Cap, and shine a
flashlight down the Vent. Remove any bird
nests, or other foreign material.
3) Check for evidences of excessive conden-
sation, such as water droplets forming in
the inner liner, and subsequently dripping
out the joints, Continuous condensation
can cause corrosion of caps, pipe, and
fittings. It may be caused by having exces-
sive lateral runs, too many elbows, and
exterior portions of the system being ex-
posed to cold weather.
4) Inspect joints, to verify that no pipe sections
or fittings have been disturbed, and conse-
quently loosened. Also check mechanical
supports such as Wall Straps, or plumbers'
tape for rigidity.
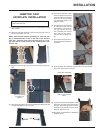
LOG REPLACEMENT
The unit should never be used with broken logs.
Turn off the gas valve and allow the unit to cool
before opening door to carefully remove the
logs. The pilot light generates enough heat to
burn someone. If for any reason a log should
need replacement, you must use the proper
replacement log. The position of these logs
must be as shown in the diagram under Log
Installation.
NOTE: Improper positioning of logs may create
carbon build-up and will alter the unit’s perform-
ance which is not covered under warranty.
GLASS GASKET
If the glass gasket requires replacement use
glass gasket (Part # 936-265) for the Bay Front
and a tadpole gasket for the Flush Front (Part
# 936-155).
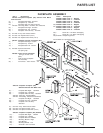
GOLD-PLATED TRIM
The 24 carat gold plated finish on the trim
requires little maintenance, and need only be
cleaned with a damp cloth. DO NOT use abra-
sive materials or chemical cleaners, as they
may harm the finish and void the warranty.
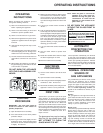
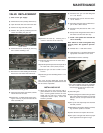
Top View of pilot flame
Top View of pilot flame
Incorrect flame pattern will have small, proba-
bly yellow flames, not coming into proper con-
tact with the rear of the burner or thermopile.
8) Periodically check the pilot flames. Correct
flame pattern has three strong blue flames:
1 flowing around the thermopile and 1
around the thermocouple, and 1 flowing
across the rear of the burner (it does not
have to be touching the burner).
If you have an incorrect flame pattern, contact
your FPI dealer for further instructions.
Clean any fingerprints off before turning
the unit on. If the top louvers start to
discolour, check the door gasket seal
and replace if necessary.
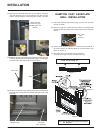
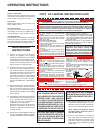
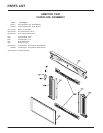
DOOR GLASS
Your FPI insert is supplied with high tempera-
ture, 5 mm Neoceram ceramic glass that will
withstand the highest heat that your unit will
produce. If your glass requires cleaning, we
recommend using an approved glass cleaner
available at all authorized dealers. Do not use
abrasive materials. Do not clean the glass
when hot.
In the event that you break your glass by
impact, purchase your replacement from an
authorized FPI dealer only, and follow our step-
by-step instructions for replacement.
Warning: Do not operate appliance
with glass panels removed, cracked
or broken. Replacement of the glass
should be done by a licensed or
qualified service person.
Caution: Wear gloves when removing
damaged or broken glass.