


Special offers from our partners!

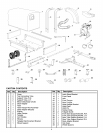
Find Replacement BBQ Parts for 20,308 Models. Repair your BBQ today.
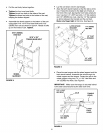
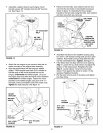
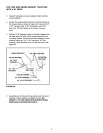
Assembleaspacertubeontoeachendoftheaxleas
showninfigure7.
Assemblea 1"flatwasher,a wheel(valvestem
facingout),andanother1"flatwasherontotheaxle
asshowninfigure7.Securethewheelwitha 1/8"x
1-1/2"cotterpin,spreadingtheendssothata hub
capwiltfitoverthepin.Assemblethehubcapby
pressingitontotheflatwasher.Repeatonotherend
of axle.
SPACER TUBE
WHEEL
\
1" FLAT _'_
WASHER
\
AXLE
T
HUB CAP
1/8" x 1-112"
COTTER PIN
1"FLAT
WASHER
FIGURE 7
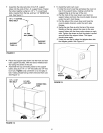
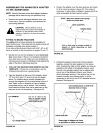
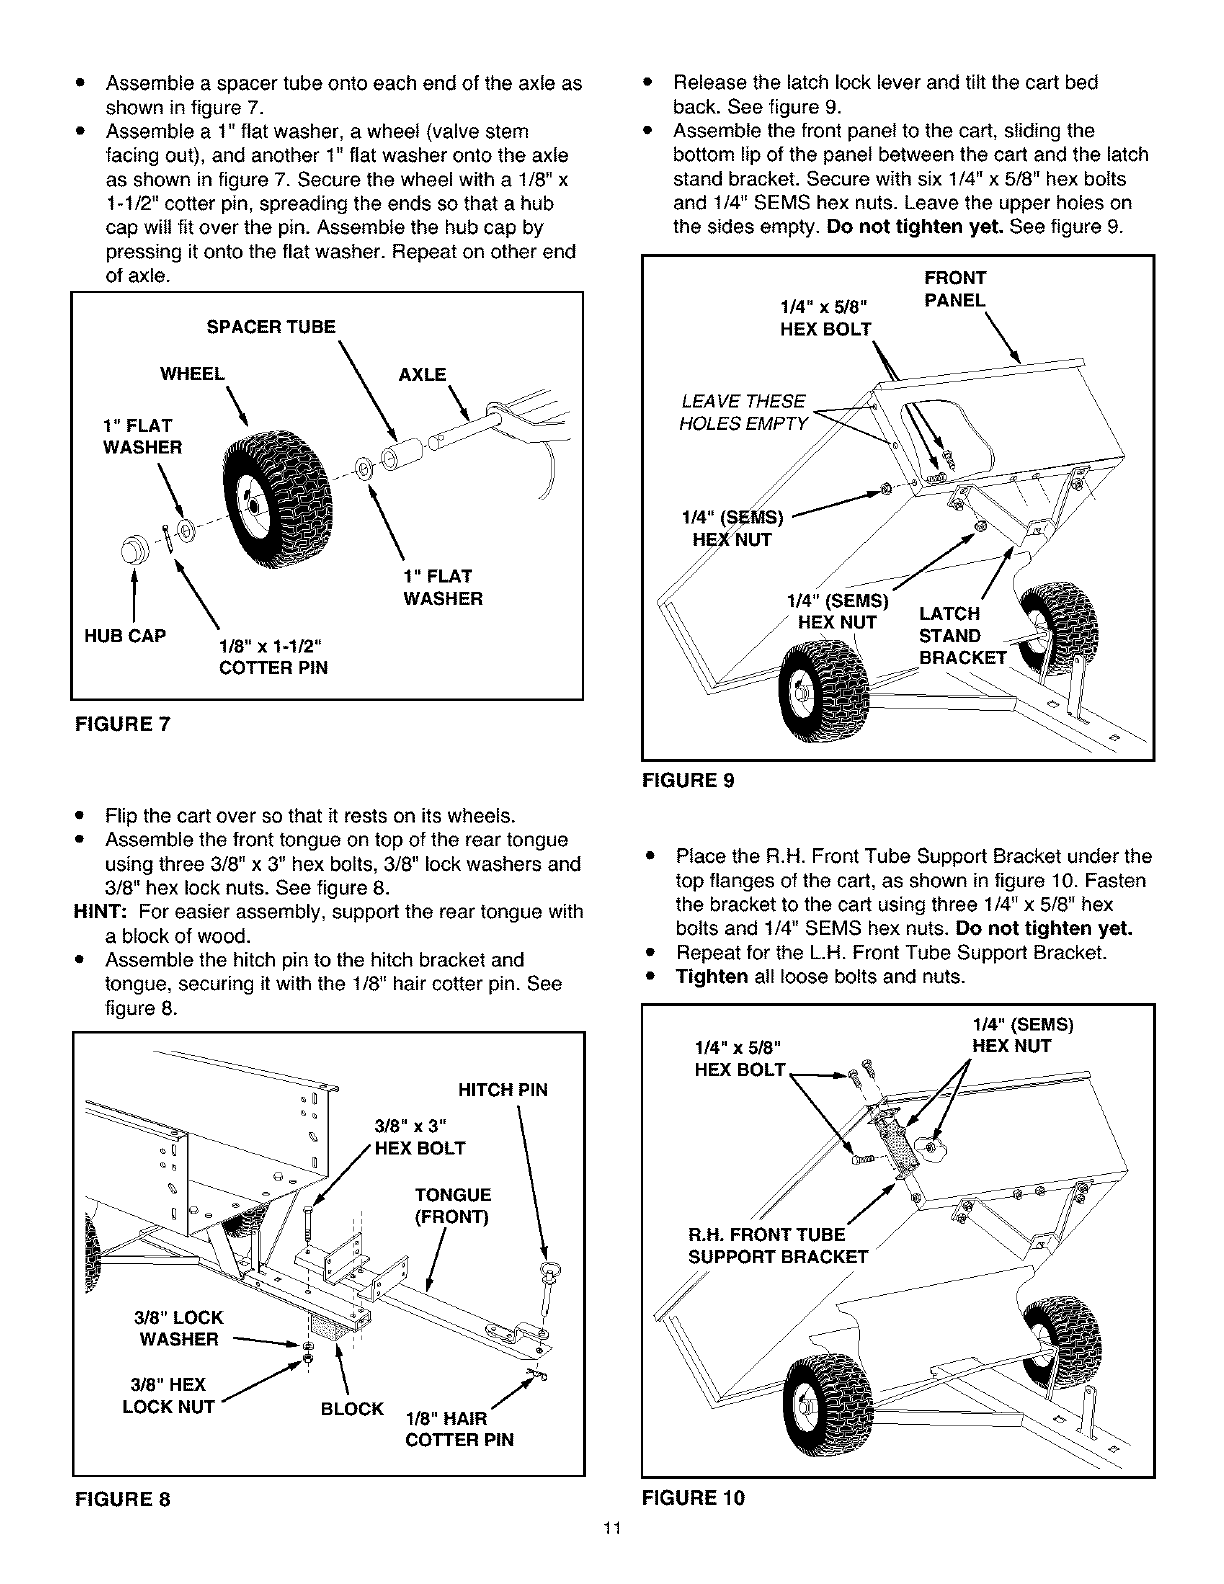
Release the latch lock lever and tilt the cart bed
back. See figure 9.
Assemble the front panel to the cart, sliding the
bottom lip of the panel between the cart and the latch
stand bracket. Secure with six 1/4" x 5/8" hex bolts
and 1/4" SEMS hex nuts. Leave the upper holes on
the sides empty. Do not tighten yet. See figure 9.
FRONT
1/4" x 5/8" PANEL
HEX BOLT
LEA VE THESE \
HOL E_ \
\
\
1/4"
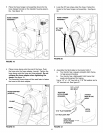
• Flip the cart over so that it rests on its wheels.
• Assemble the front tongue on top of the rear tongue
using three 3/8" x 3" hex bolts, 3/8" lock washers and
3/8" hex lock nuts. See figure 8.
HINT: For easier assembly, support the rear tongue with
a block of wood.
• Assemble the hitch pin to the hitch bracket and
tongue, securing it with the 1/8" hair cotter pin. See
figure 8.
%
HITCH PIN
3/8" x 3" \
\
TONGUE
(FRONT)
!
3/8" LOCK
WASHER :'
318"REX \
LOCK NUT-- BLOCK
1/8"HAIR
COTTER PIN
FIGURE 9
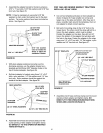
• Place the R.H. Front Tube Support Bracket under the
top flanges of the cart, as shown in figure 10. Fasten
the bracket to the cart using three 1/4" x 5/8" hex
bolts and 1/4" SEMS hex nuts. Do not tighten yet.
• Repeat for the L.H. Front Tube Support Bracket.
• Tighten all loose bolts and nuts.
1/4" (SEMS)
1/4" x 5/8" HEX NUT
SUPPORT BRACKET
FIGURE 8 FIGURE 10
11