


Special offers from our partners!

Find Replacement BBQ Parts for 20,308 Models. Repair your BBQ today.
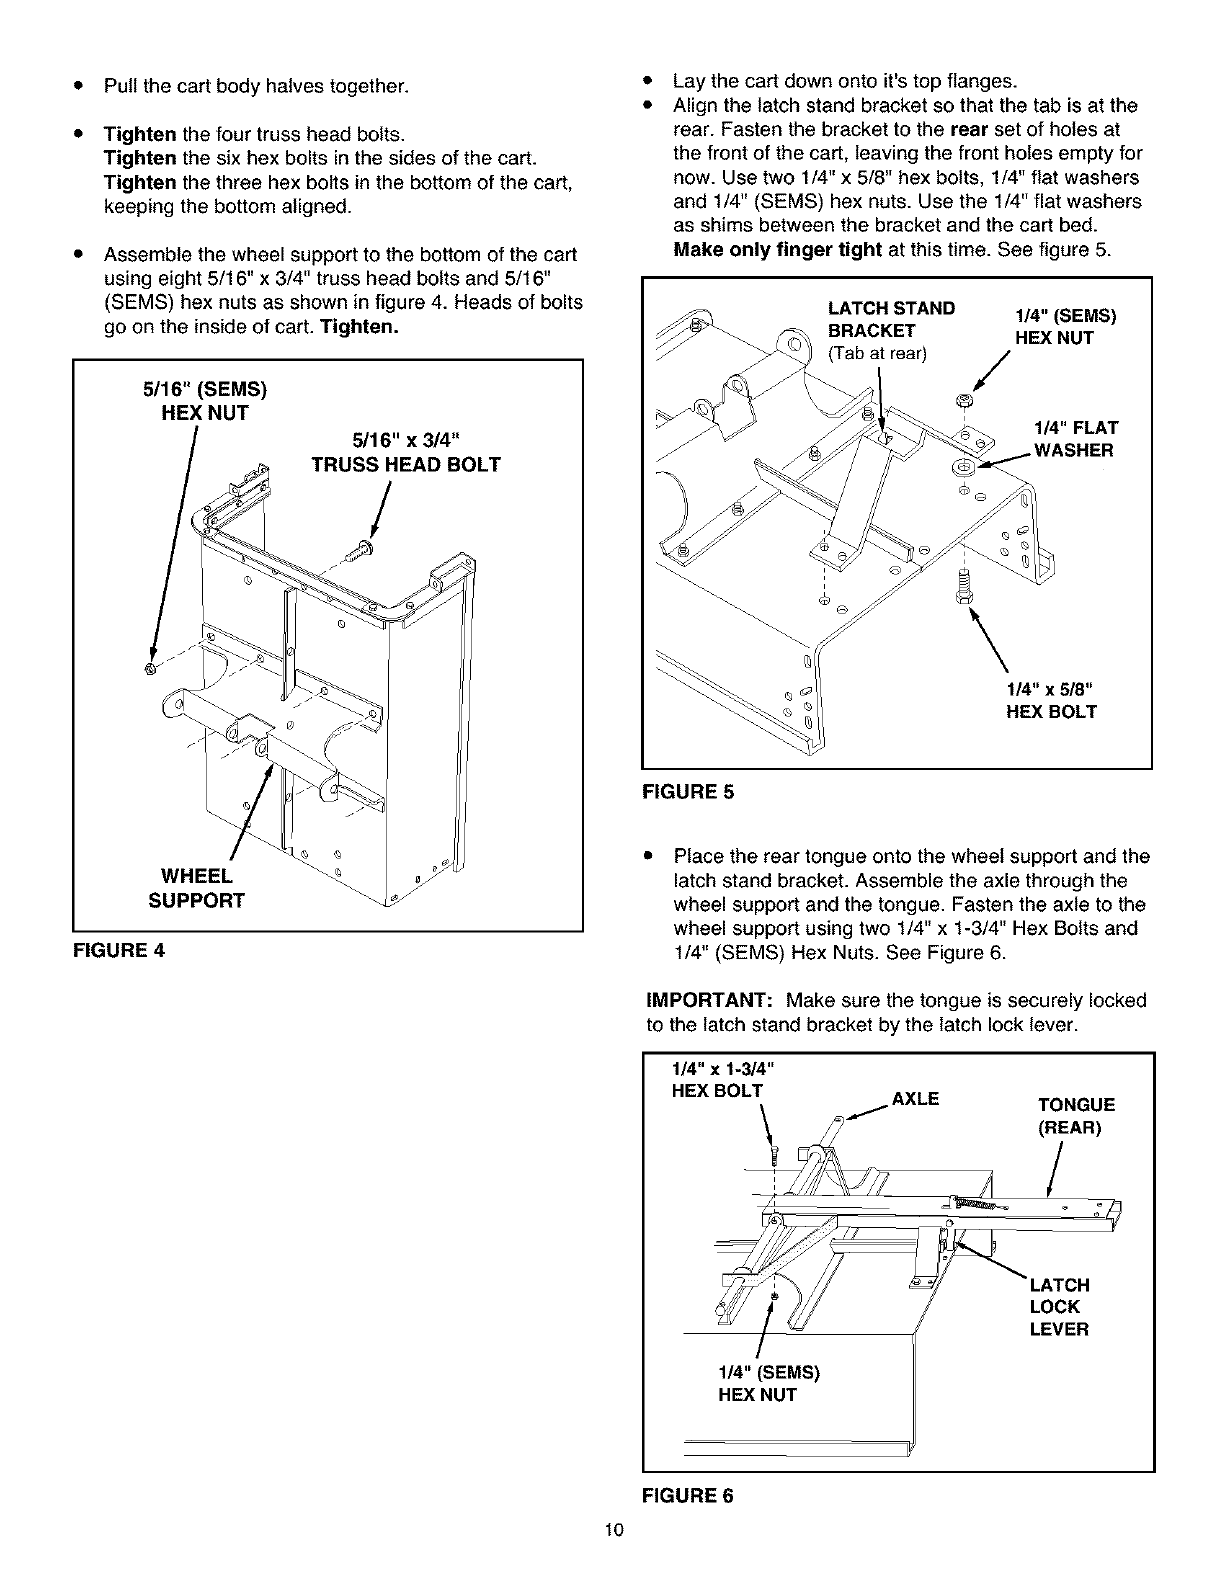
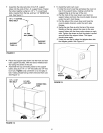
• Pullthecartbodyhalvestogether.
• Tightenthefourtrussheadbolts.
Tightenthesixhexboltsinthesidesofthecart.
Tightenthethreehexboltsinthebottomofthecart,
keepingthebottomaligned.
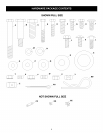
Assemblethewheelsupporttothebottomofthecart
usingeight5/16"x3/4"trussheadboltsand5/16"
(SEMS)hexnutsasshowninfigure4.Headsof bolts
goontheinsideofcart.Tighten.
5/16" (SEMS)
HEX NUT
5/16" x 3/4"
TRUSS HEAD BOLT
/
WHEEL
SUPPORT
FIGURE 4
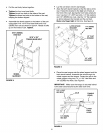
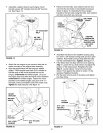
Lay the cart down onto it's top flanges.
Align the latch stand bracket so that the tab is at the
rear. Fasten the bracket to the rear set of holes at
the front of the cart, leaving the front holes empty for
now. Use two 1/4" x 5/8" hex bolts, 1/4" flat washers
and 1/4" (SEMS) hex nuts. Use the 1/4" flat washers
as shims between the bracket and the cart bed.
Make only finger tight at this time. See figure 5.
LATCHSTAND 1/4" (SEMS)
BRACKET HEX NUT
r/ ,/
®
1/4" FLAT
\
1/4" x 5/8"
HEX BOLT
FIGURE 5
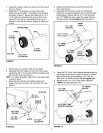
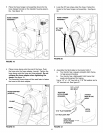
Place the rear tongue onto the wheel support and the
latch stand bracket. Assemble the axle through the
wheel support and the tongue. Fasten the axle to the
wheel support using two 1/4" x 1-3/4" Hex Bolts and
1/4" (SEMS) Hex Nuts. See Figure 6.
IMPORTANT: Make sure the tongue is securely locked
to the latch stand bracket by the latch lock lever.
1/4" x 1-314"
HEX BOLT
AXLE
TONGUE
(REAR)
1/4" (SEMS)
HEX NUT
LOCK
LEVER
FIGURE 6
10