


Special offers from our partners!

Find Replacement BBQ Parts for 20,308 Models. Repair your BBQ today.
B102097-0-0113 Page 13
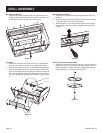
IMPORTANT!
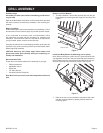
Initial Use: The rst time you use your Broilmaster Charcoal
Grill, keep the cooking temperature between 350 to 400 degrees
maximum. This will season the paint and set gasket glues properly.
Let burn for at least 60 minutes at 350 to 400 degrees to burn
off any manufacturing oils and paints before placing food on the
grill. Never use grill without ash pan in place.
Lighting Instructions
1. Follow the instructions below to build a re. You may use
charcoal briquettes or Broilmaster recommends quality Broil-
master Premium Natural Hardwood Lump Charcoal for a lon-
ger, hotter burn with less ash and more avorful wood taste.
2. Make sure the ash pan is clean to start. Open lower door and
slide out ash pan. Dispose of ashes in an approved metal
container as described in the safety section. Do not remove
hot coals. Replace the ash pan, close and latch door.
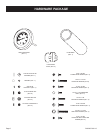
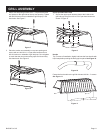
3. Filling Charcoal Tray
• Full Firebox Tray: Pile the charcoal in a pyramid shape on
the charcoal tray with enough charcoal so when spread
out it is not higher than tray sides but covers the entire
charcoal tray (about 5 to 7 pounds). Never let charcoal
burn against the casting sides of the grill, it could
damage the grill casting. Use this for larger amounts
of food cooking over the entire area, hotter cooking tem-
peratures, or longer cooking times.
• Half Firebox Tray: Pile the charcoal on one side of the
charcoal tray with enough charcoal so to cover half of the
charcoal tray but not higher than tray sides when spread
out (about 3 to 4 pounds). Use this for smaller amounts
of food, when cooking at milder temperatures or indirect
cooking. Use the Broilmaster rebox divider (sold sepa-
rately) to cook on one small section of your grill.
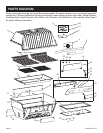
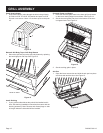
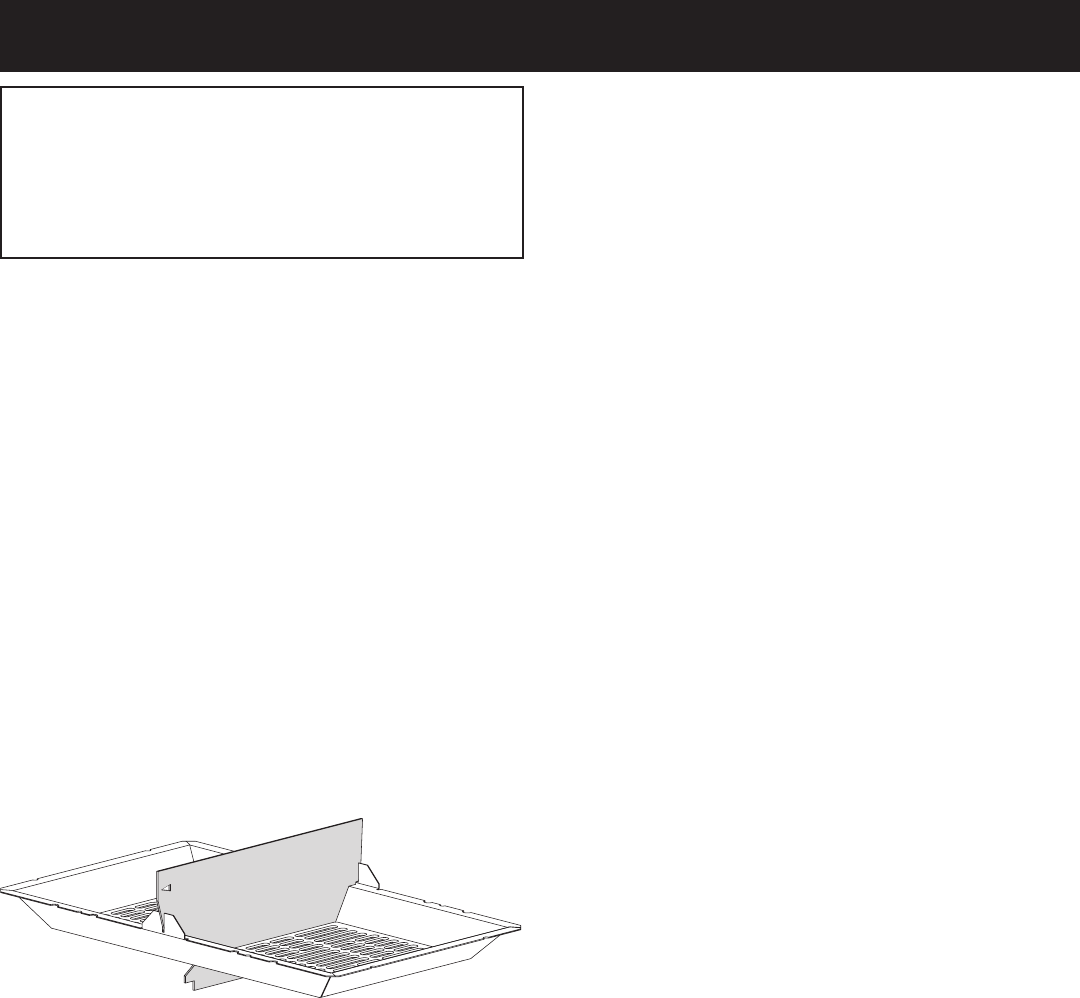
(Divider Accessory Shown)
Figure 16
Place the divider between the grates and in the holding tabs
on the frame. This will separate the rebox in half for better
control. Note: Divider must be removed to slide out ash tray.
OPERATION
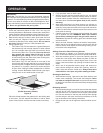
4. Fully open both lower air intake vents.
5. With the lid open and the charcoal piled in tray, use natural
charcoal starter cubes, a charcoal chimney start or an electric
charcoal starter. Always follow the manufacturer’s warnings
and instructions. Do not use lighter uid (it will void the
warranty).
6. After coals have been lit for about seven to ten minutes, or
when several coals are burning, close the lid and, with the dial
open fully, swing open the smoke vent on top full for maximum
air ow. Let burn with lid closed for about ve minutes or until
most coals are burning.
7. Carefully open the lid and spread coal as desired with metal
rod or optional ash tool. WARNING: Wear heat resistant
gloves when handling hot grill. Hot grill could cause se-
vere burns. Replace the cooking grids at the desired height
and close the lid.
8. When the heat indicator reaches the desired temperature,
reduce the air ow by adjusting the top smoke vent and the
lower air intake vents. Adjust air vents during cooking to con-
trol and ne tune temperatures.
Adding Charcoal or Wood Flavoring Chunks
1. Add charcoal to maintain or to increase cooking tempera-
tures. Or add wood avoring chunks for a special wood avor.
2. With heat resistant gloves or oven mitts carefully open the
reload door. Use caution since ames may are up when air
comes in contact with re. Always slightly crack one or two
inches a few times before fully opening to introduce fresh air
slowly.
3. With a set of long-handled cooking tongs, add charcoal or
wood chunks through the reload door opening. When n-
ished, close and latch the reload door. Always keep doors
closed while in use. Open only when needing to reload.
Shutting the Grill Down
1. When nished cooking, close the lid and close both top and
bottom vents completely. The re will self extinguish. Never
use water to extinguish the coals. It may take several hours
for the grill to cool down due to the thick heavy casting holding
in the heat.
Restarting the Grill
1. When restarting the grill, most of the charcoal that was started
with will still be in the charcoal tray if the vents were closed
after previous use. The charcoal can be reused. With the ash
tool, stir the charcoal so that any ash build-up falls through
into the ash pan. Add more charcoal as necessary to ll the
tray as described in the lighting instructions.
2. Empty the ash pan into an approved metal container and re-
place.