


Special offers from our partners!

Find Replacement BBQ Parts for 20,308 Models. Repair your BBQ today.
B102097-0-0113Page 10
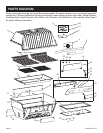
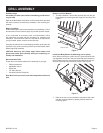
GRILL ASSEMBLY
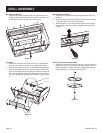
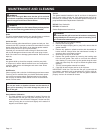
Rear Support Bracket
1. Align the four holes and attach the rear support bracket to
the back inside of the lower grill body with four #10-24 x 3/8”
screws and four #10-24 keps nuts. See Figure 3.
Figure 3
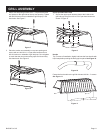
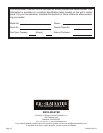
Load Door
1. Attach one door pivot using one #10-24 x 1/2” carriage bolt
and one #10-24 keps nut on the front of grill body bottom.
2. Insert the load door swing pin into the already attached door
pivot. While holding the door in place slide the second door
pivot on the opposite side door swing pin. Attach the second
door pivot to the front of the grill body bottom using one #10-
24 x 1/2” carriage bolt and one #10-24 keps nut. See Figure
4.
DOOR PIVOT
SWING PIN
Figure 4
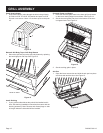
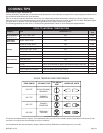
Adjusting Door Latches
1. The doors should be checked for a tight t when doors are
latched.
2. If the door latches need to be adjusted loosen the set screw
on the latch pawl with a 1/8” Allen wrench.
3. Slide the pawl in or out on the shaft to adjust for the proper
tension when the door is closed. Retighten set screw. See
Figure 5.
Figure 5
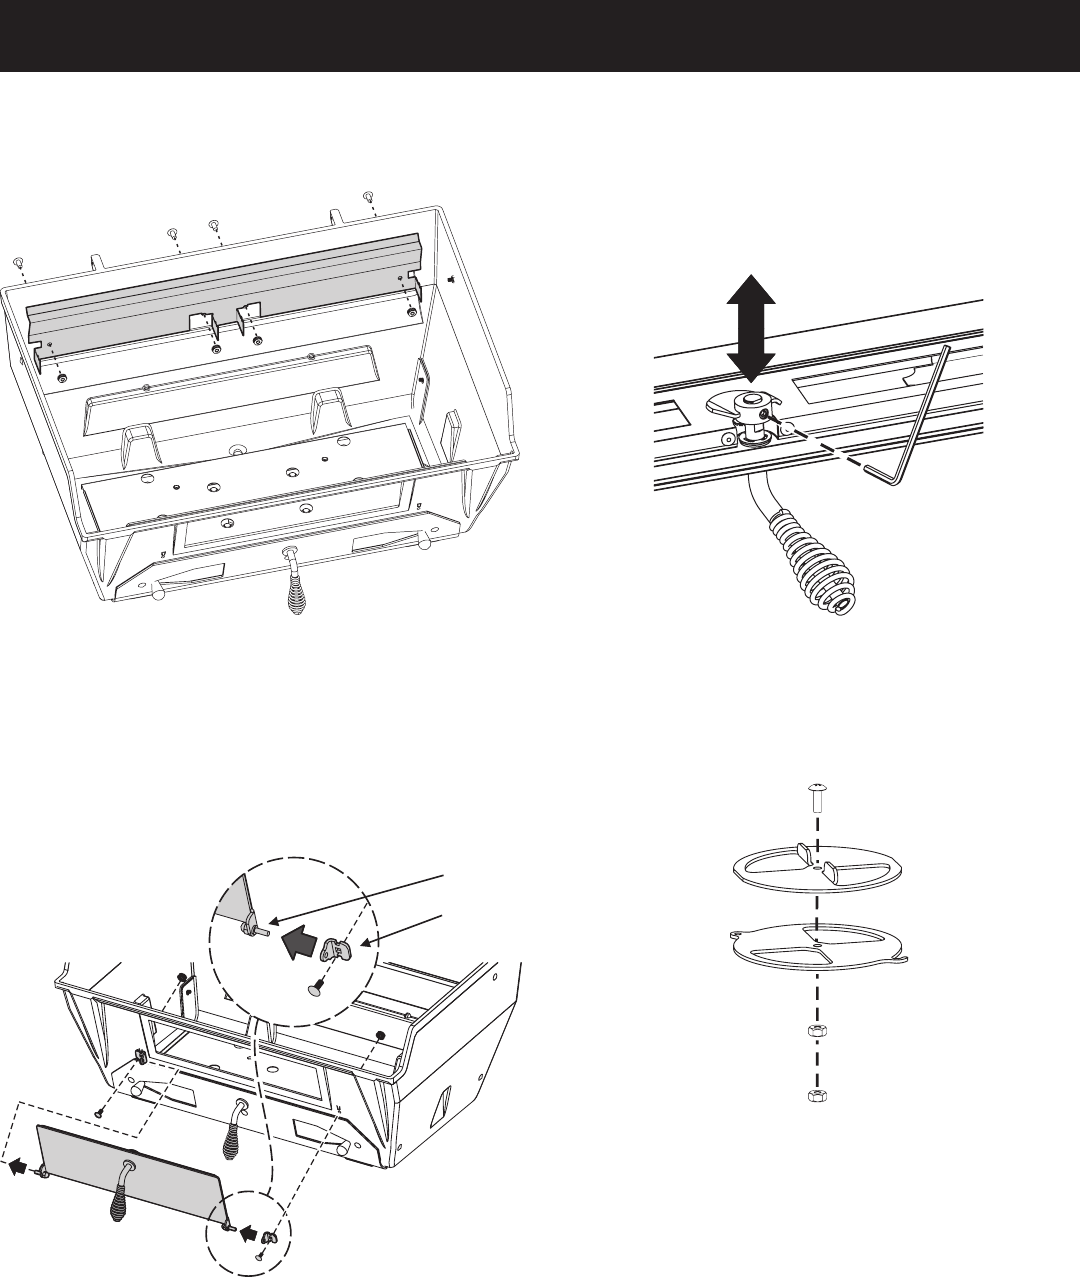
Attach Top Smoke Vent Assembly
1. Attach the vent base and vent top with one 1/4-20 x 3/4 truss
head screw and two 1/4-20 hex nuts. Hand tighten rst nut
against vent base. Tighten second nut against the rst (as a
jamb nut) using a 7/16 wrench. See Figure 6.
Figure 6