


Special offers from our partners!

Find Replacement BBQ Parts for 20,308 Models. Repair your BBQ today.
Buy Weber Grill Parts. It couldn't be easier. Find your Weber parts here.

17
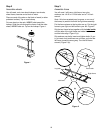
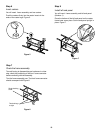
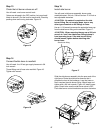
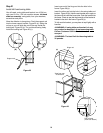
Step 13
Check that all burner valves are off
You will need: one burner control knob.
(Valves are shipped in the OFF position, but you should
check to be sure.) Put the knob on each valve. Check by
pushing down and turning clockwise. Figure 15.
Figure 15
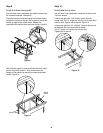
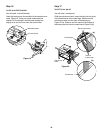
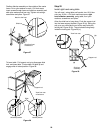
Step 14
Connect flexible hose to manifold
You will need: the 12 foot gas supply hose and a 3/4
inch wrench.
Thread fitting end of hose onto manifold. Figure 16.
Tighten with wrench.
Figure 16
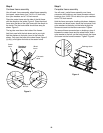
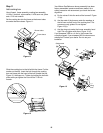
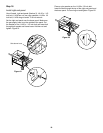
Step 15
Install side burner
You will need: side burner assembly, burner grate,
manifold bracket, 3/4 inch, 5/8 inch and an 11/16 inch or
two adjustable wrenches.
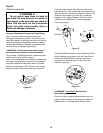
ƽCAUTION: No sealant is required on the side
burner fitting. Do not use pipe dope, tape or any
other type of sealant on the fittings or hose.
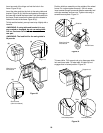
Use an 11/16 wrench to remove the protective brass cap
from the side burner fitting on the manifold. Figure 17.
ƽCAUTION: When removing the cap use a 5/8 inch
wrench to "hold" the side burner fitting to keep it
from becoming loose. If the side burner fitting
should loosen, tighten before attaching side
burner hose.
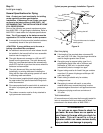
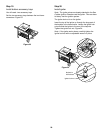
Slide the side burner assembly into the open end of the
right frame. Route the side burner hose so that it
parallels the front of the barbecue. Loop the hose so
that it reaches the side burner fitting. Attach hose and
tighten with a 3/4 inch wrench. Figure 18. Install burner
grate. Check to be sure the side burner valve is OFF.
Push side burner control knob down and turn clockwise.
Figure 17
Figure 18
Cap
Side burner fitting