


Special offers from our partners!

Find Replacement BBQ Parts for 20,308 Models. Repair your BBQ today.
Buy Weber Grill Parts. It couldn't be easier. Find your Weber parts here.
13
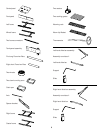
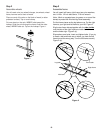
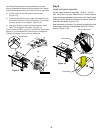
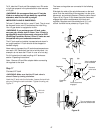
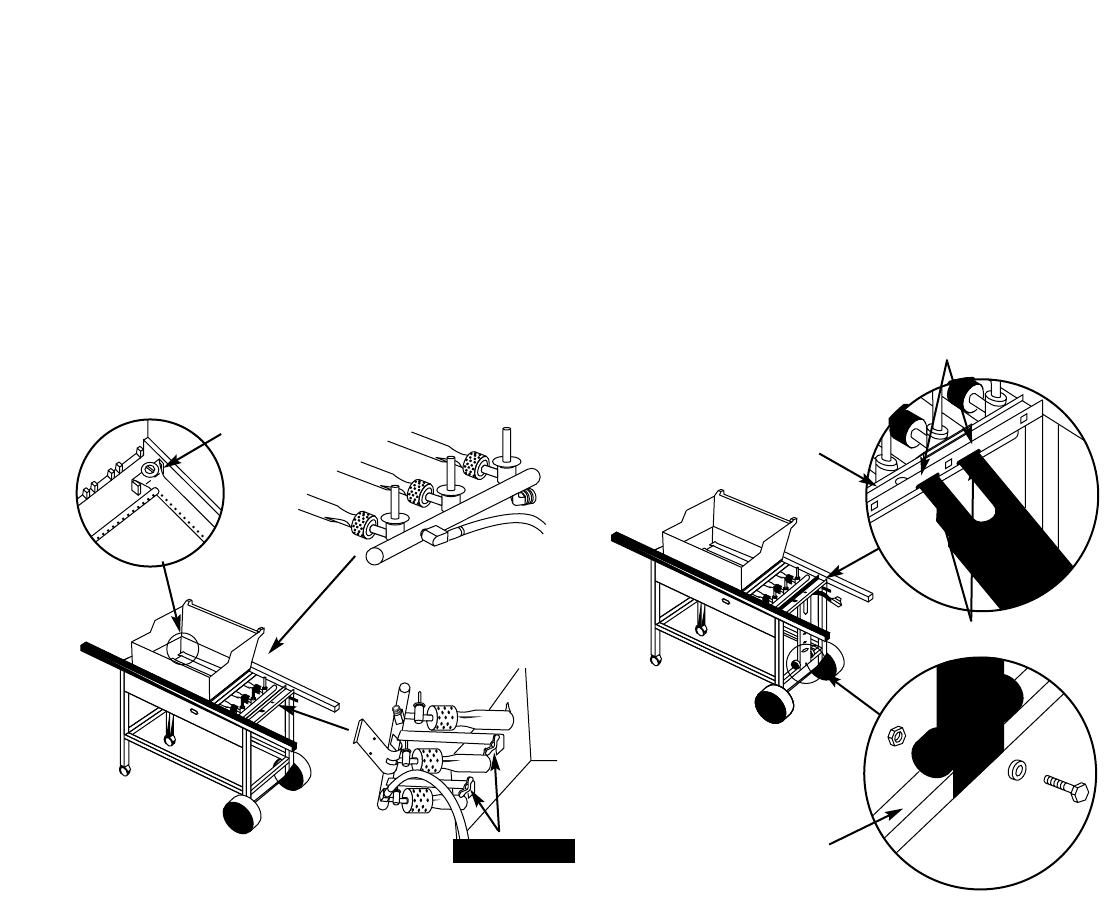
Your Weber Gas Barbecue burner assembly has been
factory assembled, pressure and flame tested. As a safety
precaution we recommend you check the burner alignment:
a) Do the valves fit into the ends of the burners?
Figure 9 (a).
b) Are the ends of the burners under the washers at the
left rear and left front of the cooking box? The screws
are only guides. Do not tighten. Figure 9 (b).
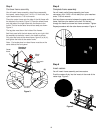
c) Are the wing nuts under the burner assembly hand
tight? Do not tighten with pliers. Figure 9 (c).
If you answered YES to a, b and c, the burners are correctly
aligned. If you answered NO, the burners are misaligned.
Contact your dealer. Do not use your barbecue.
Guide screw
Figure 9
(a)
(b)
(c)
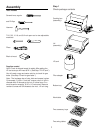
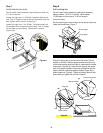
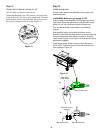
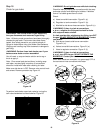
Step 9
Install tank panel assembly
You will need: tank panel assembly, 1/4-20 x 1 1/4 inch
bolt, 1/4-20 hex nut, nylon washer and a 7/16 inch wrench.
Insert the tank panel tabs into the slots in the frame brace.
Slide up until the notch at the bottom of the tank panel fits
over the cross brace. Figure 10 (a).
Add the washer to the bolt. Put the bolt through panel and
frame brace, add hex nut and tighten with the 7/16 inch
wrench. Figure 10 (b).
Figure 10
(a)
(b)
Tabs on tank panel
Slot in frame brace
Frame brace
Cross brace
Wing nuts