


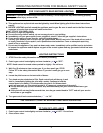
Special offers from our partners!

Find Replacement BBQ Parts for 20,308 Models. Repair your BBQ today.

4
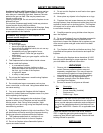
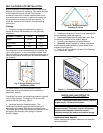
Figure 4 - Side Projection Clearance
Figure 3 - Projection Clearance
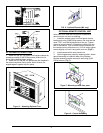
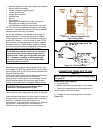
Figure 5 - Attaching Optional Trim
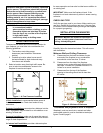
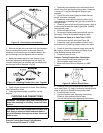
FIG. 6 - Optional Remote (MV only)
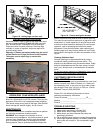
Figure 7- Mounting remote face plate
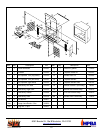
Figure 8 - Control Assembly
ATTACHING OPTIONAL TRIM
1. Attach the top SS trim piece onto fireplace cabinet by
loosening existing (3) #8 Phillips screws, slide trim into
place, then tightening down screws.
2. Attach the (2) side SS trim pieces onto the fireplace in
the same manner as the top piece. Note: Be sure the
angled edges fit against top trim piece.
OPTIONAL REMOTE CONTROL UNIT
Note: Be sure to read the instructions included with
remote control unit prior to installing.
1. Install the remote control unit into remote control
bracket and using (2)#8 Phillips screws. Be sure that the
word "TOP" is on the left-hand side of the unit. Tighten
screws to a point where 2-3 threads are visible from the
rear of the bracket. This will allow enough clearance for
the remote cover to slide onto unit. If unit is loose, tighten
screws slightly until unit is snug with cover on. (Fig 6.)
2. Install remote switch onto remote unit.
3. Open hinged lower panel by releasing catch. Attach
remote assembly to inside left side of the fireplace.
Remote assembly can be secured to wall using (2)#8
Phillips screws ( Fig 7).