


Special offers from our partners!

Find Replacement BBQ Parts for 20,308 Models. Repair your BBQ today.
6
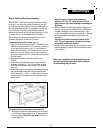
Mountings
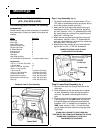
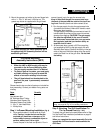
Complete view of Cart Assembly
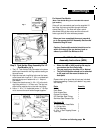
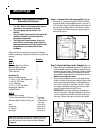
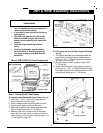
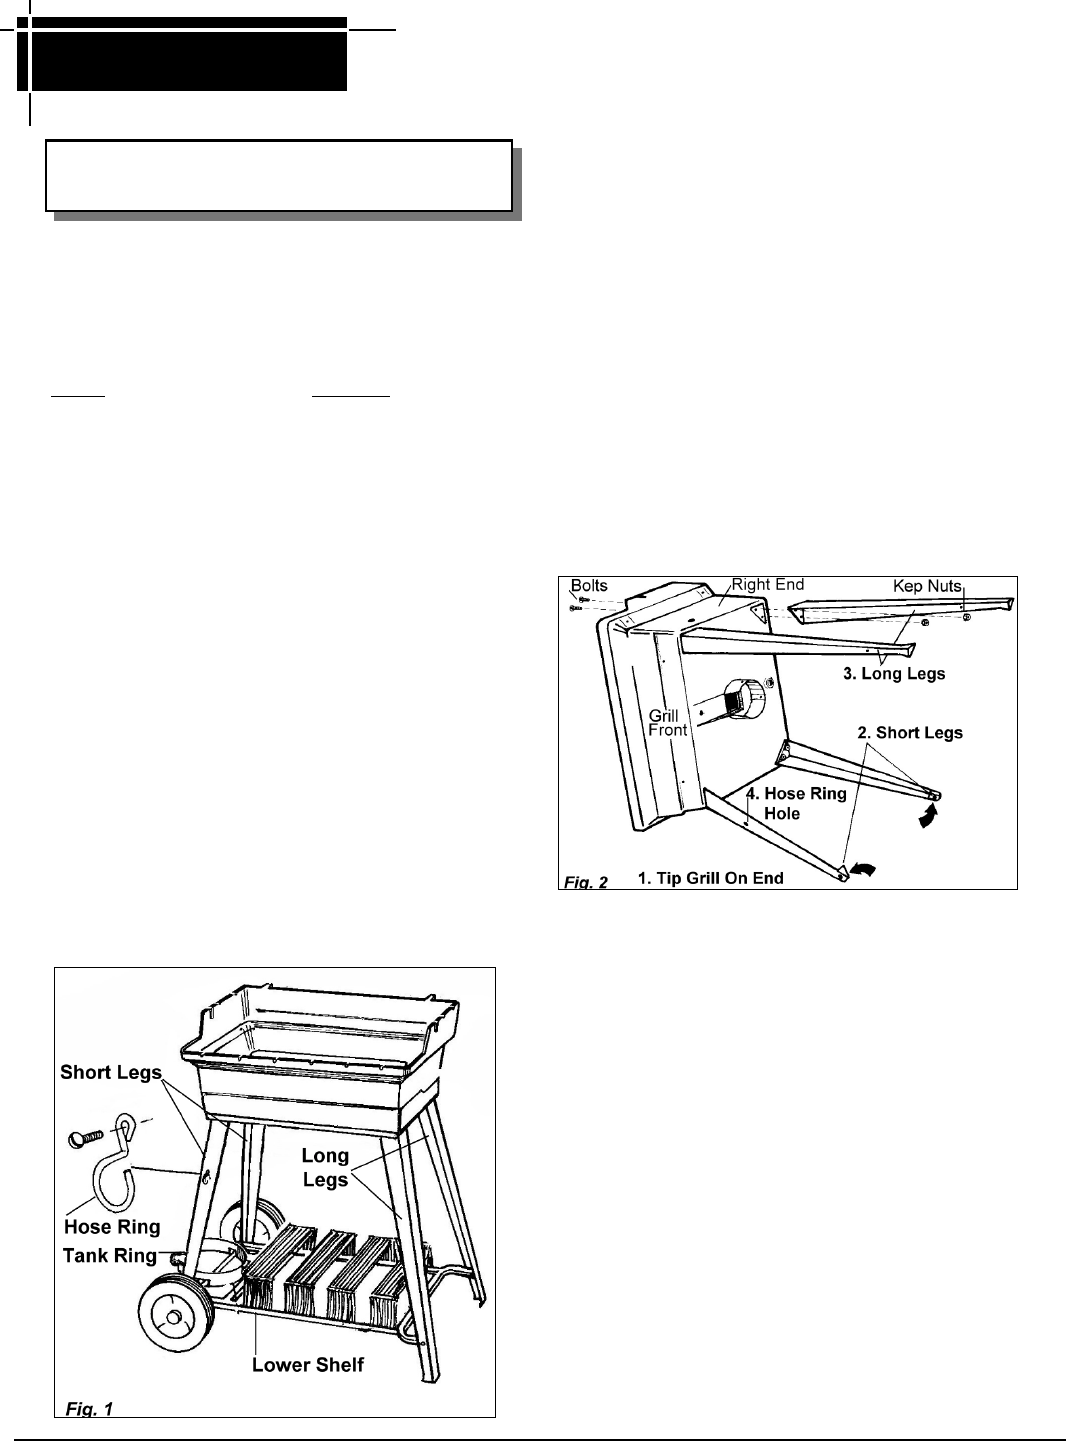
Step 1: Leg Assembly
(Fig. 2)
1. Tip the grill head bottom on end as shown in Fig. 2.
(TIP: work on protected area such as: carpet, tarp or
one of the boxes to protect cart finish.)
2. Attach the two short legs to the left end of the grill
head bottom with the “Hose Ring Hole” leg facing
grill front. Use two ¼-20 x 1½" slotted bolts for each
leg. Insert bolts from inside grill box, attach leg and
fasten with ¼-20 Kep nuts.
3. Attach the two long legs to the right end of the grill
head bottom. Use two ¼-20 x 1½" slotted bolts for
each leg. Insert bolts from inside grill box, attach leg
and fasten with ¼-20 Kep nuts.
4. Attached the hose clamp ring to the front left short
leg with the 10 x 24 x ½" Rd. Hd. slotted bolt.
FINGER TIGHTEN ALL BOLTS UNTIL
LOWER SHELF IS ATTACHED.
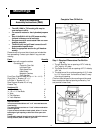
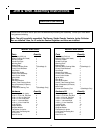
Cart Mounting carton contains the following
components:
Please check to be sure that all parts are included be-
fore proceeding. Contact your dealer if any parts are
missing.
Parts
Quantity
Long Legs 2
Short Legs 2
Lower Shelf Frame 1
Stainless Grease Cup 1
Grease Cup Holder 1
8” Rubber Wheels 2
Axle Hitch Pins 2
Axle Washers 2
Hub Caps 2
Hose Retaining Ring 1
LP Tank Holder Ring Assembly 1 (Propane Models Only)
Hardware Kit
¼-20 x 1 ½" Rd. Hd. Sltd. Bolts 11
¼-20 Kep Nuts 15
10-24 x ½" Rd. Hd. Sltd. Bolt 1
10-24 x ½" Hex Kep Nut 1
¼-20 Thumb Sc 1 (Propane Cart Only)
¼-20 x ¾" Hex Head Bolt 1 (Propane Cart Only)
12’ Natural Gas Hose 1 (Nat. Gas Cart Only)
Brass Quick-Disconnect 1 (Nat. Gas Cart Only)
Quick-Disconnect Dust Plug 1 (Nat. Gas Cart Only)
Dust Cap 1 (Nat. Gas Cart Only)
Cart Assembly Instructions
(JCP, JCN, WCP & WCN)
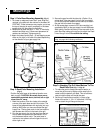
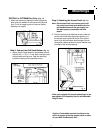
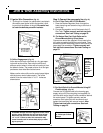
Step 2: Lower Shelf Assembly
(Fig. 3)
1. Slip the lower shelf axle through the holes in the
short legs.
2. Slide the wheels on the axle ends, then a washer
on each, followed by a hitch pin clip through the
axle hole. Tap plastic hub cap lightly to secure
tight.
3. Align the other end of the lower shelf with the holes
in the long legs. For the JNR model, slip the axle
through the holes and fasten both ends with the
threaded ¼-20 x ¾" slotted Rd. Hd. head bolt. For
WNK model, use two ¼-20 x 1½" bolts and Kep
nuts to fasten the lower shelf to the long legs (see
Fig 3 inset).
STAND GRILL UPRIGHT TO SEAT LEGS AND
TIGHTEN ALL BOLTS AND NUTS MAKING THE LEGS &
FRAME RIGID. PERIODICALLY CHECK ALL
FASTENERS FOR TIGHTNESS.