


Special offers from our partners!

Find Replacement BBQ Parts for 20,308 Models. Repair your BBQ today.
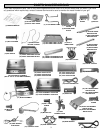
6
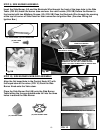
FIG. 2
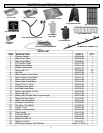
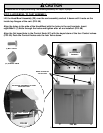
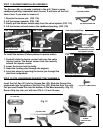
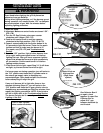
STEP 3) Front Crossbar Assembly:
Turn cart assembly right side up. Attach
Front Crossbar (21/22) to side panels
with two M6 x 15 screws into the
threaded inserts in the ends of Side
Panels. (FIG. 3A)
Attach Bottom Panel Brace (9/10) to
Crossbar (21/22) with two Screws and
Nuts.
On top inside of Crossbar, attach three
M6 x 15 Screws through Side Panels into
the threaded inserts. (FIG. 3B)
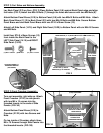
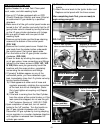
(5/6) BOTTOM PANEL
INSTALL M6 (7) BOLTS
AND NUTS (8) AT ARROWS
(19/20) RIGHT
SIDE PANEL
(14/15) LEFT
SIDE PANEL
(21/22) CROSSBAR
ATTACH OUTER
SCREWS INTO
THREADED INSERTS
ATTACH WITH TWO SCREWS
AND NUTS TO BOTTOM
PANEL BRACE
FIG. 3A
ATTACH SCREWS TO
THREADED INSERTS
(TOP INSIDE)
FIG. 3B
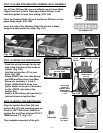
ATTACH BOTTOM PANEL BRACE (9/10) TO BACK
PANEL BRACE (11/12) WITH ONE ST4.0 X 10MM SCREW (13)
(11/12) BACK
PANEL BRACE
(8) M6 NUT
(7) M6 x 15 BOLT
(13) ST4.0 x 10mm
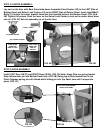
Install four ST4.0 x10mm Screws (13)
from inside the Back Panel to the
LEFT Side Panel (14/15) and RIGHT
Side Panel (19/20).
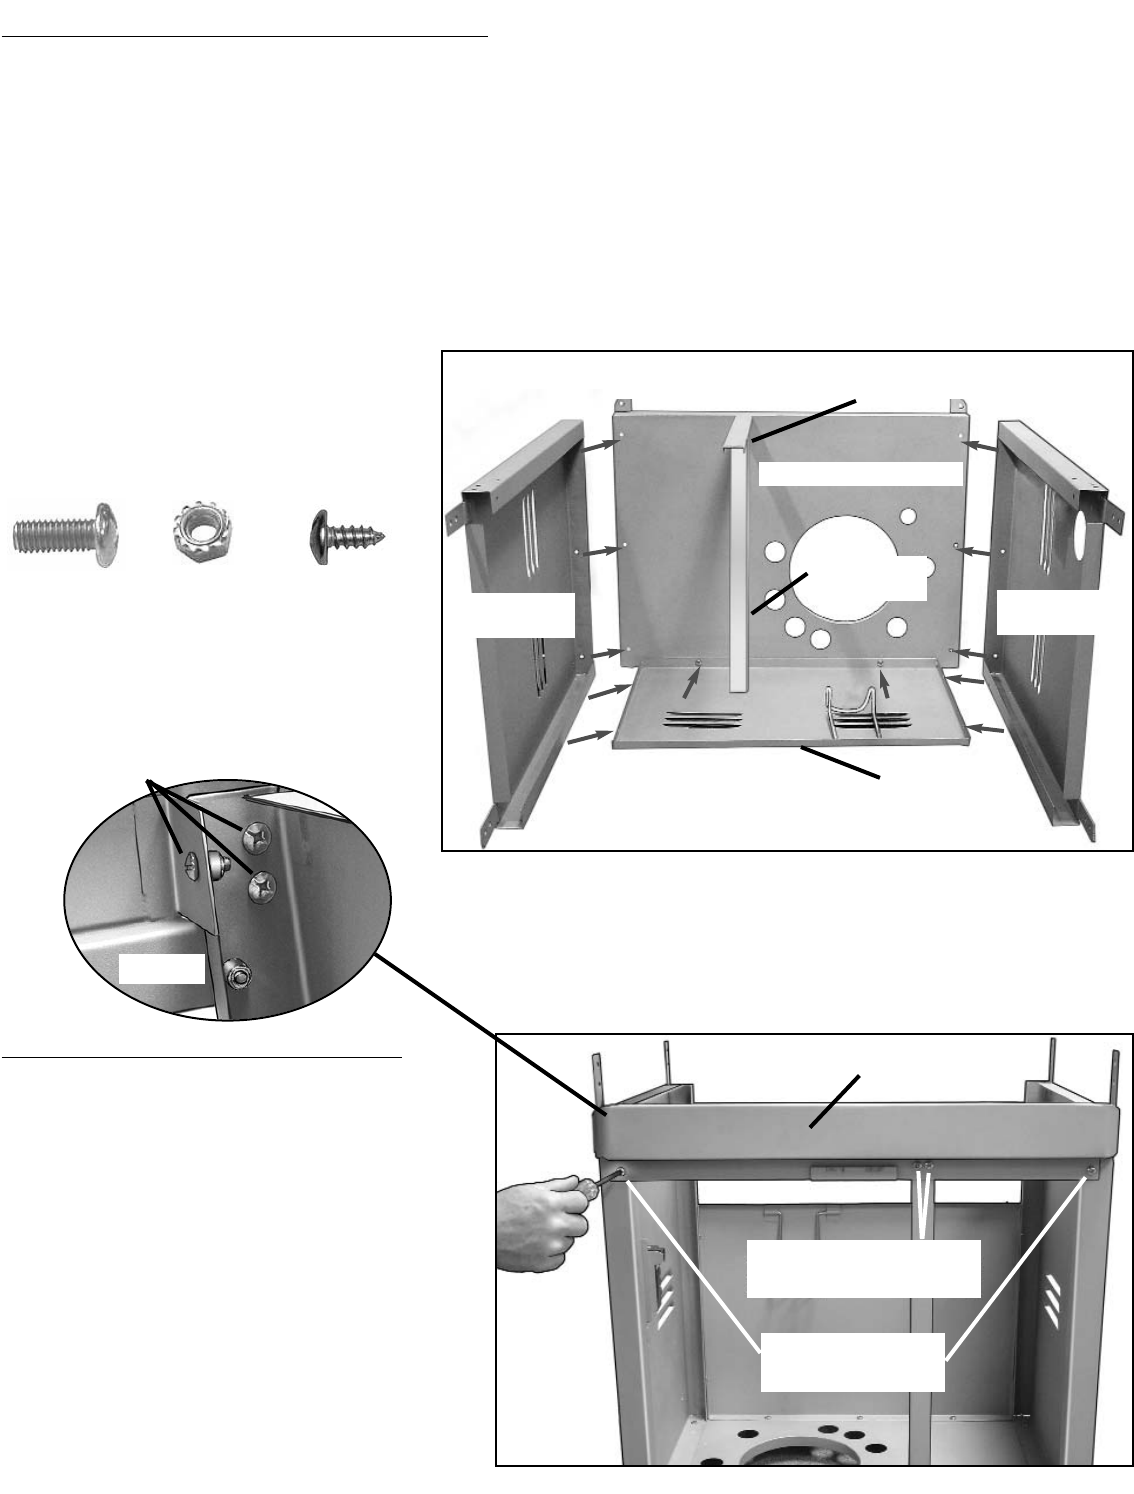
STEP 2) Cart Sides and Bottom Assembly:
Lay Back Panel (2/3) on floor. (FIG. 2) Place Bottom Panel (5/6) against Back Panel edge and align
the holes. (FIG. 2) Install two M6x15 Bolts (7) through the holes and secure with two M6 Nuts (8).
Attach Bottom Panel Brace (9/10) to Bottom Panel (5/6) with two M6x15 Bolts and M6 Nuts. Attach
Back Panel Brace (11/12) to Back Panel (2/3) with two M6x15 Bolts and M6 Nuts. Secure Bottom
Panel Brace and and Back Panel Brace with one ST4.0 x10mm Screw (13).
Attach Left Side Panel (14/15) and Right Side Panel (19/20) to Bottom Panel with six M6x15 Screws
and M6 Nuts.
(2/3) BACK PANEL