


Special offers from our partners!

Find Replacement BBQ Parts for 20,308 Models. Repair your BBQ today.
6
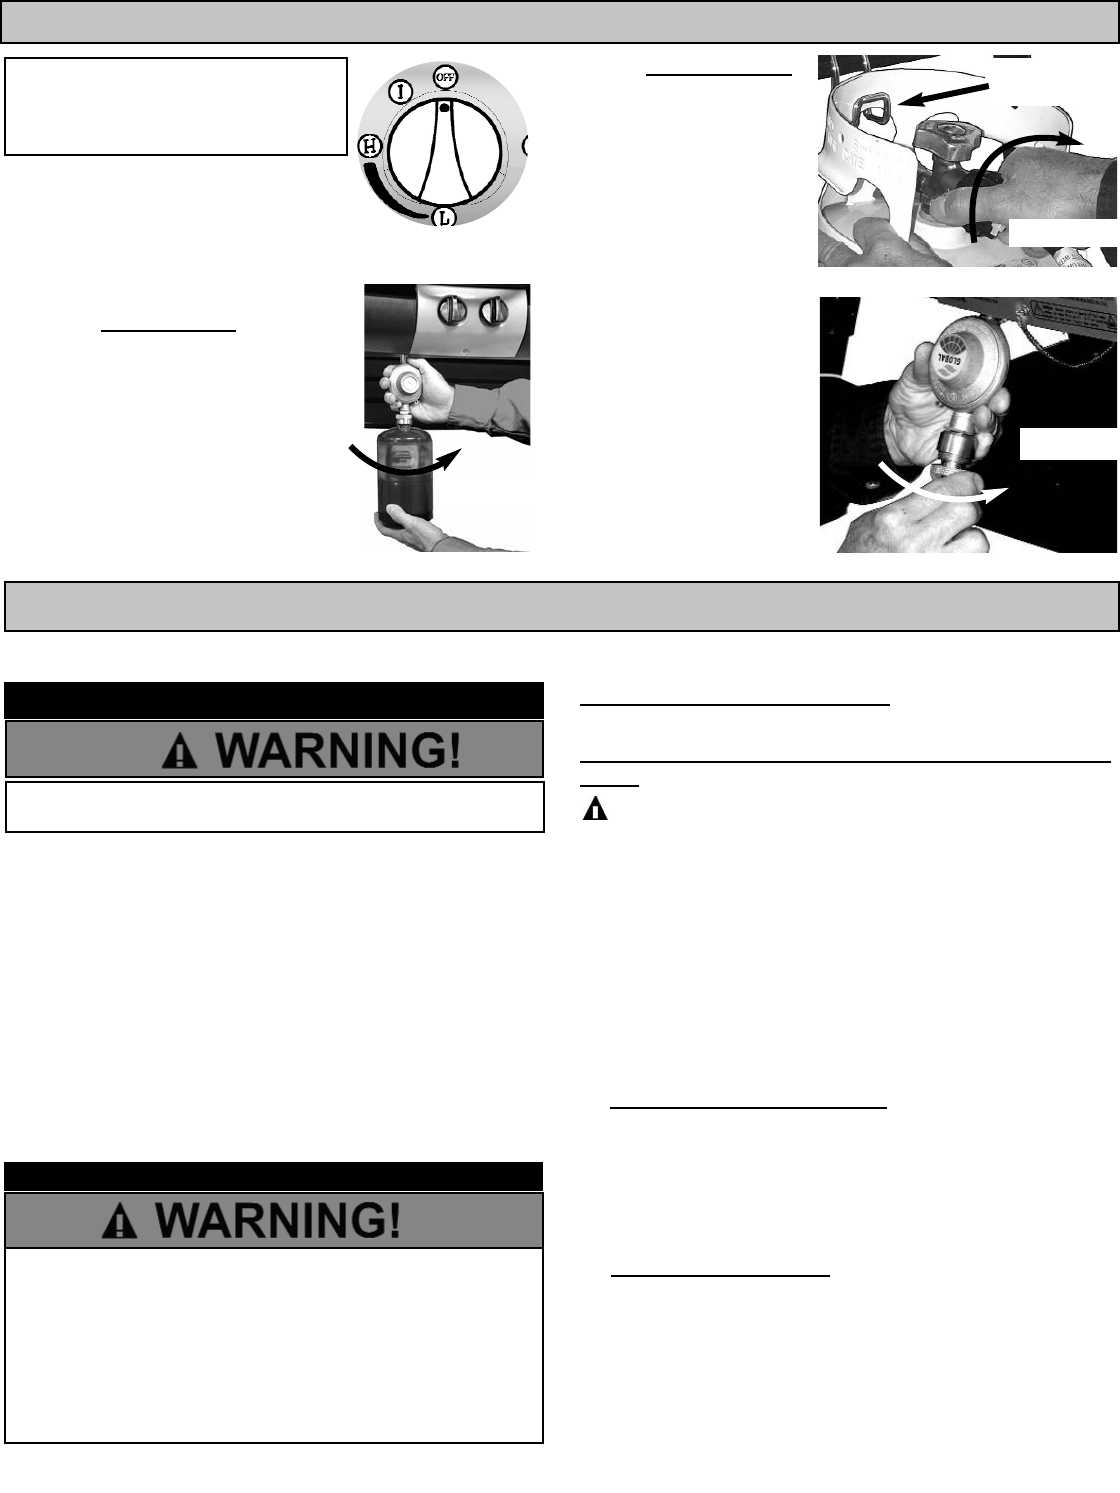
FIG. 15B
FIG. 15A
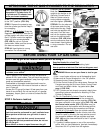
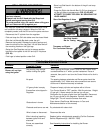
BEFORE USING YOUR LP GAS GRILL
STEP 1. Set up grill at the location where you will be using it.
· Do not use an LP gas grill indoors, on recreational
vehicles, or on a boat.
· This LP gas grill is for outdoor use only and should be
placed on firm, level surface. The grill should be placed in
an open area with good ventilation, away from high traffic
areas and combustible materials.
· Combustible or flammable materials should never be
used or stored within 36 inches of the back or sides of
your LP gas grill.
· Locate your LP gas grill at least 10 feet away from your
house or any building. Do not use the grill in a garage,
breezeway, carport, porch, or under a surface that can
catch fire.
Selecting a Location
STEP 2. Perform a leak test.
· Always perform a leak test before each use.
· Leak test must be performed in a well ventilated area.
· Never perform a leak test on a grill while in use or
hot.
· If you detect a gas leak that cannot be corrected
by using the leak test procedures below, do not use
the LP gas grill.
· Never smoke or have an open flame near the grill.
Leak Testing
Supplies Needed for a Leak Test
Clean paint brush, water, and dishwashing liquid.
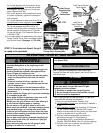
How to perform a leak test: See leak test diagrams next
page.)
WARNING! Never use an open flame to test for gas
leaks.
1) Mix 1-cup of water with one cup of dishwashing liquid.
2) Make sure all Control Knobs are in the “Off” position.
3) Remove the two Cooking Surfaces.
4) Pull the Control Knobs off the valve stems. Remove the
5-screws securing the Grid Insert Guide, Control Panel
and Chain and Match Holder. Lay parts aside. (See
page 11 FIG. 22A)
5) If LP Cylinders are not already connected, attach them
according to above instructions for Attaching LP Gas
Cylinder to Regulator.
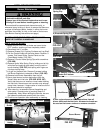
6) (For 1lb. Disposable Cylinders)
Check for leaks by
brushing the soap solution around the connections
between the gas cylinder and the regulator (FIG. 17A),
the hose connection to the contol valve (FIG. 17B), and
the Control valve nozzle. (FIG. 17C) Make sure you
generously brush the locations with the soap solution,
completely surrounding the connections and fittings.
(For 20 lb. LP
Cylinders) Open the cylinder valve by
turning the LP gas cylinder handle counter-clock wise.
Check for leaks by brushing the soap solution around
the connection between the gas regulator and hose
(FIG. 18A) and the hose connection to the LP cylinder
valve (FIG. 18B)
7) If “growing” bubbles appear on any of the connection
points, then you have detected a gas leak. Immediately
disconnect the LP cylinder from the regulator.
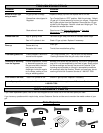
ATTACHING THE LP GAS CYLINDER TO THE REGULATOR
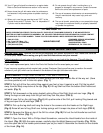
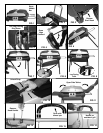
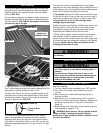
STEP 3B. (20 lb Cylinder)
Hook the 20 lb. Cylinder
upright to the hanger on the
right side. Connect end of
hose to Cylinder valve by
turning counter-clockwise
and hand tighten. (FIG.16A)
STEP 4B. Run the other end
of the hose under the Leg
shelf behind the leg. Grasp
and hold the regulator with
one hand. Push the hose
end into the regulator nipple
and turn the knurled knob
clockwise. (FIG. 16B) Make
sure the connection does not
cross thread. Hand tighten to
a snug connection. Do not
use tools.
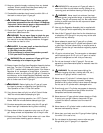
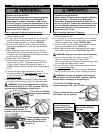
STEP 1. Turn the Grill Control Knobs
to the “OFF” position. (FIG. 15A)
STEP 2. Remove the protective cap
from the cylinder gas nozzle. Keep it
for re-capping.
STEP 3A. (1 lb Cylinder)
Grasp the
Regulator with one hand. Hold the LP
cylinder upright with other hand, push
the LP Cylinder nozzle into regulator
nipple and turn counterclockwise.
(FIG. 15B) Do not turn Cylinder
upside down. Make sure the connec-
tion does not cross thread.
STEP 4A. Hand tighten to a snug
connection. Do not use tools.
FIG. 16A
FIG. 16B
LP Cylinder
Hanger
NOTE: Your Gas Grill uses a 1 lb.
Disposable LP Cylinder but a 20
lb. cylinder and 4 ft adaptor hose
can be purchased separately.