


Special offers from our partners!

Find Replacement BBQ Parts for 20,308 Models. Repair your BBQ today.
5
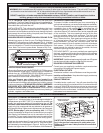
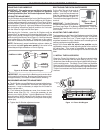
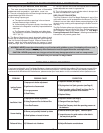
This is a SLIDE-IN TYPE unit designed to fit into open-front
enclosures. The Front Panel (Face) of the unit is removable for
gas hookup, servicing and Burner adjustment, and MUST remain
removable after you install the unit.
INSTALLER NOTE: This unit should be installed so that it can
be removed at a later date if factory service is required. Any
protrusion into the Barbecue enclosure may obstruct the frame
and prevent the unit from sliding into place (see "Gas Supply
Plumbing Requirements" below).
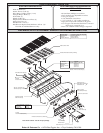
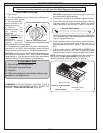
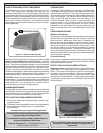
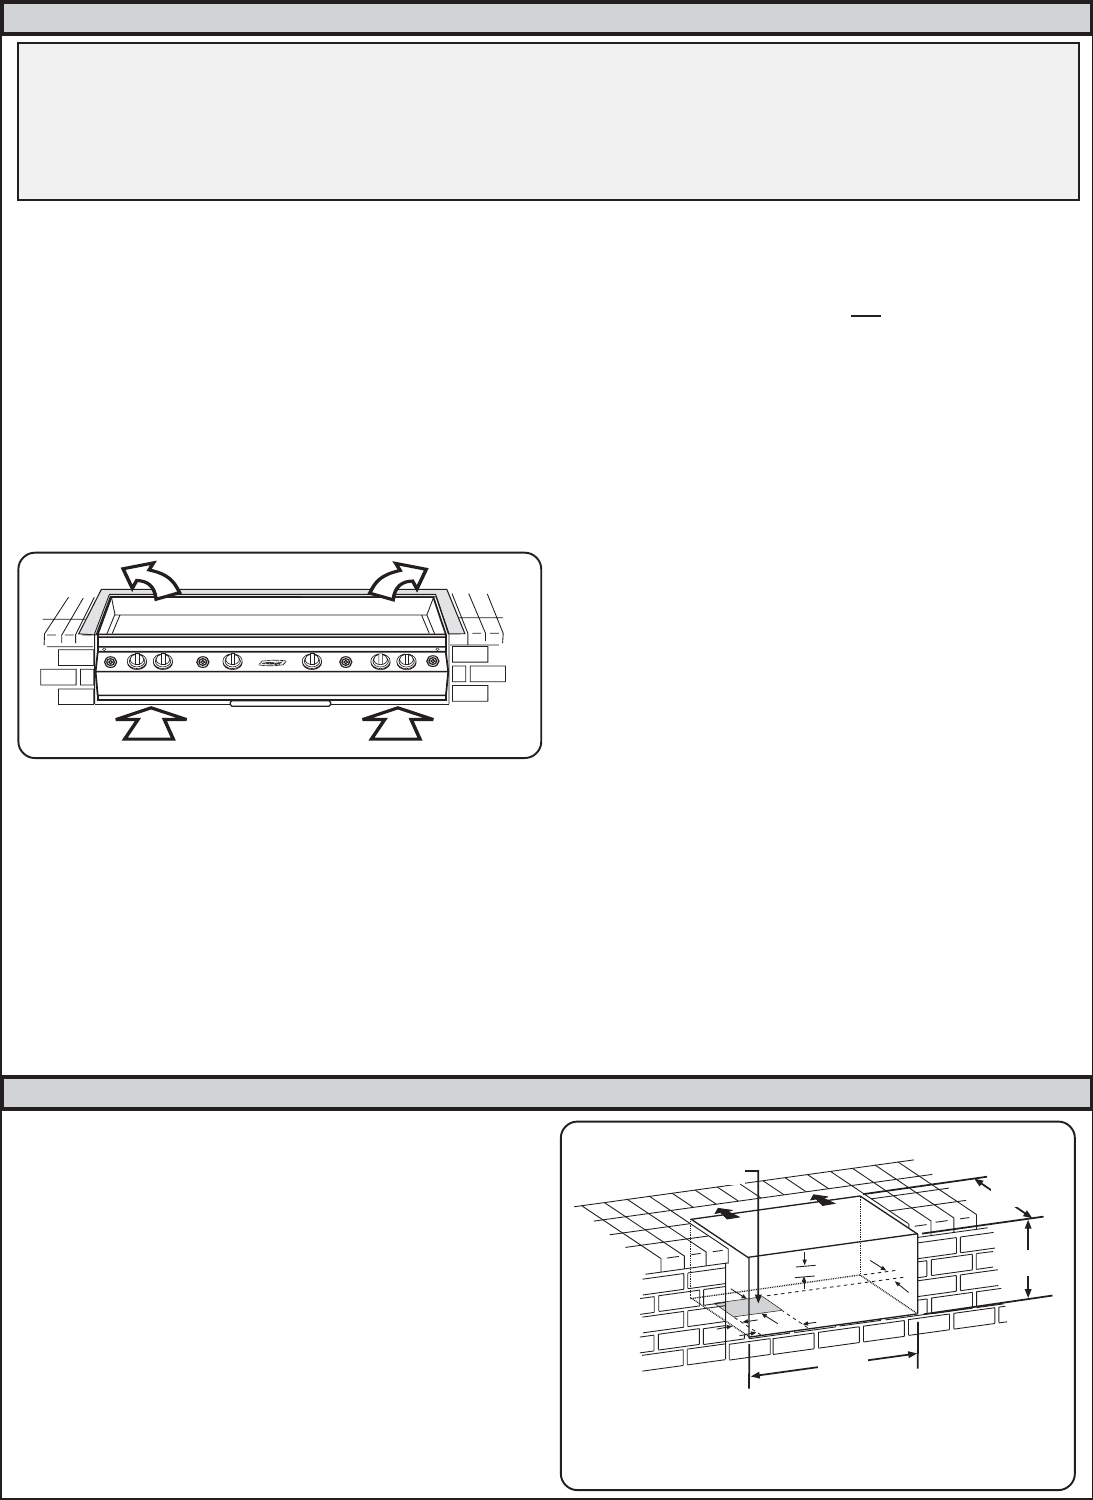
ENSURING PROPER COMBUSTION AIR & COOLING FLOW
Maintaining proper air flow for your Fire Magic Barbecue is
essential if it is to perform as it was designed (Fig 1). If airflow
is blocked, overheating and poor combustion will result. Make
sure not to block the 1" front air inlet along bottom of Barbecue
Face. Note: The front air space allows access to Drip Tray.
Fire Magic Barbecues are designed FOR OUTDOOR USE ONLY.
WARNING: Built-in models must be installed in masonry or other type of fireproof enclosure. The unit is NOT insulated
and therefore must be installed with 18" of side and back clearance from unprotected combustible materials such as
wood, plastic, or stucco with wood framing.
DO NOT install this unit under unprotected flammable surfaces. DO NOT install or use this appliance inside a
building, garage, or any other enclosed area including recreational vehicles or boats.
PLANNING FOR INSTALLATION OF YOUR ELITE 50 GOURMET BARBECUE
VENTILATION OF ENCLOSURES
When using Propane gas, take EXTREME CAUTION to ensure
ample ventilation of gas vapor. Propane vapor is invisible and
heavier than air. A DANGEROUS EXPLOSION could occur,
resulting in SERIOUS INJURY, OR LOSS OF LIFE if Propane
gas is allowed to accumulate and then ignite.
Figure 1
Ventilation Diagram
Only one Propane gas cylinder may be located in an
enclosure. Extra or spare cylinders must be stored outdoors
out of the reach of children and outside of any building, garage
or other enclosed area. READ AND FOLLOW ALL WARNINGS
PROVIDED WITH PROPANE GAS CYLINDERS. Never
locate a cylinder under or near Barbecue unless sufficient
ventilation and shielding is provided to prevent any heating of
cylinder, regulator and rubber hose.
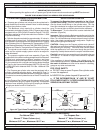
PROPANE CYLINDER ENCLOSURES
To prevent invisible combustible gas from accumulating in
your cylinder enclosure, you must provide adequate ventilation.
This is accomplished by having one side of the enclosure left
completely open to the outside
OR by providing four (4)
ventilation openings. Two openings are to be at the cylinder
valve level (Approx.16” above the floor) and on opposite walls
of the enclosure. Two more openings must be at the floor
level on opposite sides of the enclosure. The floor level
openings must start at the floor and shall extend no higher
than 5” above the floor. Each opening must have a minimum
of 10 square inches (64.5 cm
2
) of free area. To achieve the
proper ventilation, you may drill a series of holes, omit the
grout from masonry joints or replace a brick with a hardware
cloth screen. If the floor in the cabinet is raised and the
space beneath the cabinet is open to the outside, the lower
ventilation openings may be in the floor.
FOR YOUR SAFETY, you must provide these openings for
drainage, replacement air and cross ventilation of any storage
area exposed to possible leakage from gas connections, the
Barbecue or Propane Cylinder.
IMPORTANT: Additional requirements for safe use of Propane
gas and gas cylinders appear on Pg. 6 of this manual.
HOUSEHOLD PROPANE GAS SERVICE
Consult your gas supplier for ventilation requirements when
connecting to a household Propane supply.
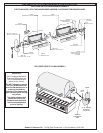
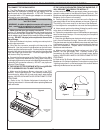
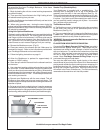
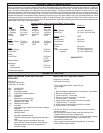
GAS SUPPLY PLUMBING REQUIREMENTS
Rigid 3/4" or 1” black steel pipe, or local code approved pipe for
temperatures up to 800°F (427°C), is required to conduct gas
supply into enclosure opening for connection to the unit. Do
not use a rubber hose within enclosure for Barbecue unit.
Apply only joint compounds that are resistant to all gasses on
all male pipe fittings. Make sure to tighten every joint securely.
NOTE: Review page 7, prior to connecting unit. If 1/2” Pipe
is used, it should be no longer than five feet and only to conduct
Gas Supply into Barbecue cut out for connection to the Flex
Connector. The gas supply pipe should enter through the floor
at rear of enclosure and terminate near the left end (Figure 2).
Install gas line stub at least 2" away from the left side and back
walls, but within 9" of the back wall and 14” from the left wall,
as illustrated by the shaded area in Figure 2. No Pipe or fittings
should rise higher than 2 1/2” into the bottom of the Barbecue.
23 3/4"
DEPTH
CONNECT TO GAS LINE
STUB IN THIS AREA
51"
WIDTH
12"
HEIGHT
2
1
7
12
3
ELECTRICAL OUTLETS
All electrical outlets in area of Barbecue must be grounded.
Installer and User Note: Keep electrical supply cords away
from all heated surfaces.
EXHAUST REMOVAL
If installed under a patio roof, the grill area should be fully
covered by a chimney and exhaust hood. An exhaust fan with
a rating of 1000 CFM (cubic feet per minute) or more may be
necessary to efficiently remove smoke and other cooking by-
products from the covered area. Installation in fully-enclosed
patio areas is not recommended.
Figure 2 - Gas Stub Diagram
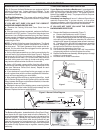
SAFETY NOTE: An external valve (with a removable
key) in the gas line is necessary for safety when your
Barbecue is not in use. It also provides for convenient
maintenance
GAS SUPPLY REQUIREMENTS