


Special offers from our partners!

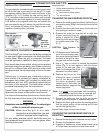
Find Replacement BBQ Parts for 20,308 Models. Repair your BBQ today.
34
BACKBURNER (IF EQUIPPED)
The backburner is set at the factory and will not
require adjustment unless this unit is converted or
used at an elevation above 2,000 ft.
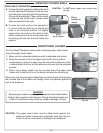
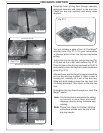
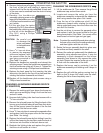
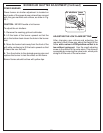
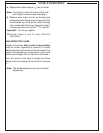
Flames from a properly adjusted backburner will
appear as a horizontal line of even blue fl ames along
the bottom of and behind the backburner grating. The
grating itself will glow red after it heats up.
Note: It is normal for the backburner to smoke
when it is fi rst used. Burning the backburner
on HI LIGHT for approximately 15 minutes
will eliminate the smoking.
If, instead of being blue and even, the backburner
fl ames appear to have orange in them and waver
slowly left and right, or if the fl ames appear to lift
off the burner, adjust the backburner air shutter by
following the steps below.
The backburner air shutter adjustment is located
behind the right side of the access panel in the back
of the oven, above the cooking grid.
Note: It is only necessary to remove the backburner
back panel, not the backburner, when
adjusting the backburner air shutter.
1. Follow the safety precautions and steps for
backburner back panel removal (steps 1-4) in
the CHANGING THE BACKBURNER ORIFICE
section.
CAUTION: The backburner air shutter can be
safely adjusted with the backburner lit
if it is adjusted using a long-handled
screwdriver or well-insulated fi re and
heat-resistant gloves.
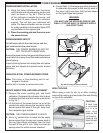
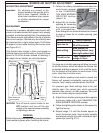
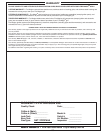
2. Adjust the air-shutter opening by loosening the
adjustment screw with a
screwdriver, then sliding
the air shutter backward
or forward to open or
close the air shutter
opening (see Fig 34-2).
Watch the backburner
flames while adjusting
the air shutter.
Too large an air shutter opening will allow too much
air into the burner, which will cause the fl ames fi rst
to shorten and then to appear to lift up off the ports.
For the bottom of the fl ames to move closer to the
ports, close the air shutter more.
If the air shutter opening is too small or closed, the
fl ames will present consistently orange tips and
become “lazy,” slowly wavering left and right.
3. Continue adjustment until the fl ames appear to
touch the burner ports, burning fairly steadily,
consistently, and almost entirely blue with some
light-yellow tips (see Fig. 34-1), then retighten
the backburner air shutter adjustment screw.
4. Replace the burner access plate (step 8 in the
CHANGING THE BACKBURNER ORIFICE
section).
Fig. 34-1
Blue fl ames behind burner screen
Back panel
Fig. 34-2
Backburner air shutter
adjustment screw
Open
Close
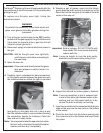
SIDEBURNER
The sideburner is set at the
factory and will not require
adjustment unless this unit
is converted or used at an
elevation above 2,000 ft.
The flames from a properly
adjusted sideburner will touch the burner ports and
appear mostly blue with light-yellow tips.
If they are orange, “lazy,” or lift off the burner ports,
then adjust the sideburner air shutter using the
following steps.
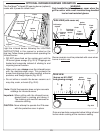
The sideburner air shutter is located underneath the
sideburner shelf on the left side of the unit, near the
wall of the cart. It can safely and easily be adjusted
while the sideburner is lit.
CAUTION: Do not touch the sideburner or the
shelf around it. They will be hot while
adjusting the sideburner air shutter.
1. Light the sideburner following the lighting
instructions in this manual.
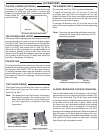
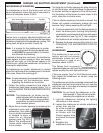
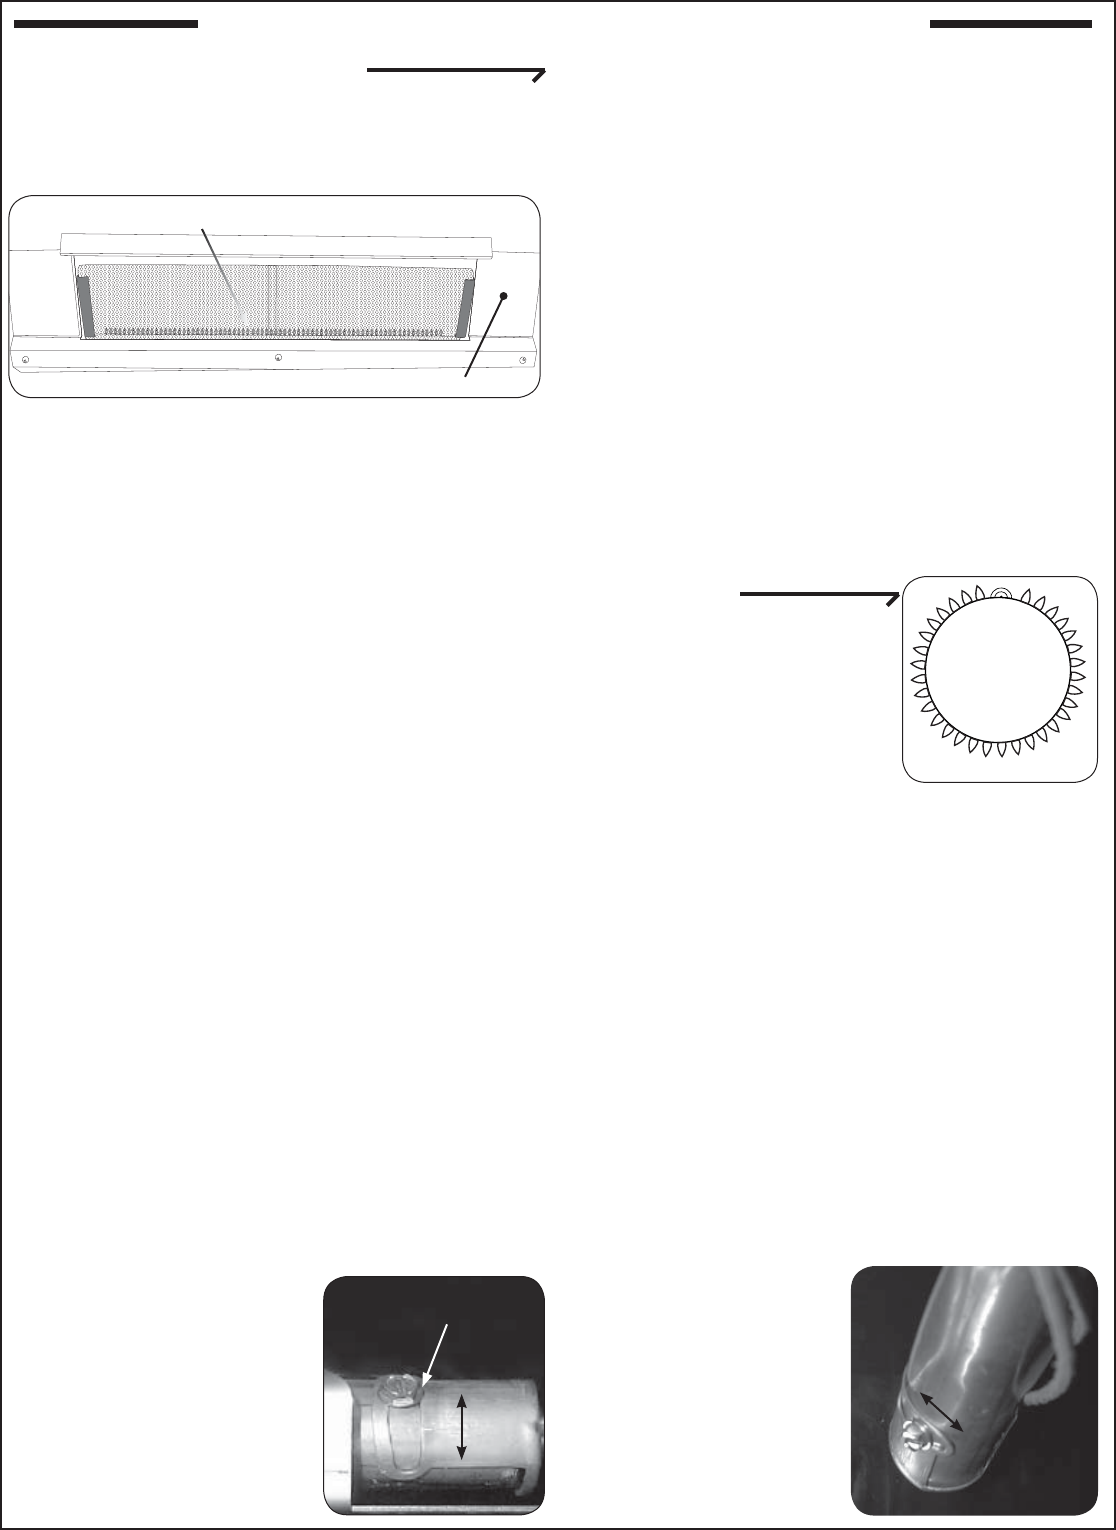
2. Loosen the sideburner air shutter adjustment
screw, then use the
tip of the screwdriver
to open or close the
air shutter until the
flames appear blue
and touch the burner
ports.
3. Retighten the
adjustment screw.
Fig. 34-4
Close
Open
Fig. 34-3
BURNER AIR SHUTTER ADJUSTMENT (Continued)