


Special offers from our partners!

Find Replacement BBQ Parts for 20,308 Models. Repair your BBQ today.
22
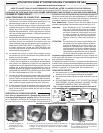
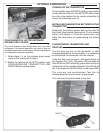
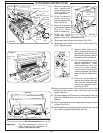
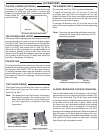
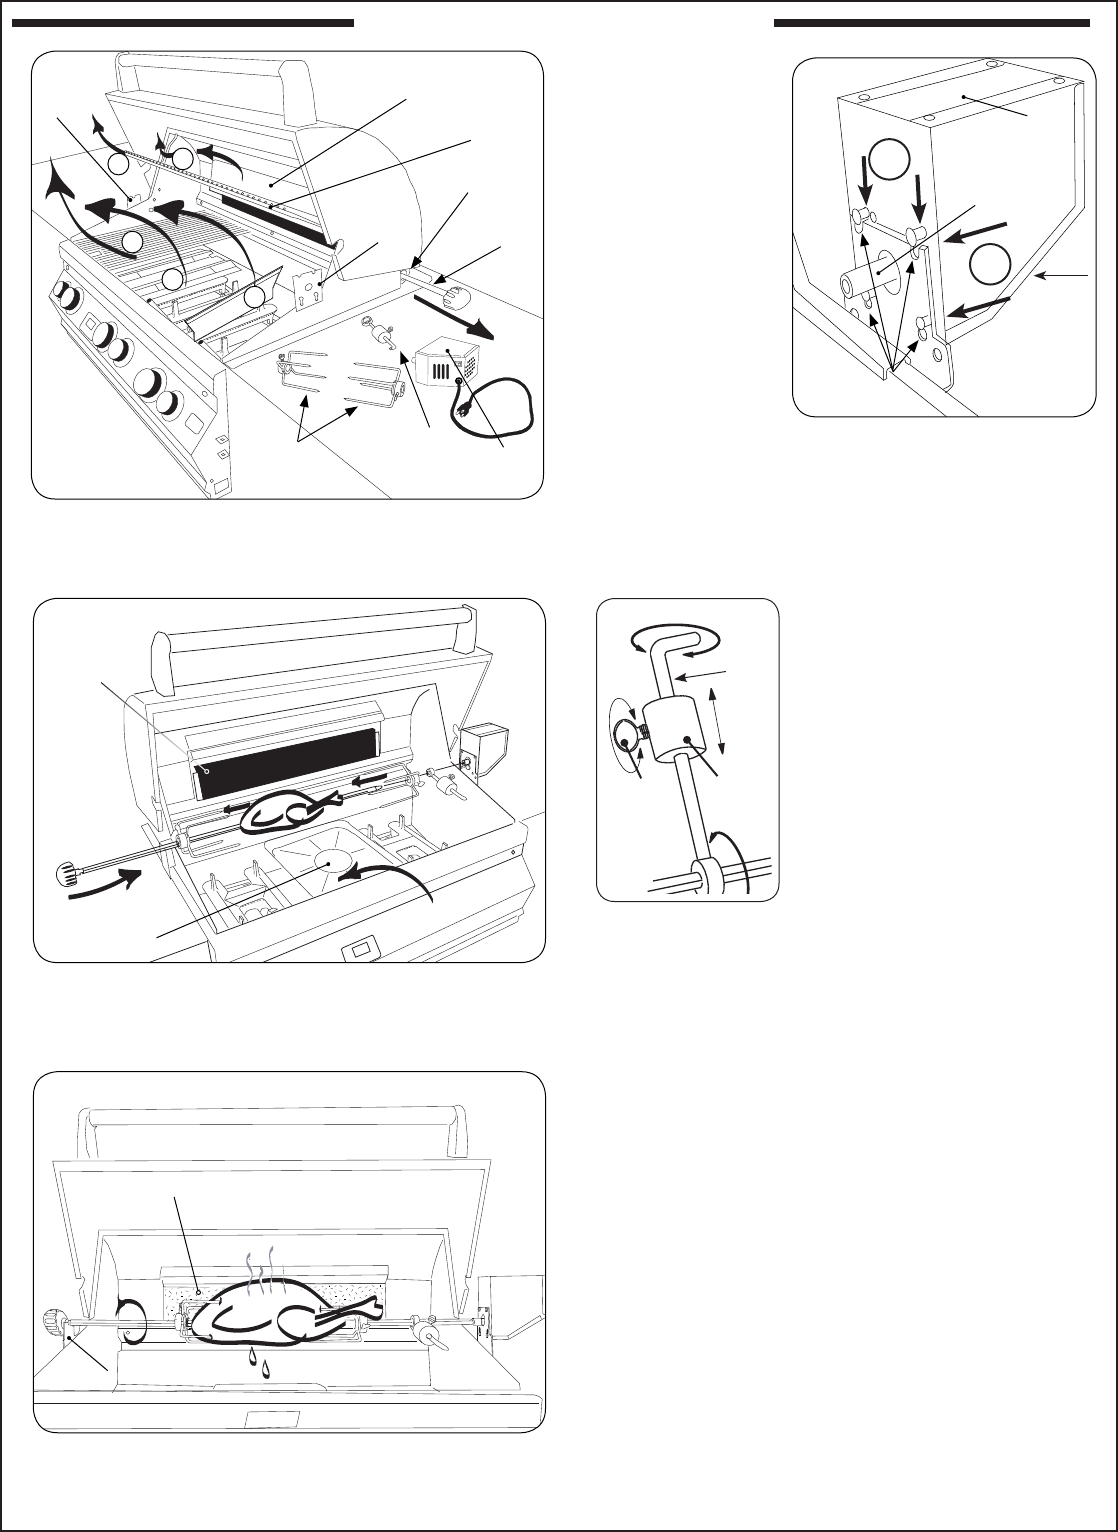
ROTISSERIE INSTRUCTIONS
Backburner cover
Warming rack
Rotisserie rod
bracket
Rotisserie
rod
and
knob
Rotisserie
motor
Meat
holders
Counter-
balance
Rotisserie
motor
bracket
A
B
2
1
Rotisserie
rod
bracket
Fig. 22-1
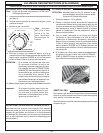
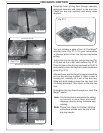
Drip
Tray
Fig. 22-3
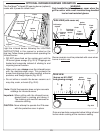
Backburner
(unlit)
Fig. 22-5
Backburner
(lit)
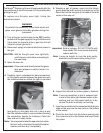
1. Remove warming
rack, backburner
cover, cooking grids,
flavor grids, and
zone separators.
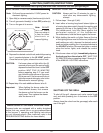
2. Slide rotisserie
motor fully onto
motor bracket (right
side, Fig. 22-2).
3. Remove rotisserie
rod from rear bracket
(Fig. 22-1) attach
knob if necessary.
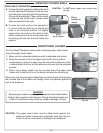
4. Slide left meat
holder onto rod as
shown in Fig. 22-3 and tighten screw.
5. Slide meat onto rod and into holder (Fig. 22-3).
6. Slide right meat holder onto rod and into meat (Fig.
22-3). Tighten screw.
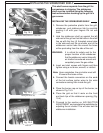
7. Support both ends of the
rod so it spins freely (do not
grip tightly). Allow the rod to
rotate until the heavy side of
the meat points downward.
8. The counterbalance may
then be attached to even
weight distribution. Slide
counterbalance onto rod
next to the meat holder.
Loosen the arm and point it
upward opposite the heavy
side of the meat. Tighten the
arm.
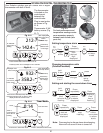
9. Slide the counterbalance
weight up or down the arm
until the rod rotates most
evenly then tighten thumb
screw (Fig. 22-5).
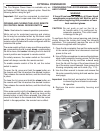
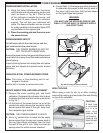
10. Insert the pointed end of the rod into the motor drive
socket and the groove next to the knob into the left
support bracket.
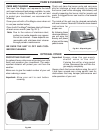
11. To keep drippings off the burners and simplify cleanup,
place Fire Magic
®
drip tray liners under the meat, if
desired.
12. Plug-in the rotisserie motor and press the rocker switch
to start (Fig. 22-6).
13. Light backburner per lighting instructions in this manual
or on drip tray handle and close oven lid.
Important: Turn the backburner to low or off
when stopping the rotisserie, to
prevent overcooking meat.
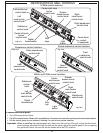
3
Rotisserie
motor slots (4)
Heavy-duty
Rotisserie
motor
Rod drive socket
Fig. 22-2
1
2
Rocker
switch
Left support bracket
Fig. 22-4
Thumb
screw
loosen/
tighten
slide
Weight
Arm