


Special offers from our partners!

Find Replacement BBQ Parts for 20,308 Models. Repair your BBQ today.
111285-01B
For more information, visit www.desatech.com
For more information, visit www.desatech.com
8
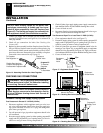
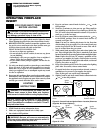
Figure 6 - Attaching Left Surround Side Panel
3. Align holes in left surround side panel with screen mounting
screw holes. Replace 5/16" screen mounting shoulder screws
removed in step 1 (see Figure 6). Do not tighten. Install Phillips
screw in bottom (see Figure 6). Repeat for right side.
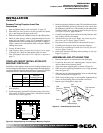
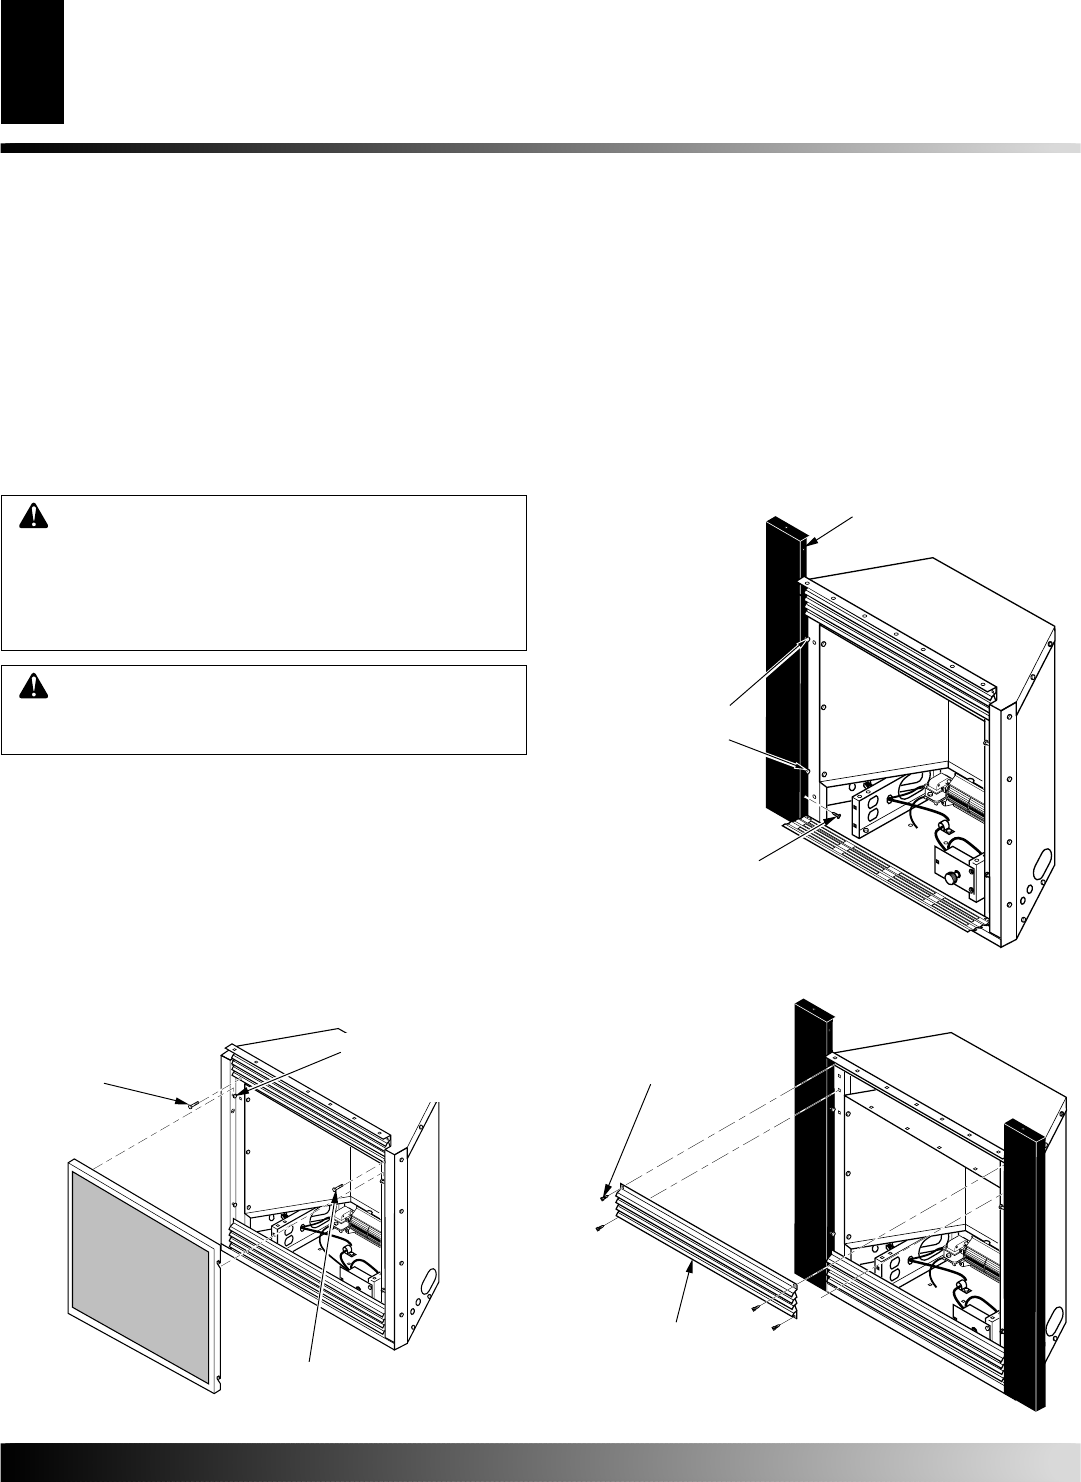
4. Using Phillips screwdriver, remove four screws attaching
top louver (see Figure 7).
5. Place top surround panel at top of fireplace insert. Bottom edge
of panel will slide under top edge of insert. Align top panel
screw holes with those in insert. Install four #10 Phillips screws,
do not tighten. See Figure 8, page 9
Figure 7 - Remove Louver
CAUTION: Close masonry fireplace damper se-
curely before installing fireplace insert. If chimney
does not have a damper, block or cap top of chimney.
Failure to cap an open chimney could cause drafts
that can affect the heater’s performance and increase
surface temperatures.
INSTALLING SURROUND KIT (GS38 OR GS43)
CAUTION: A GS38 or GS43 surround kit accessory
must be installed on this fireplace insert before install-
ing into your masonry fireplace or wall opening.
Note:
Use the accessory which best covers the existing masonry
fireplace opening or wall opening.
• Model GS38 Surround Kit (for use with fireplaces with an open-
ing smaller than 30" H and 38" W)
• Model GS43 Surround Kit (for use with fireplaces with an open-
ing 30" to 36
3
/
4
" H and 38" to 43" W)
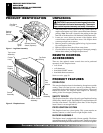
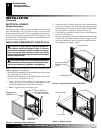
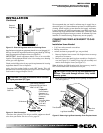
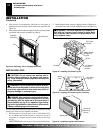
1. Using a 5/16" nut driver, remove two shipping screws and
screen (see Figure 5). Discard these screws. Remove 5/16"
screen mounting shoulder screws (do not discard).
2. Remove log packaging from firebox cavity.
Figure 5 - Removing Screws and Screen
INSTALLATION
Electrical Hookup
Installing Surround Kit
ELECTRICAL HOOKUP
(Blower Accessory)
This fireplace insert includes a blower assembly with an electrical
cord. The electrical cord is five feet in length. You must locate
fireplace insert within reach of a 120 volt grounded electrical outlet.
If not, install and properly ground GA3555, three-prong 120 volt
electrical outlet, in fireplace insert. Follow instructions included in
kit (see Accessories, page 30).
INSTALLATION
Continued
Shipping Screw
(DISCARD)
Screen Mounting
Shoulder Screw (4)
(DO NOT DISCARD)
Shipping Screw
(DISCARD)
Surround Side
Screen Mounting
Shoulder Screws
(5/16")
Phillips Screw
Top Louver
Phillips Screws