


Special offers from our partners!

Find Replacement BBQ Parts for 20,308 Models. Repair your BBQ today.
9
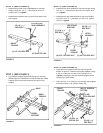
USING AS A PUSH CART
IMPORTANT:
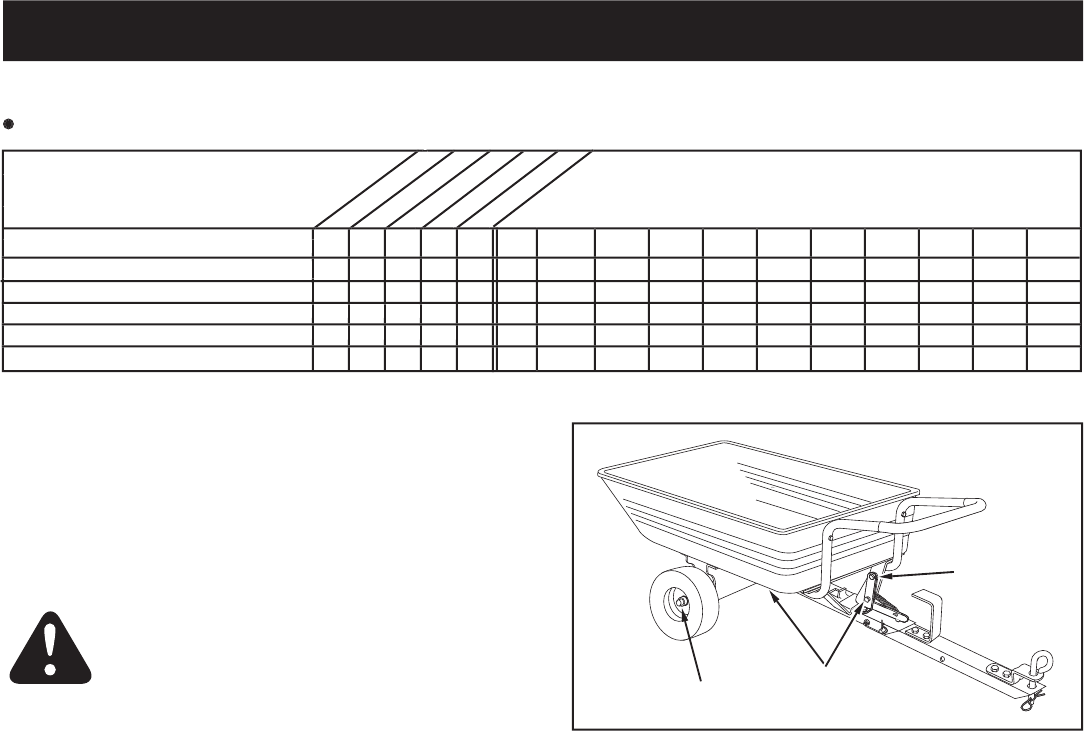
Leave the latch lock clevis pin in place at
all times while using the cart as a push cart. The clevis
pin is shown in fi gure 1 on page 4.
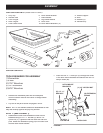
• To convert the cart for push operation, remove the 4"
long clevis pin and hairpin cotter which secure the
tongue in the towing position. (See drawing on page
8.) Pivot the front tongue into the storage position
underneath the rear tongue and secure it using the
same clevis pin and hairpin cotter. (See fi gure 5 on
page 5.) Place the plastic cap over the exposed end
of the tongue.
MAINTENANCE SCHEDULE
MAINTENANCE SCHEDULE
Fill in dates as you
complete regular service.
complete regular service.
Before each use
Before each use
After each use
Twice a year
Twice a year
Every season
Every season
Before storage
Before storage
Service Dates
MAINTENANCE/STORAGE
Check for loose fasteners X
Check for loose fasteners X
Check for loose fasteners X
Check for worn or damaged parts X
Check for worn or damaged parts X
Check for worn or damaged parts X
Check tire pressure X
Check tire pressure X
Check tire pressure X
Lubricate X
Lubricate X
Lubricate X
Lubricate X
Lubricate X
Lubricate X
Clean X X
Clean X X
Clean X X
Clean X X
Clean X X
Clean X X
Clean X X
CAUTION: DO NOT
infl ate tires beyond
the maximum recommended pressure
printed on side of tire.
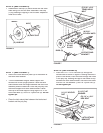
SCHEDULED MAINTENANCE
• Check for loose fasteners before each use.
• Check for worn or damaged parts before each use.
• Keep tires fi lled to recommended tire pressure printed
on the tire.
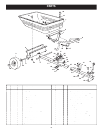
• At the beginning of each season, using a light
machine oil, lubricate the latch, the latch pivot bolt,
and the area of the axle where the draw bar tongue
pivots. See fi gure 13.
• Grease or oil the wheel bearings periodically (at least
once each season). Use grease or 20 weight oil. See
fi gure 13.
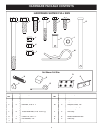
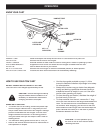
CART SPECIFICATIONS
Tires:
14" x 4" Pneumatic
Axle:
5/8" Dia. Steel
Capacity:
Up to 500 Lbs. Max.
Approx. Sh. Wt.
55 Lbs.
STORAGE
• Clean thoroughly before storing.
• Remove any rust from painted surfaces and coat with
touch up paint.
• Store in a dry area.
FIGURE 13
• For best handling, and to help prevent accidental
tipping, distribute the weight of the load evenly in the
cart.
• Do not load more weight into the push cart than you
can handle and control comfortably.
• To dump material from the push cart, lift up on the
handle and tilt the cart forward.
Be sure
that the latch
mechanism on the tongue is locked and secured with
the clevis pin to prevent accidental release of the
latch.
CUSTOMER RESPONSIBILITIES
Read and follow the maintenance schedule and the procedures listed in the maintenance section.
OIL
OIL
GREASE