


Special offers from our partners!

Find Replacement BBQ Parts for 20,308 Models. Repair your BBQ today.
4
ASSEMBLY
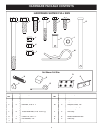
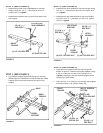
CARTON CONTENTS
CARTON CONTENTS
(Loose Parts in Carton)
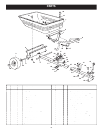
1. Poly Tray
2. Handle Tube
3. Front Tongue
4. Rear Tongue
5. Latch Stand Plate
11. Wheel Support
12. Axle
13. Wheels (2)
14. Handle Grip
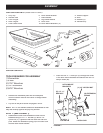
• Remove the hardware pack and all loose parts
from the carton. Be sure the carton is empty before
discarding.
• Lay out all the parts shown on pages 3 and 4.
NOTE:
All 1/4" fl at washers should be assembled so that
they rest directly against the poly tray surface.
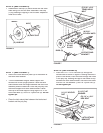
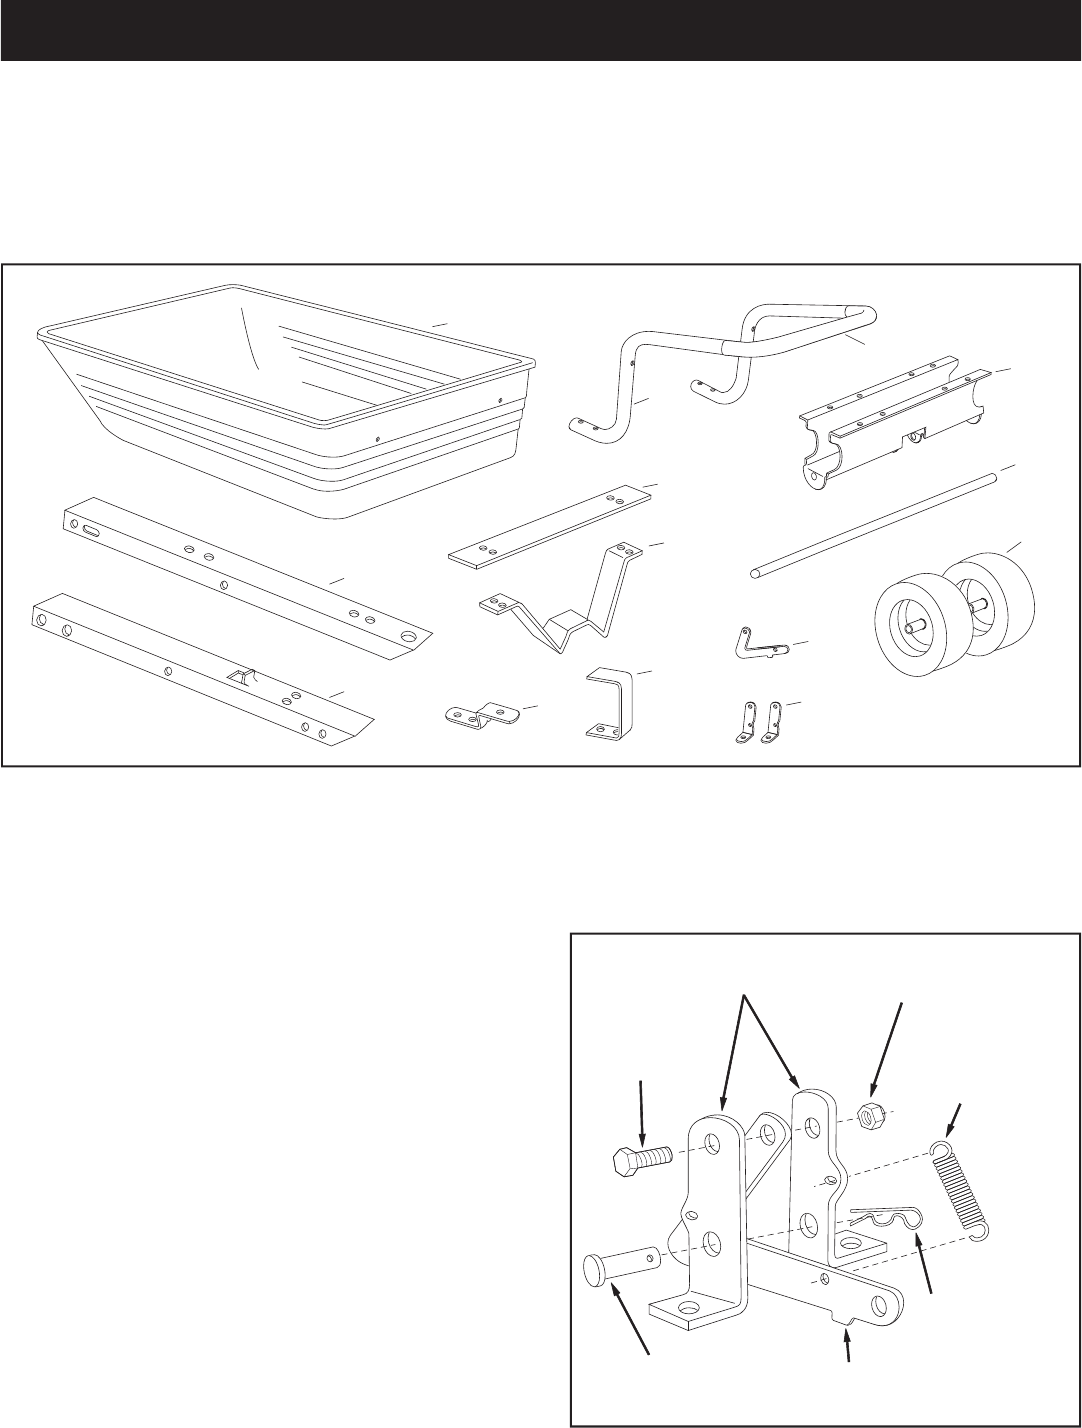
STEP 1: (S
EE FIGURE
1
)
• Assemble the latch lock between the latch mount
brackets using a 1/4" x 1" hex bolt (E) and a 1/4"
nylock nut (J). Tighten so that the latch lock can still
pivot. Attach the extension spring (N) to the latch lock
and the latch mount bracket.
TOOLS REQUIRED FOR ASSEMBLY
(1) Screwdriver
(1) Pliers
(2) 7/16" Wrenches
(2) 1/2" Wrenches
(2) 9/16" Wrenches
FIGURE 1
LATCH LOCK
(N) EXTENSION
SPRING
(J) 1/4" NYLOCK NUT
(E) 1/4" x 1"
HEX BOLT
LATCH MOUNT
BRACKETS
(M) 1/8" HAIRPIN
COTTER
(H) 3/8" x 1"
CLEVIS PIN
7
13
11
1
6
12
9
10
5
8
3
4
2
14
6. Latch Stand Bracket
7. Hitch Bracket
8. Leg Stand Bracket
9. Latch Lock
10. Latch Mount Brackets (2)
• Insert the 3/8" x 1" clevis pin (H) through the holes
in the latch mount brackets and secure with an 1/8"
hairpin cotter (M).