Special offers from our partners!

Find Replacement BBQ Parts for 20,308 Models. Repair your BBQ today.
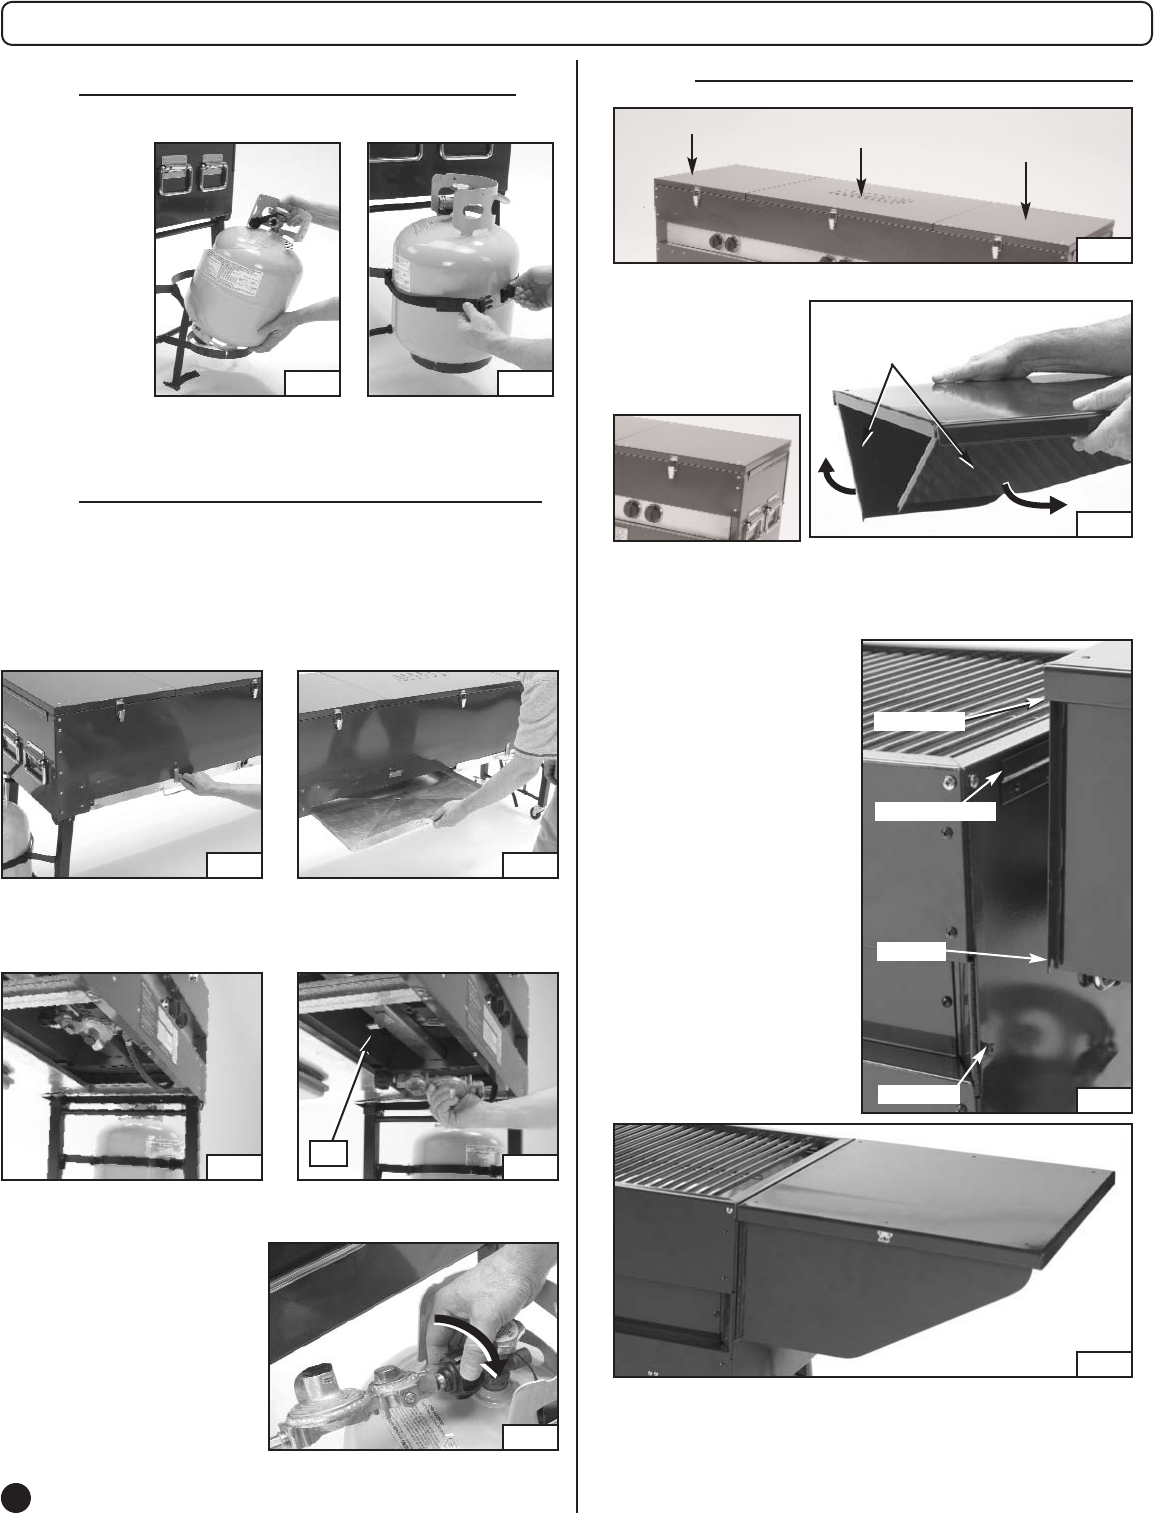
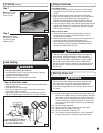
NOTE: Storage position for the regulator is above the grease pan.
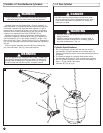
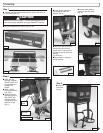
■ Unlock the grease pan (located on the back side of the grill). (Fig. 25)
■ Slide the grease pan half way out. (Fig. 26)
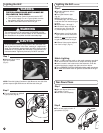
Step 4
■ Place a 20 lb.
propane cylinder
in the right tank
mount and secure
as shown.
(Fig. 23 & 24)
NOTE: Point
cylinder valves
toward front of
grill.
NOTE: Each
cylinder provides
fuel to only one
side of the grill.
■ Attach the regulator to the
propane cylinder connection
and hand-tighten. (Fig. 29)
■ Repeat Step 4 and Step 5 to
attach the second cylinder on
the left side.
Step 5
8
To Set Up continued
■ The storage position for the regulator is above the grease pan. (Fig. 27)
■ Remove the regulator from the clip attached to the bottom of grill. (Fig. 28)
Fig. 24Fig. 23
Fig. 26Fig. 25
Fig. 28Fig. 27
Fig. 29
Clip
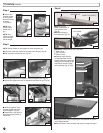
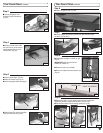
■ Carefully insert Shelf Lip
on Right Side Shelf into Top
Channel, while at the same time
making sure the Notches on the
side Flaps fit into the Flanges
on the grill body. (Fig. 32 & 33)
TOP CHANNEL
NOTCH
FLANGE
SHELF LIP
■ Repeat the same order for attaching the Left Side Shelf as you did
on the Right Side Shelf.
■ Remove Center Lid and set aside until ready for storage of the grill.
Step 6
CENTER LID
LEFT LID (SHELF)
RIGHT LID (SHELF)
■ Unlock Right Lid.
NOTE: Undo latches on
front and back of lid.
(Fig. 30)
■ Release lid flaps to
form Right Shelf. (Fig. 31)
LID FLAPS
IMPORTANT: Always remove Lids in this order:
•
Right Lid first.
•
Left Lid second.
•
Center Lid last.
Fig. 30
Fig. 31
Fig. 33
Fig. 32


