


Special offers from our partners!

Find Replacement BBQ Parts for 20,308 Models. Repair your BBQ today.
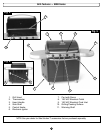
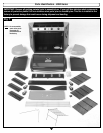
Grill Assembly
8
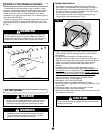
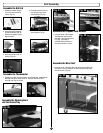
3. Assemble the side windbaffles. Each side windbaffle is held in place
with four screws and lockwashers. The lockwashers assemble next to
the heads of the screws (Fig. 11, 12, and 13).
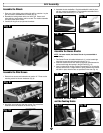
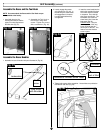
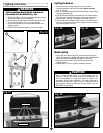
1. Place part of the shipping carton behind the grill for protection. Lay the
grill on its back to assemble the four wheels (Fig. 8).
2. Assemble the locking wheels at the front of the grill. Secure each
wheel with four metal washers and four screws. The washers assemble
next to the heads of the screws.
3. Carefully lift the grill cart upright onto the wheels.
Fig. 8
Fig. 9
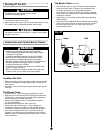
1. Remove three screws and lockwashers at location “A”. These are the
mounting screws for the rear windscreen (Fig. 9).
Fig. 10
2. Attach the rear windscreen with three screws. The lockwashers
assemble next to the heads of the screws (Fig. 10).
Assemble the Wind Screen
Assemble the Wheels
A
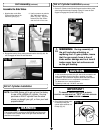
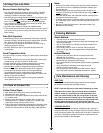
NOTE: On some models, the Grease Diverter is pre-assembled at
the factory.
1. The Grease Diverter is installed without tools. It is to be located right
below the burners with tabs inserted into slots (Fig. 17).
2. Install the Grease Diverter from above by slipping it down between the
burners and through the opening in the grill firebox (Fig. 14).
3. Once it is below all the burners, position it horizontally (Fig. 15) and align
the tabs with the slots. A slight amount of spring tension in the diverter
will hold it in place when the tabs are positioned in the slots (Fig. 16).
Fig. 18
Fig. 14 Fig. 16Fig. 15
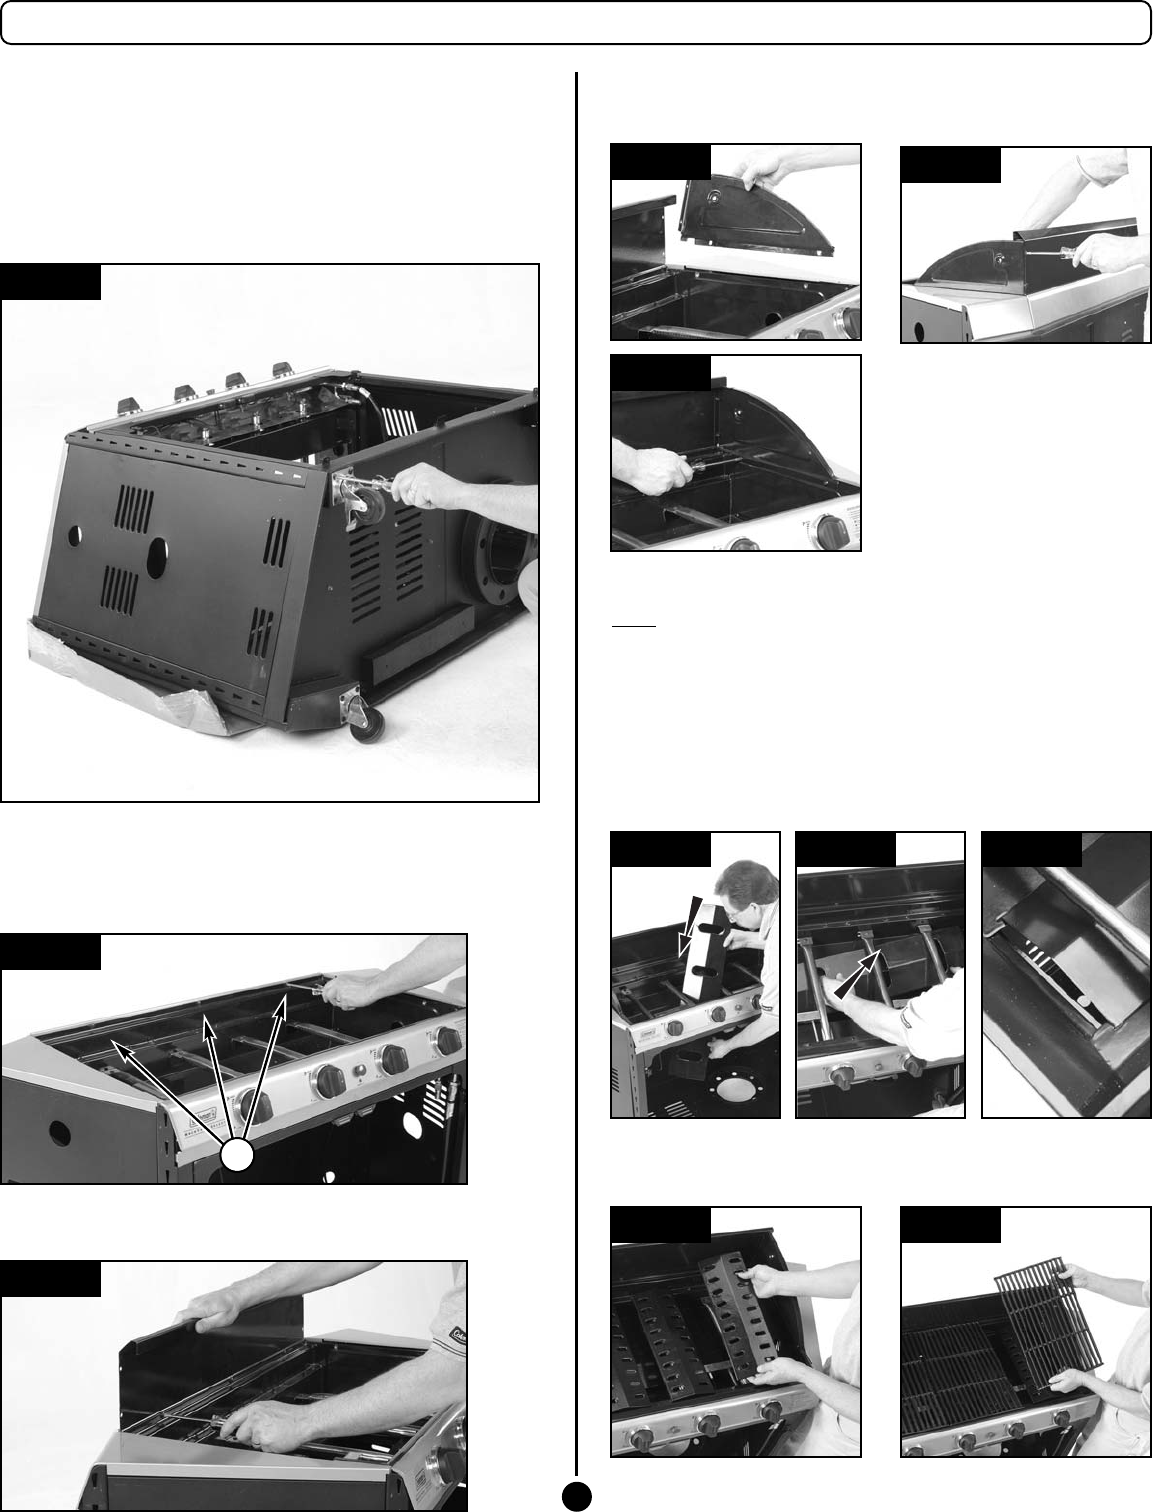
Assemble the Heat Tents
and the Cooking Grates
Assemble the Grease Diverter
Fig. 11
Fig. 12
Fig. 13
Fig. 17