


Special offers from our partners!

Find Replacement BBQ Parts for 20,308 Models. Repair your BBQ today.
Buy Weber Grill Parts. It couldn't be easier. Find your Weber parts here.
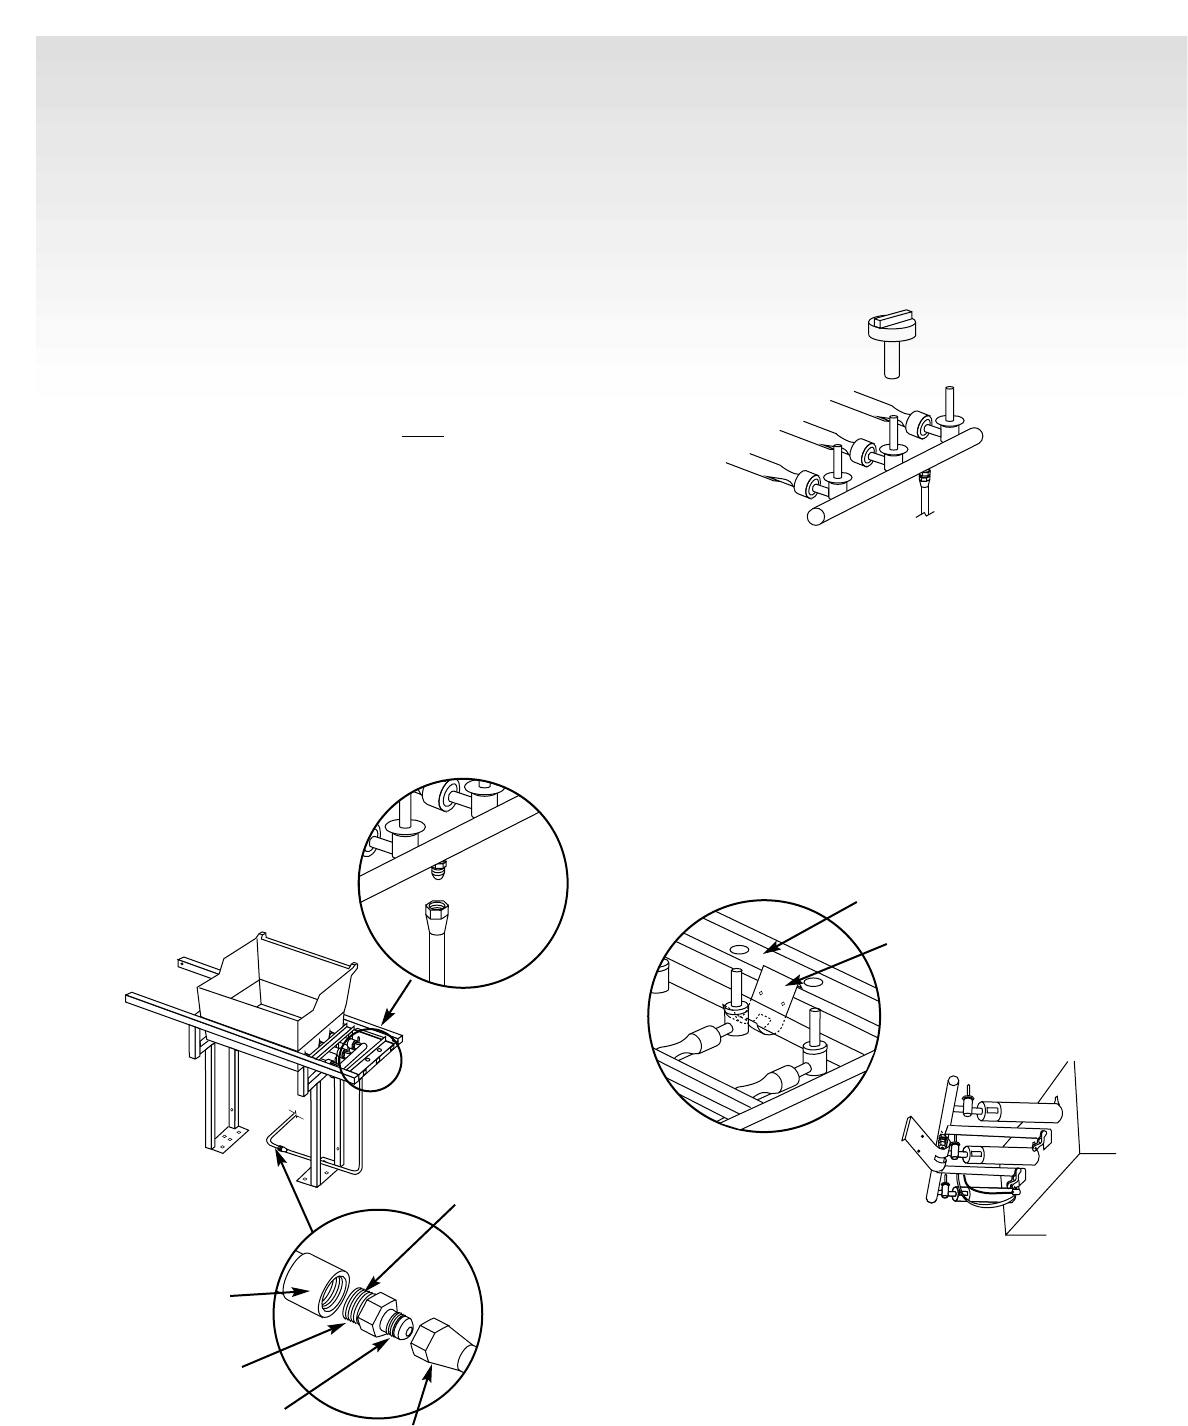
Step 8
Connect barbecue gas supply line to the
natural gas supply
Note - We recommend that the connection
between the barbecue gas supply line and the
natural gas supply be flare to flare. A 3/8-inch flare
fitting has been included with the barbecue gas
supply line of your gas barbecue.The fitting is
loosely connected for shipping and should be
removed before installation.
You will need: barbecue gas supply line, 3/8 inch flare
fitting, 3/4 inch and 11/16 inch wrenches.
ƽWARNING: This barbecue is NO
T portable. It
must be bolted down at all times when it is
connected to a natural gas supply.
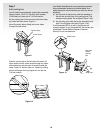
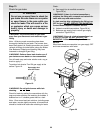
Unscrew the 3/8 inch flare fitting from the barbecue
gas supply line. Apply pipe sealant to the threads
of the pipe fitting. Screw the pipe fitting end of the
3/8 inch flare fitting into the natural gas supply pipe.
Tighten with an 11/16 inch wrench. Figure 14 (a).
Attach the flare nut on the barbecue gas supply line
to the flare fitting end of the 3/8 inch flare fitting.
Tighten with a 3/4 inch wrench. Figure 14 (a).
Attach the flare nut at the other end of the barbecue
gas supply line to the manifold fitting. Tighten with a 3/4
inch wrench. Figure 14 (b).
20
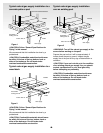
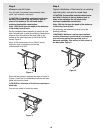
Figure 14
(a)
(b)
Natural Gas
Supply Pipe
Pipe fitting end
of 3/8-inch
Flare Fitting
Flare fitting end of
3/8-inch Flare Fitting
Barbecue gas
supply line
Apply pipe
sealant here
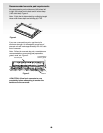
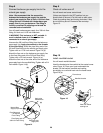
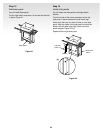
Figure 15
View from below
cooking box
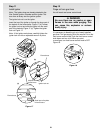
Frame brace
Manifold bracket
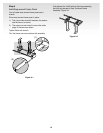
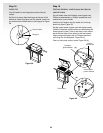
Figure 16
(a)
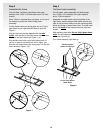
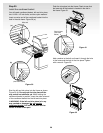
Step 9
Check all valves are off
You will need: one burner control knob.
(Valves are shipped in the OFF position, but you
should check to be sure.) Put the knob on each valve.
Check by pushing down and turning clockwise. If they
do not turn they are off. Proceed to the next step.
Figure 15.
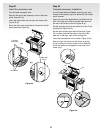
Step 10
Install manifold bracket
You will need: manifold bracket.
Hook the bracket onto the manifold at the center burner
valve. Figure 16. Place your hand underneath the
bracket. Lift the bracket, manifold and cooking
box slightly as a unit and hook onto the frame brace.
Figure 16 (a).